The Privileged Application Launcher (PAL) is a local Windows desktop application that enables users to temporarily check-out vaulted Active Directory credentials and launch Windows applications as the check-out identity. PAL acts much like the Runas command but without requiring the user to be granted knowledge of the privileged user password.PAL operates using Windows security so it is limited by Windows domain and trust restrictions.
| Info | ||
|---|---|---|
| ||
For help in creating a Master password, see Creating a Secret. |
To install the Privileged Application Launcher
Employees install the Privileged Application Launcher on their local machines.
- Double-click the installer file, EmpowerIDApplicationLauncherInstaller.msi.
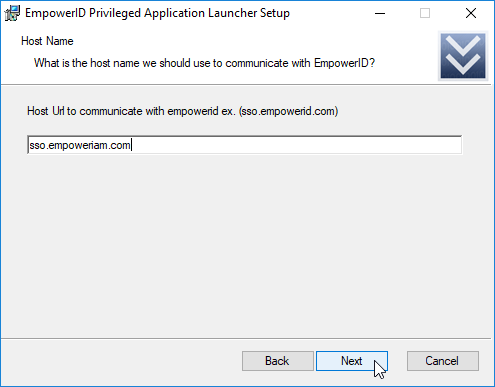
- In the setup wizard that appears, provide the URL of the EmpowerID host and click Next.
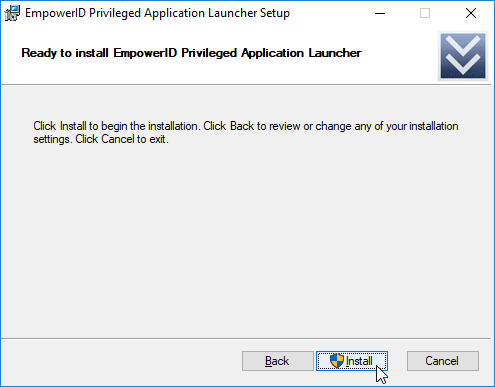
On the Ready to install page, click Install.
Note Since this must be installed as an administrator, a message flashes on your taskbar. Click it to open the User Account Control requesting permission to make changes on your device. Click Yes to continue.
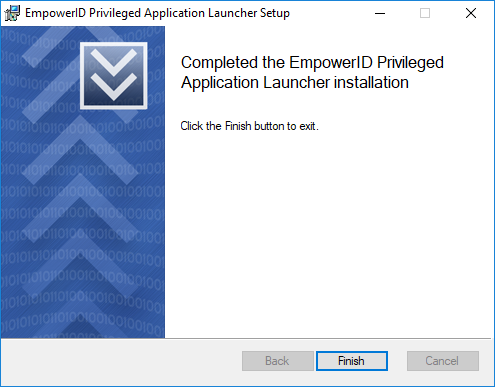
- When the agent finishes installing, click the Finish button to close the wizard.
Once the Privileged Application Launcher
There are two ways to use the Privileged Application Launcher. Here is the first.
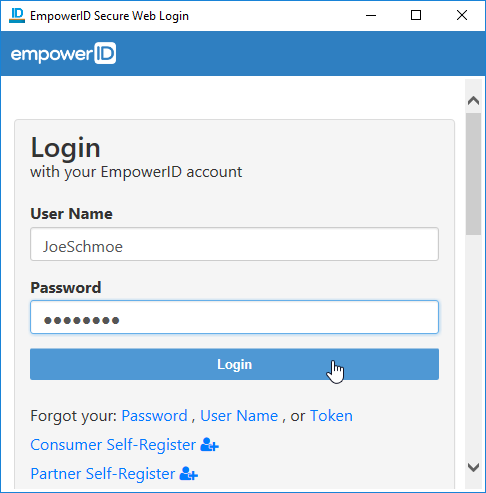
Enter your EmpowerID credentials in the EmpowerID Secure Web Login dialog that appears and click Login.
The dialog disappears. Back in the Privileged Application Launcher, the Login button changes to Refresh. Click Applications.
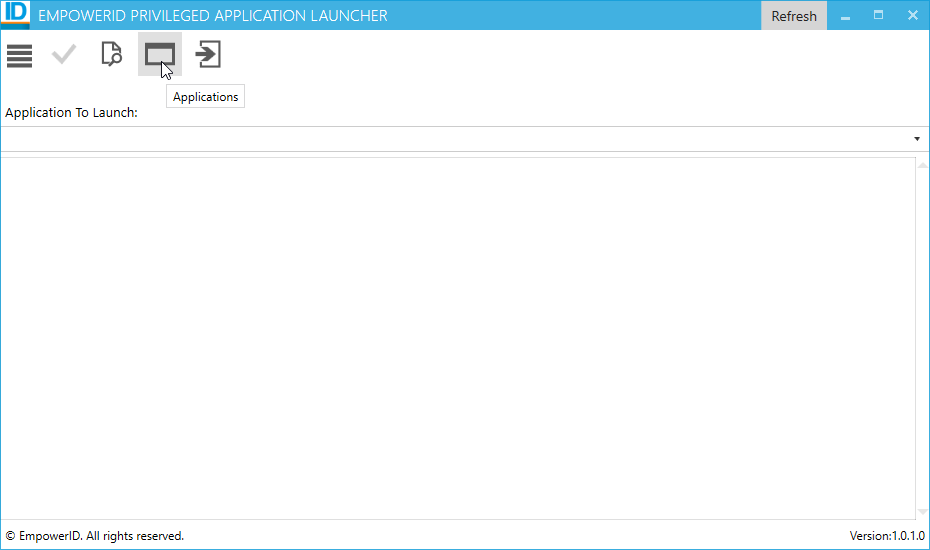
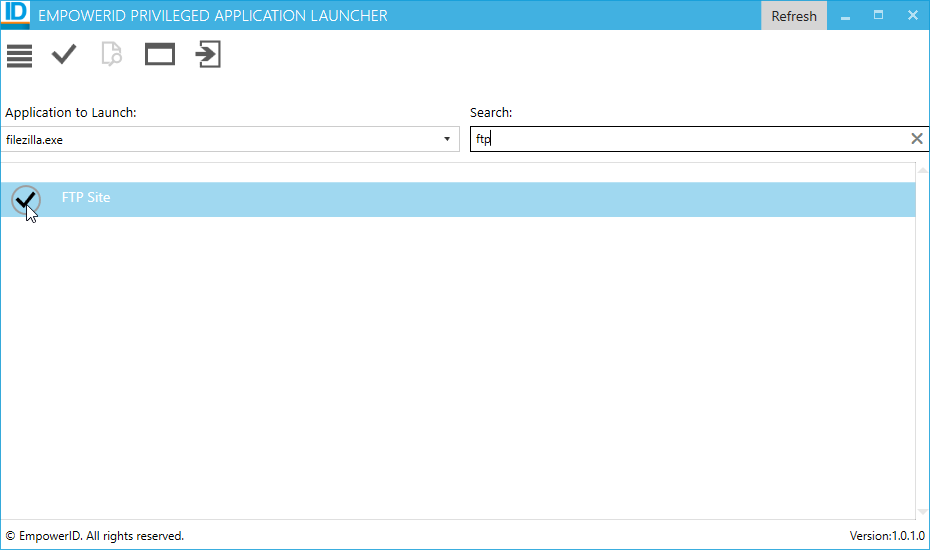
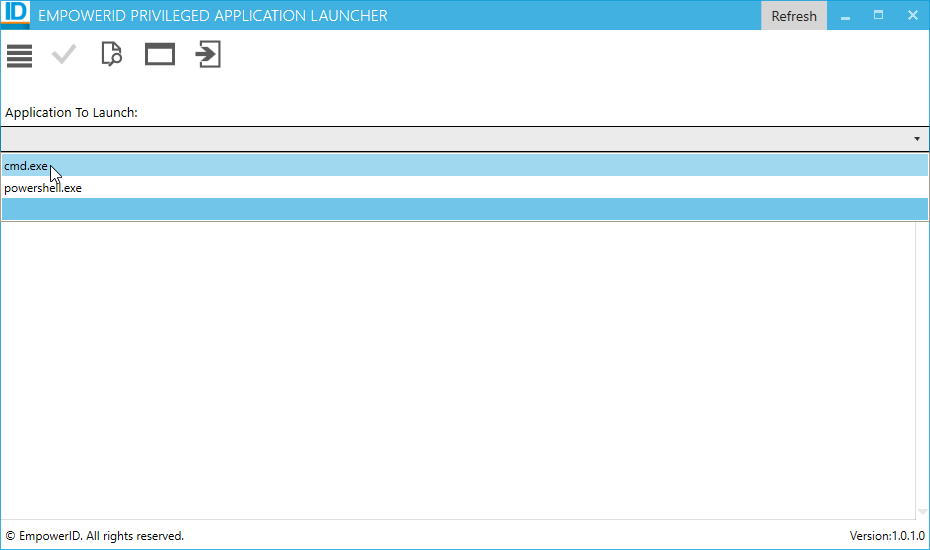
The list populates with links to any applications to which you have access. To limit the choices, type part of the name of the application you want in the Search box and hit Enter.
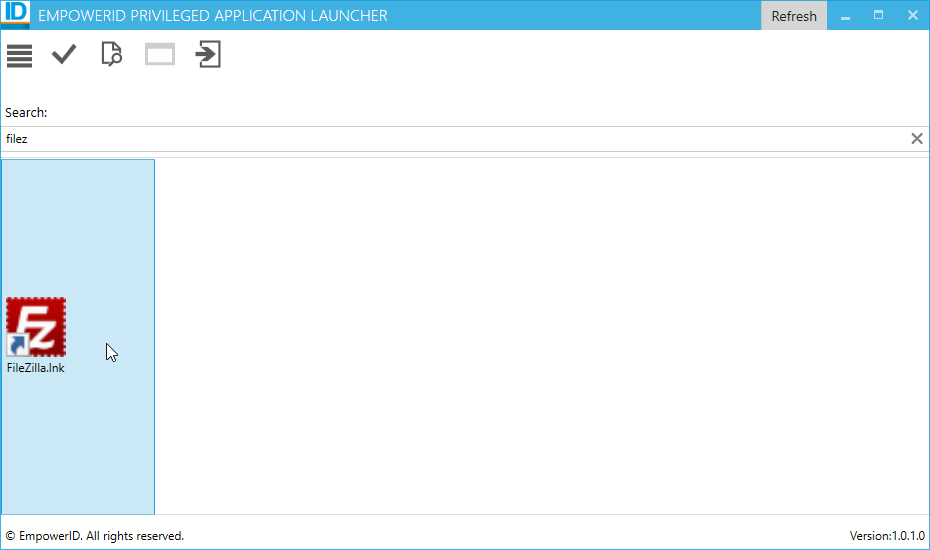
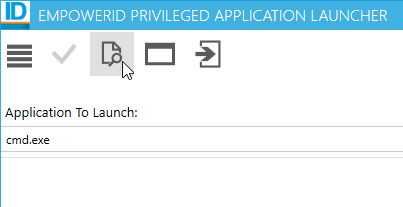
When you see the application you want in the search results, double-click it to select it. The selected application link is populated in the Application To Launch field. Click Find Credentials.
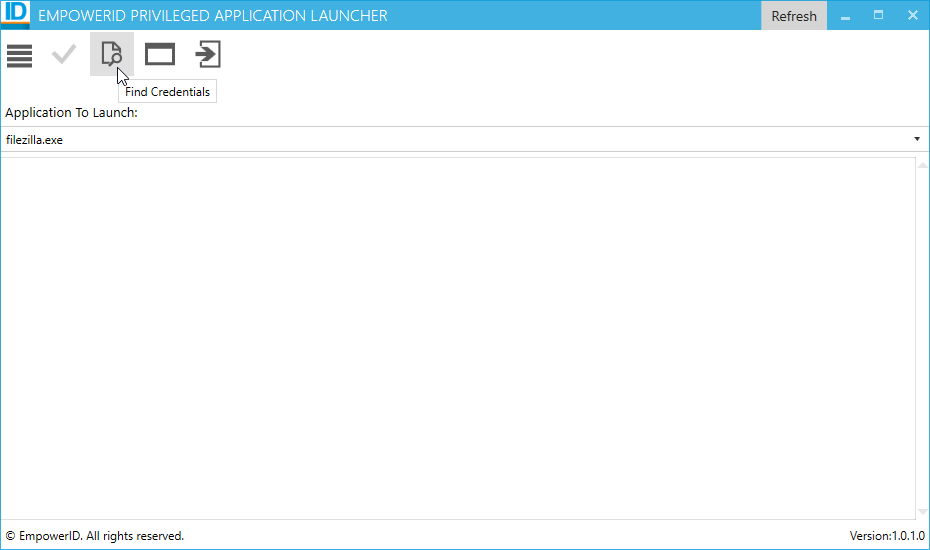
The list populates with any credentials to which you have access. To limit the choices, type part of the name of the credentials you want in the Search box and hit Enter.
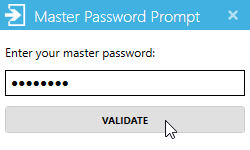
In the Master Password Prompt dialog that appears, enter the master password that you used when initially vaulting your credentials and click Validate.
To use the Privileged Application Launcher from File Explorer
There are two ways to use the Privileged Application Launcher. Here is the second.
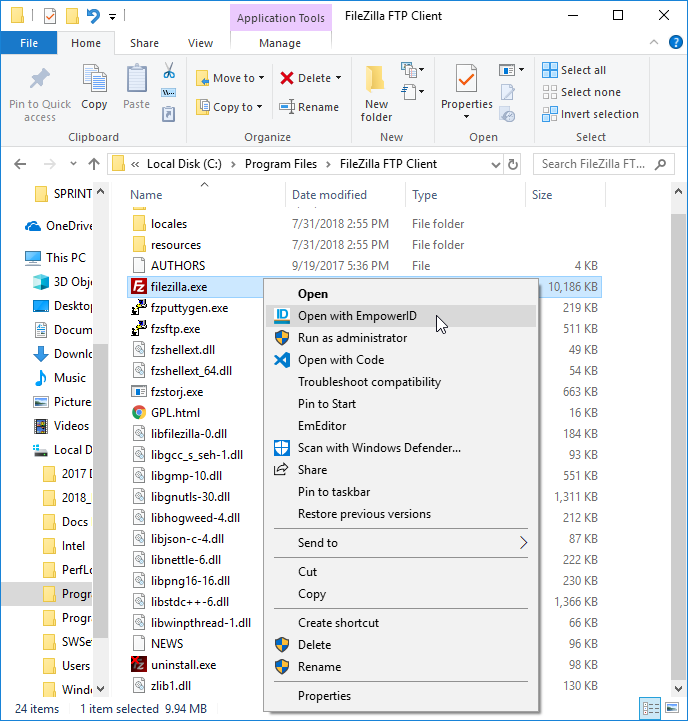
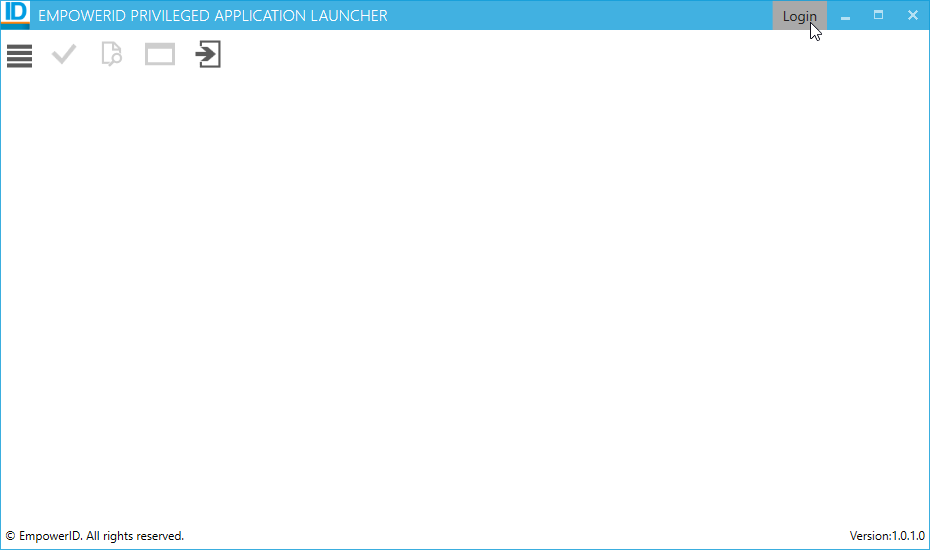
In the EmpowerID Privileged Application Launcher window that appears, click the Login button.
Log in using your EmpowerID credentials the EmpowerID Secure Web Login dialog that appears and click Login.
The dialog disappears. Back in the Privileged Application Launcher, the Login button changes to Refresh and the Application To Launch field populates with the name of the application to launch. Click Find Credentials.
The list populates with any credentials to which you have access. To limit the choices, type part of the name of the credentials you want in the Search box and hit Enter.
In the Master Password Prompt dialog that appears, enter the master password that you used when initially vaulting your credentials and click Validate.
To open a command prompt as administrator
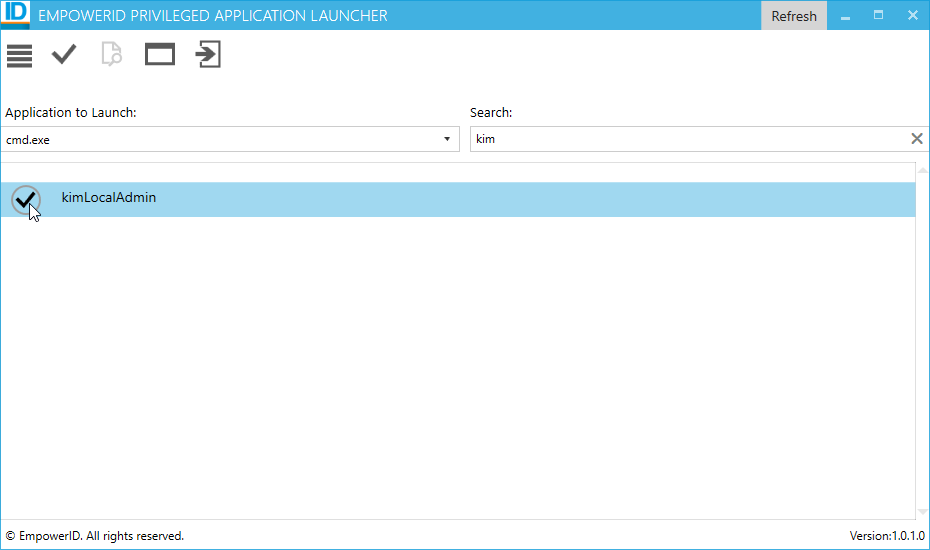
Click the Find Credentials button.
Search for the shared credential that has local admin access to your machine, and click the check mark icon to select it.
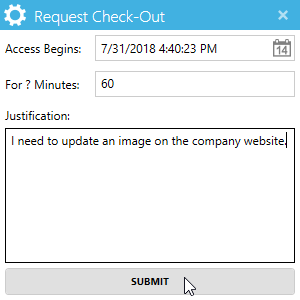
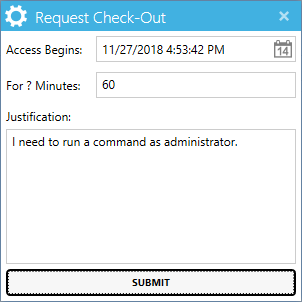
In the Request Check-Out dialog that appears, provide justification for the access, and optionally change the default starting date and time and duration, then click SUBMIT.
In the Master Password Prompt dialog that appears, enter your master password and click Validate.
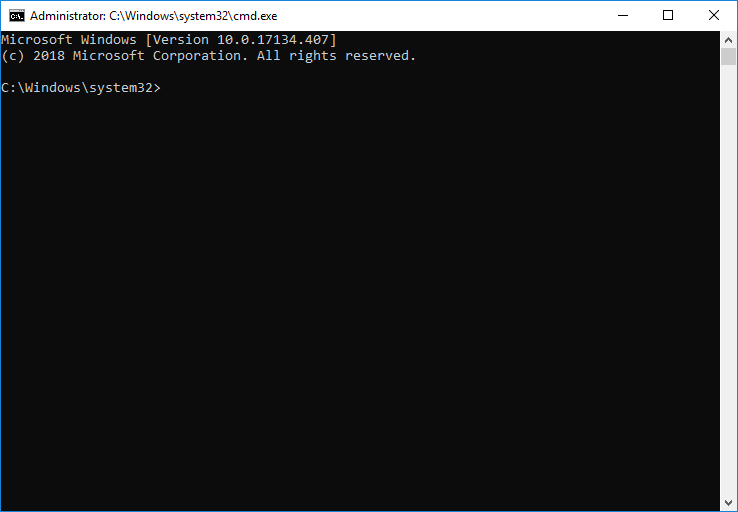
The elevated command prompt appears.
has been successfully installed on a machine, users can launch it to access any privileged applications for which they have access. See Using Privileged Application Launcher for details.
| Div | ||||||||||||||||||||||||
|---|---|---|---|---|---|---|---|---|---|---|---|---|---|---|---|---|---|---|---|---|---|---|---|---|
| ||||||||||||||||||||||||
|