Setting Up SSO with UltiPro
The EmpowerID SSO framework allows you to integrate UltiPro with EmpowerID, making EmpowerID the identity provider for your organization's UltiPro account. In this way, users can access their corporate UltiPro accounts directly from EmpowerID using their EmpowerID credentials, their corporate AD logins or those of another trusted (third-party) identity provider that has been integrated with EmpowerID.
As a prerequisite to creating an SSO Connection for UltiPro as a service provider in EmpowerID, you must have an UltiPro account. Additionally, UltiPro uses ADFS2 to federate with third-party applications, therefore you must send UltiPro the certificate you are using in your EmpowerID configuration so they can configure ADFS2 appropriately.
This topic describes how to set up SSO with UltiPro.
To create an UltiPro SSO application in EmpowerID
- In the Navigation Sidebar, expand Applications and click Manage Applications.
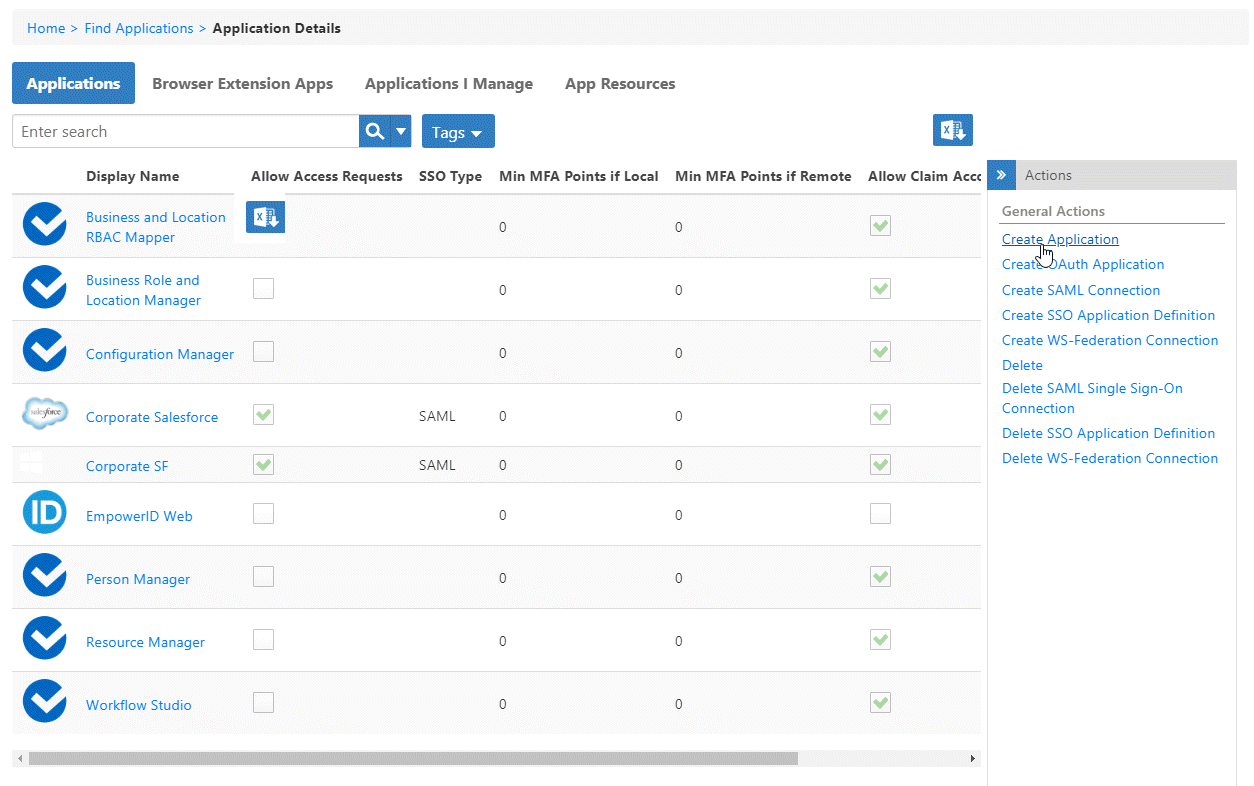
- From the Actions pane of Application Manager, click the Create Application action.
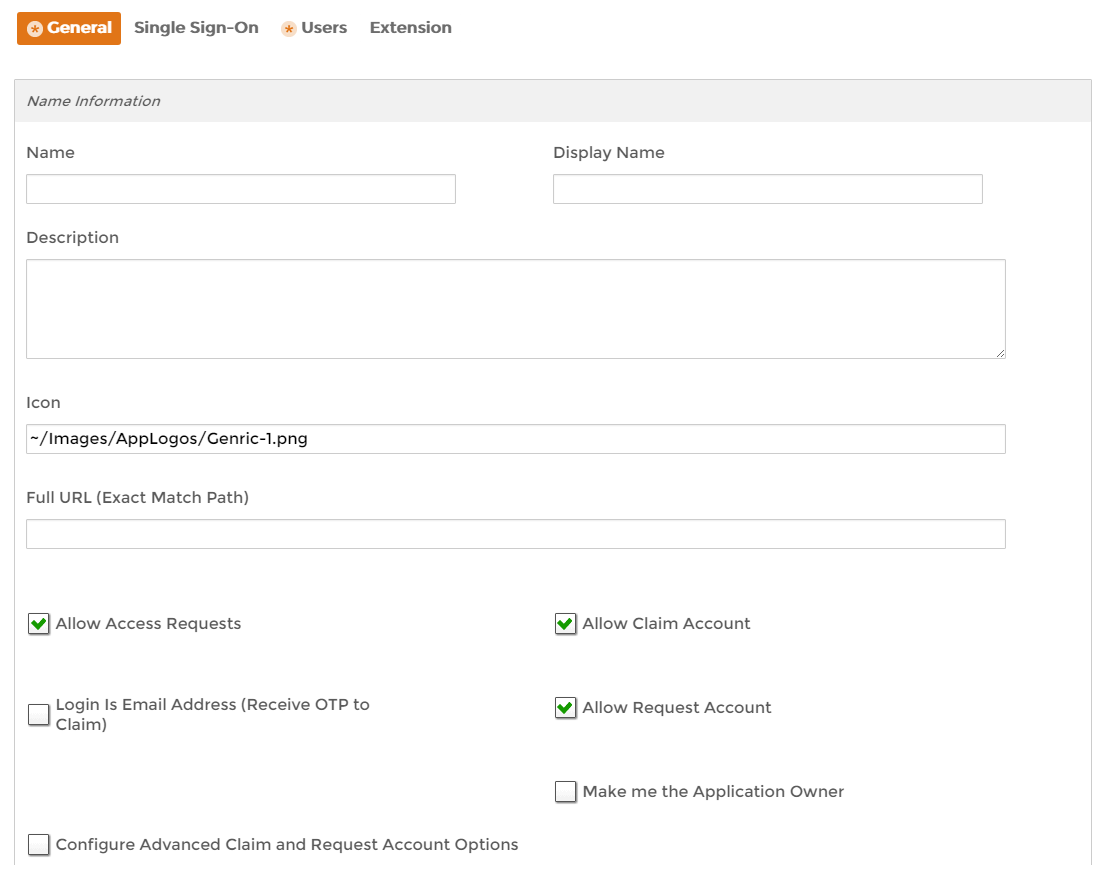
This opens the Application Details form, which contains various tabs and fields for creating the application. - From the General tab of the Application Details form, do the following:
- Enter a name, display name and description for the application in the Name, Display Name and Description fields.
- In the Icon field, enter ~ Images/AppLogos/UltiPro.png to use the UltiPro image provided by EmpowerID. This image appears in the Personal Applications page of the EmpowerID Web application for users with access to UltiPro.
- Set Allow Access Requests to specify whether to allow users to request or claim an account in the application from the IT Shop.
- Set Allow Claim Account to specify whether to let users claim their accounts in the IT Shop and gain instant access after passing the requisite identity proofs.
- Set SSO Enabled to specify whether the application is an SSO app. In this example, select it.
- Set Requires Account For SSO to specify whether users must have an account in the application for SSO. In this example, select it.
- Set Allow Request Account to specify whether to allow users to request an account in the application. Select this option and Allow Access Requests to allow users to request an account in the application.
- Set Login Is Email Address to specify whether the login for the application is an email address. This setting is necessary for passing the appropriate identity assertion to the application when logging in from EmpowerID.
- Set Make me the Application Owner to specify whether you can manage the application and approve or deny access requests.
- Configure Advanced Claim and Request Account Options - Select this option and provide advanced configuration information if you have custom pages and workflows configured in EmpowerID to process access requests and manage accounts linked to the application's EmpowerID account directory.
- Click the Single Sign-On tab and do the following:
- From the Single Sign-On Connection Type drop-down, select SAML and then Create a New SAML Connection.
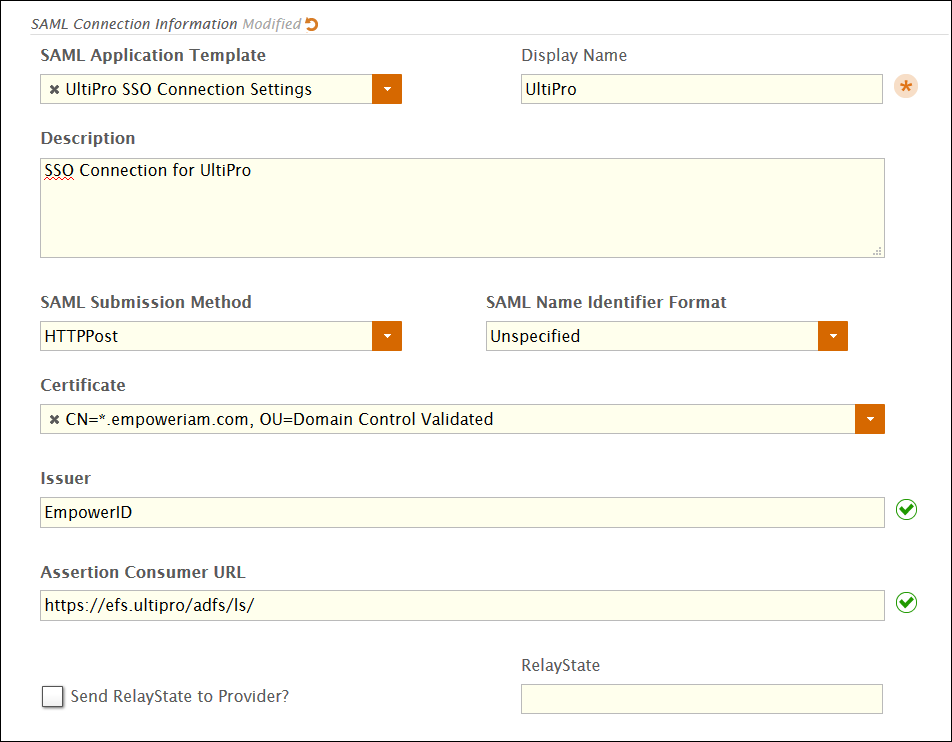
- In the SAML Connection Information section that appears, select UltiPro SSO Connection Settings from the SAML Application Template drop-down. This populates the SAML Connection Information section with the common SSO settings for UltiPro provided by the template.
- In the Display Name field of the SAML Connection Information section, type the name for the UltiPro SSO Connection that you want to appear to users in the EmpowerID user interfaces. By default EmpowerID populates the value of this field with the name you gave to the application above.
- Select the appropriate certificate to sign the SAML assertions sent to UltiPro from the Certificate drop-down.
- Leave all other fields set to their default values.
At this point, the SAML Connection Information section of the form looks similar to this image.
- From the Single Sign-On Connection Type drop-down, select SAML and then Create a New SAML Connection.
- Click the Users tab and do one of the following:
If you have not connected EmpowerID to your enterprise UltiPro account - Select Create a New Account Directory. This instructs EmpowerID to create a special type of account store that is internal to EmpowerID, known as a "tracking-only" account store. A tracking-only account store exists as a container within EmpowerID for storing user and group records apart from those located in the actual directory in UltiPro.
Although you have the option to create a tracking-only account store for UltiPro, the best practice is to connect EmpowerID to UltiPro so you can inventory and synchronize the user data in your UltiPro account with EmpowerID. This lets you create new UltiPro accounts in EmpowerID and have them appear in UltiPro and vice-versa. For more information on connecting EmpowerID to UltiPro, see Connecting to UltiPro.
- If you have connected EmpowerID to your enterprise UltiPro account - Select the Account Store for UltiPro account from the Select existing Account Directory drop-down. EmpowerID uses this directory to map your UltiPro users with their corresponding EmpowerID Persons. Please note that you must add this account store to EmpowerID before it will appear in the drop-down.
- Click Add to Cart, click the My Cart link, and in the Cart dialog that appears, enter a reason for creating the application and click Submit.
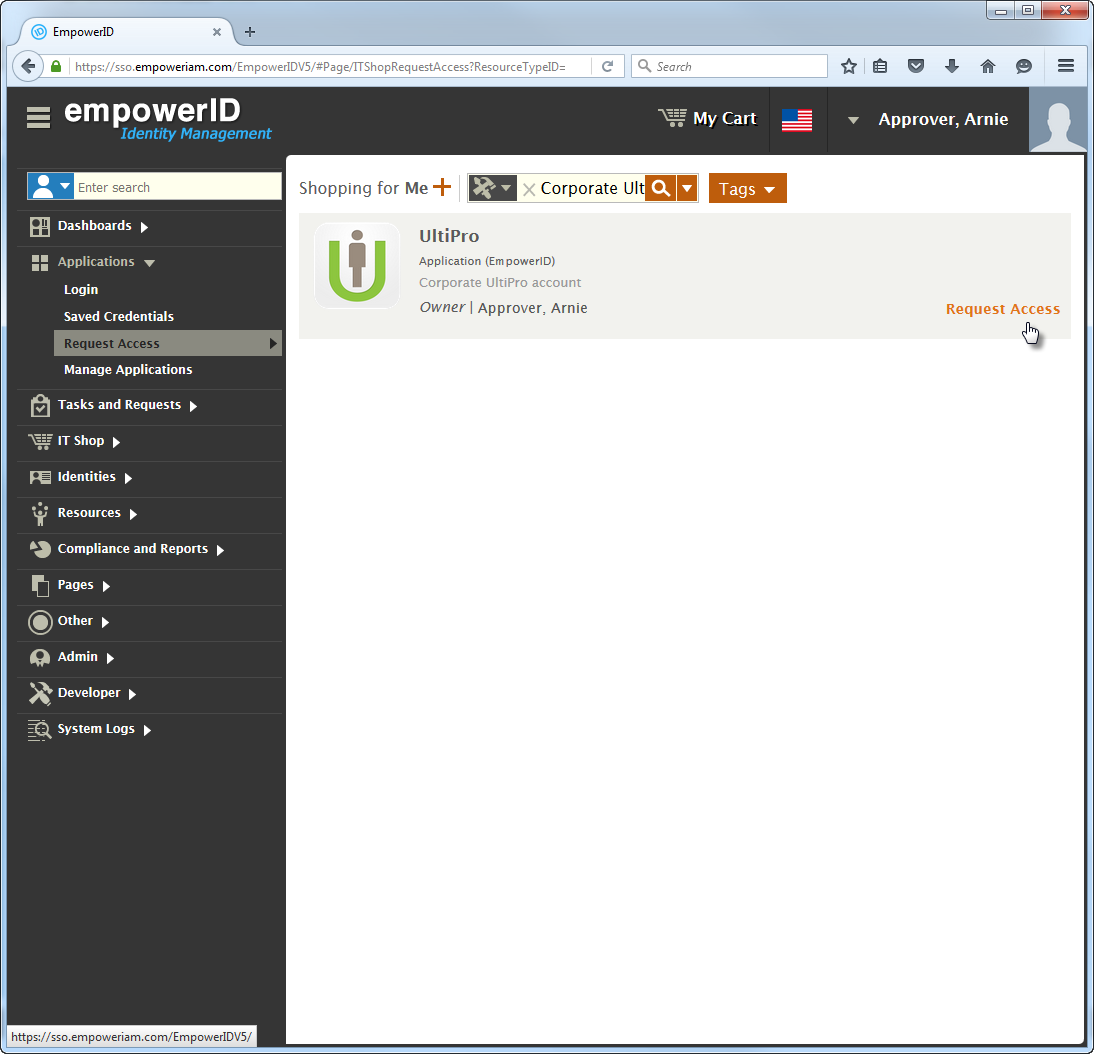
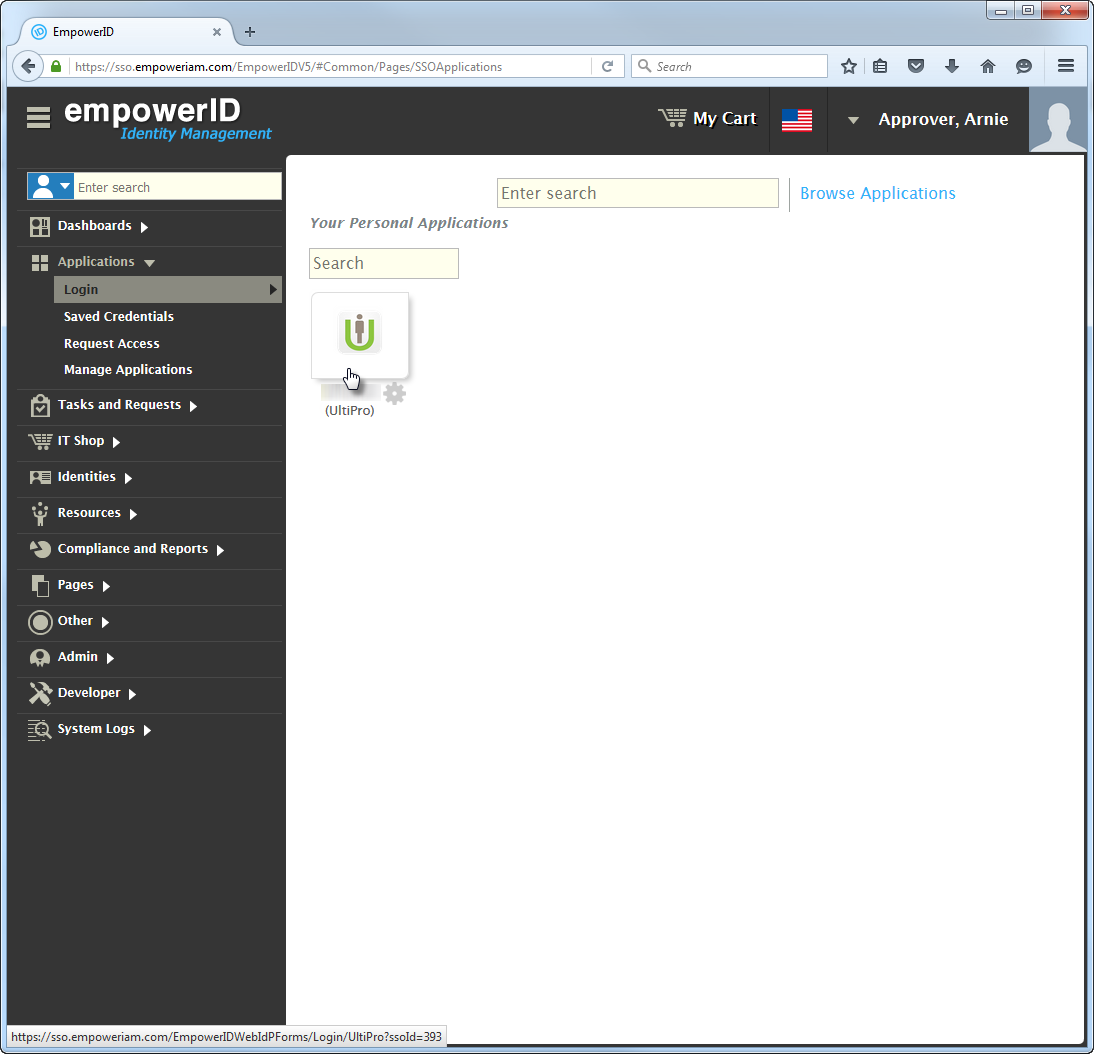
Now that you have created the application in EmpowerID, the next step is for UltiPro to set your account for SSO. Once they have completed this, you can access your UltiPro account from EmpowerID, as shown below.
To test the UltiPro SSO application
- Log in to the EmpowerID Web application as the owner of the UltiPro application you just created.
- In the Navigation Sidebar, expand Applications and click Request Access.
- In the IT Shop, search for the UltiPro application you just created and click the Request Access link.
- Below Account Management, click either Claim Existing Account (if you have connected EmpowerID to UltiPro and it has inventoried your account) or Request New Account (if you do not have an UltiPro account that is inventoried by EmpowerID). In this example, select Claim Existing Account.
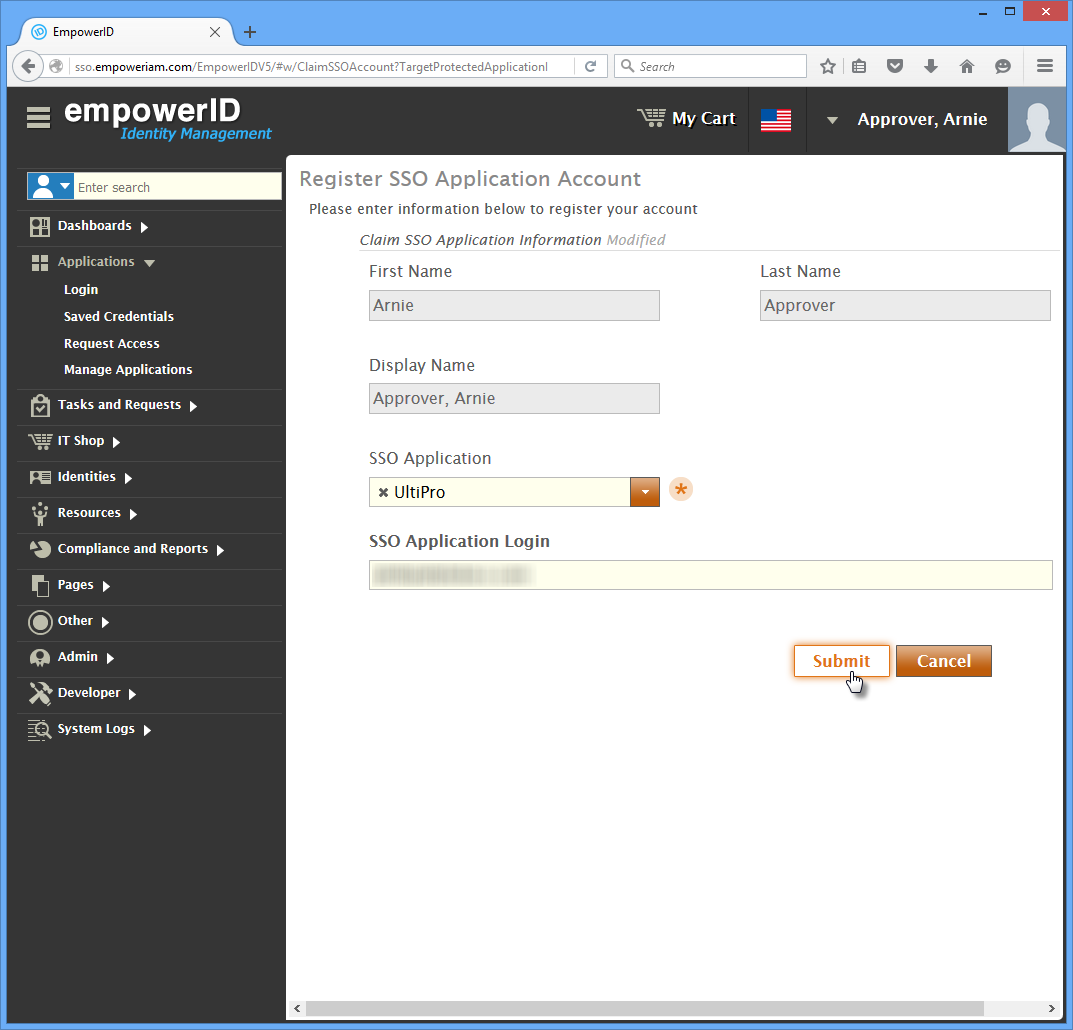
- In the Register SSO Application Account form that appears, select UltiPro (or whatever you named the SSO application when you created it) from the SSO Application drop-down, type your UltiPro login in the SSO Application Login field and click Submit.
- In the Navigation Sidebar, expand Applications and click Login. UltiPro is listed as one of your personal applications. Click the UltiPro image to sign in seamlessly to UltiPro.
