/
Configuring the EmpowerID RADIUS Server
Configuring the EmpowerID RADIUS Server
- Universal Importer for Confluence
- Patrick Parker
- Kim Landis (Unlicensed)
- Phillip Hanegan
Owned by Universal Importer for Confluence
EmpowerID provides a RADIUS Server support for managing authentication and authorization of RADIUS devices. Doing so involves configuring the RADIUS device to remotely access EmpowerID, configuring EmpowerID for the remote RADIUS device, and configuring the EmpowerID Password Manager Policy for RADIUS.
The EmpowerID RADIUS Server is now available in a new version that runs as a Docker container and integrates with flexible ABAC authorization policies that can be managed and assigned in the web interface.
This topic demonstrates configuring EmpowerID for RADIUS by configuring EmpowerID for the Cisco ASA 5505 RADIUS device and is divided into the following activities:
- Configuring Cisco server settings
- Configuring EmpowerID RADIUS Settings
- Configuring the EmpowerID Password Manager Policy for RADIUS
To configure the Cisco Server Settings
- On the Cisco server, open the Cisco ASDM.
- Click Configuration on the toolbar.
- Click the Device Management panel at the bottom of the screen.
- Expand Users/AAA and select AAA Server Groups.
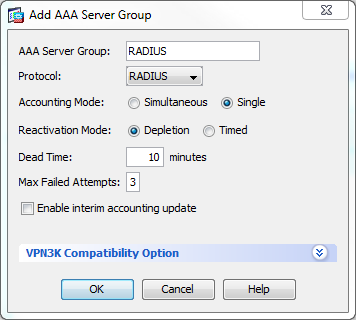
- Add the following settings to set up the server group and then click OK when completed.
- Name
- Protocol — Select RADIUS from the drop-down.
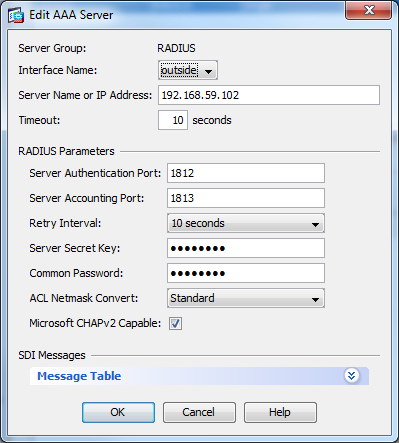
- In the Servers in the Selected Group section, click Add to the right and then enter the following settings:
- Server Name or IP Address — This should be the IP address or server name of the EmpowerID server.
- Interface Name— This should be the same interface as the EmpowerID server.
- Server Authentication Port— Set this to 1812.
- Server Secret Key
- Common Password— This should be the same password as the Server Secret Key.
- Microsoft CHAPv2 Capable— Make sure this is selected.
- Click OK to save the RADIUS Server Group settings.
- Click Apply to apply the settings.
- Make sure the Server Group method on the connection profile is set to RADIUS.
- Apply and save the configuration.
- Once configured, your RADIUS Server Group settings should look similar to the following image.
To configure EmpowerID RADIUS Settings
- From the Navigation Sidebar of the EmpowerID Web interface, expand Admin > SSO Connections and click RADIUS Connections.
- From the RADIUS Connections page, click the Add Connection
 button.
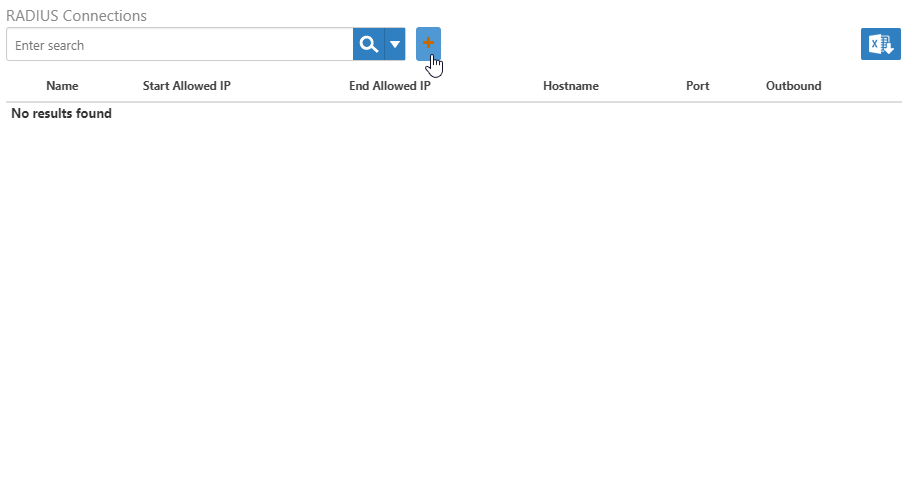
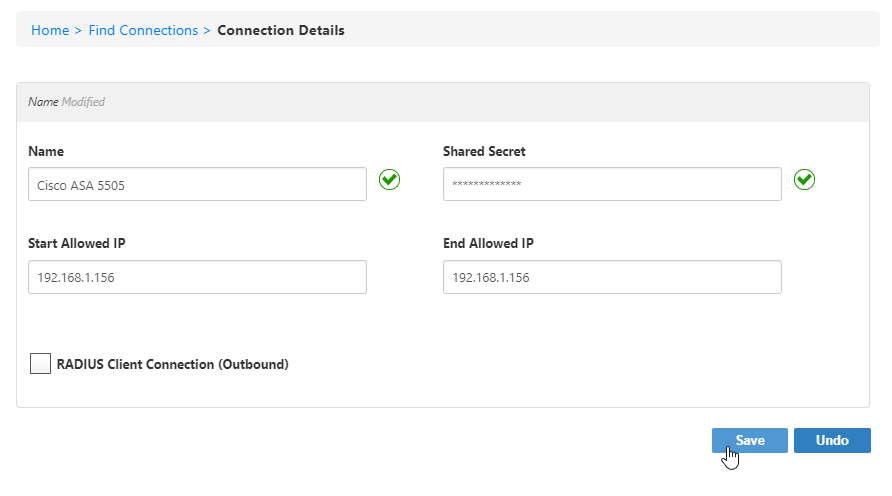
- In the Connection Details form that appears, do the following:
- Type the name of the RADIUS connection in the Name field.
- Type the IP address for the CISCO device in the Start Allowed IP field.
- Type the IP address for the CISCO device in the End End Allowed IP field.
- Type the same Secret Key set previously for the RADIUS server group on the CISCO device in the Shared Secret field.
- Click Save.
To configure the Password Manager Policy
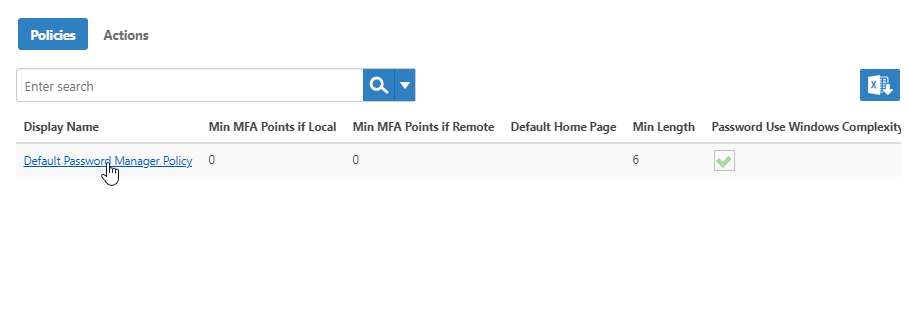
- From the Navigation Sidebar, expand Admin > Policies and click Password Manager Policies.
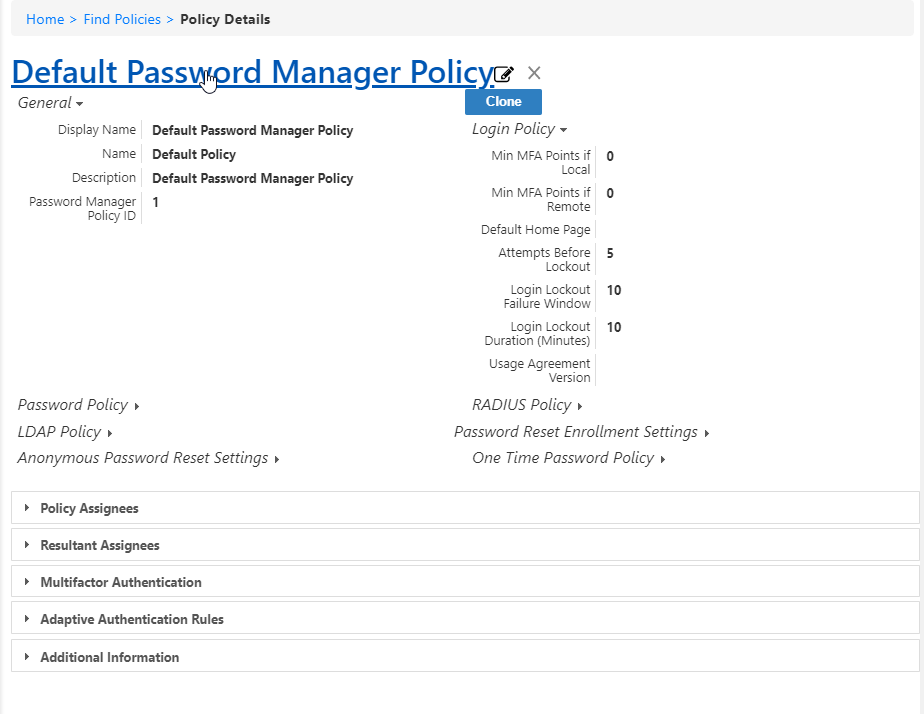
- From the Password Manager Policies page, search for the policy to which you want to enable RADIUS authentication and click the Display Name link for that policy.
- From the Policy Details page for the policy that appears, click the policy Edit link.
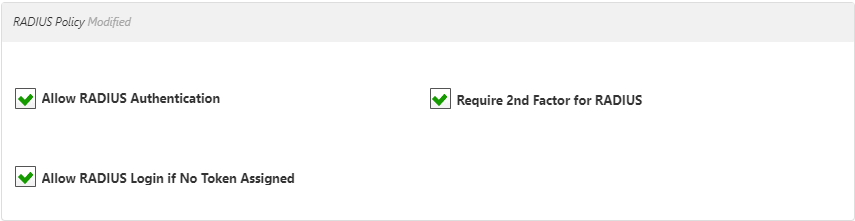
- On the Edit page for the policy, click the Authentication Settings tab and in the RADIUS Policy section do the following:
- Select Enable Authentication to allow RADIUS authentication.
- Select Require Second Factor Authentication if two-factor auth for RADIUS is required in your environment.
- Select Enable RADIUS Login if No Token Assigned according to your requirements.
- Click Save to save your changes to the policy.
In this article
, multiple selections available,
Related content
Configuring the EmpowerID RADIUS Server
Configuring the EmpowerID RADIUS Server
More like this
Configure the EmpowerID RADIUS Server
Configure the EmpowerID RADIUS Server
More like this
Configure the EmpowerID RADIUS Server
Configure the EmpowerID RADIUS Server
More like this
Configure the EmpowerID RADIUS Server
Configure the EmpowerID RADIUS Server
More like this
Configure the EmpowerID RADIUS Server
Configure the EmpowerID RADIUS Server
More like this
Configure the EmpowerID RADIUS Server
Configure the EmpowerID RADIUS Server
More like this