...
...
...
...
...
...
...
...
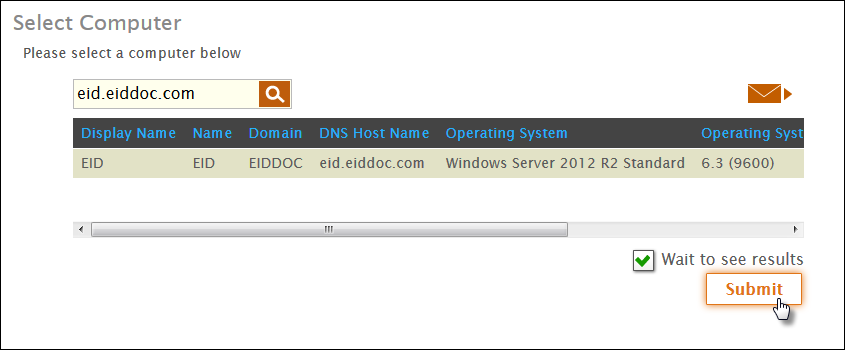
- In the Select Computer lookup that appears, search for the File server you registered with EmpowerID, click the record for that server to select it and then click Submit.
...
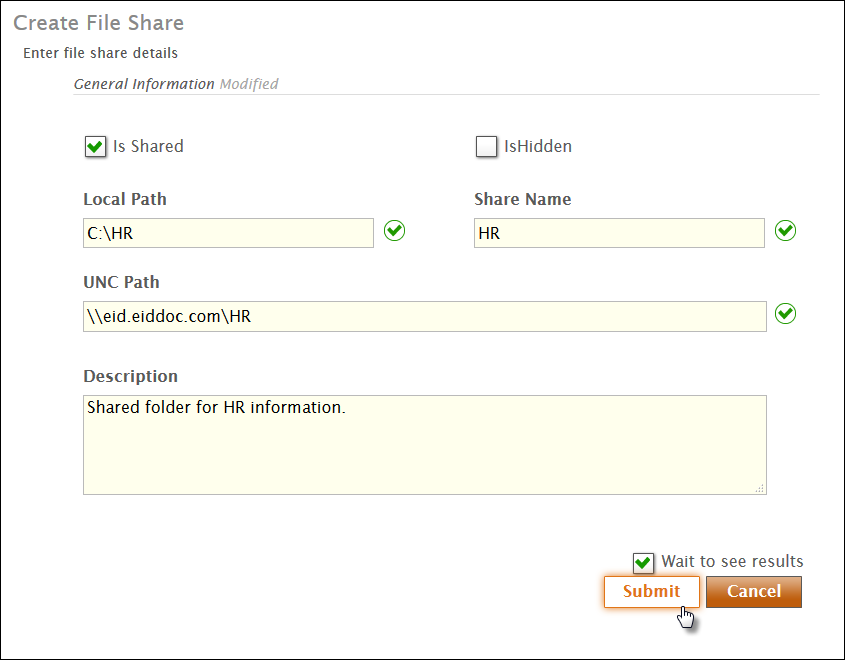
- In the Create File Share form that appears, enter the appropriate information for the share and then click Submit.
...
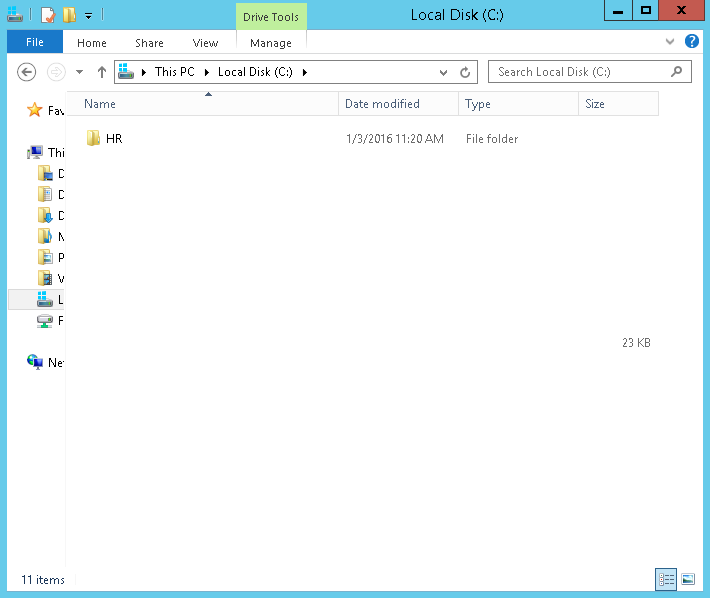
To verify EmpowerID created the shared folder on the file server
- On your File server, navigate to the local path you specified for the shared folder when you created it.
- You should see the home folder you just created.
...
| icon | false |
|---|---|
| title | Related Content |
...
| Div | ||||||||||||||||||||||||
|---|---|---|---|---|---|---|---|---|---|---|---|---|---|---|---|---|---|---|---|---|---|---|---|---|
| ||||||||||||||||||||||||
|