...
...
...
...
...
...
Home / Identity Administration / Shared Folders / Current: Creating Shared Folders
This topic demonstrates how to create shared folders in EmpowerID.
| Info | ||
|---|---|---|
| ||
|
...
Creating a shared folder
- In the Navigation Sidebar, expand Resources and click Shared Folders.
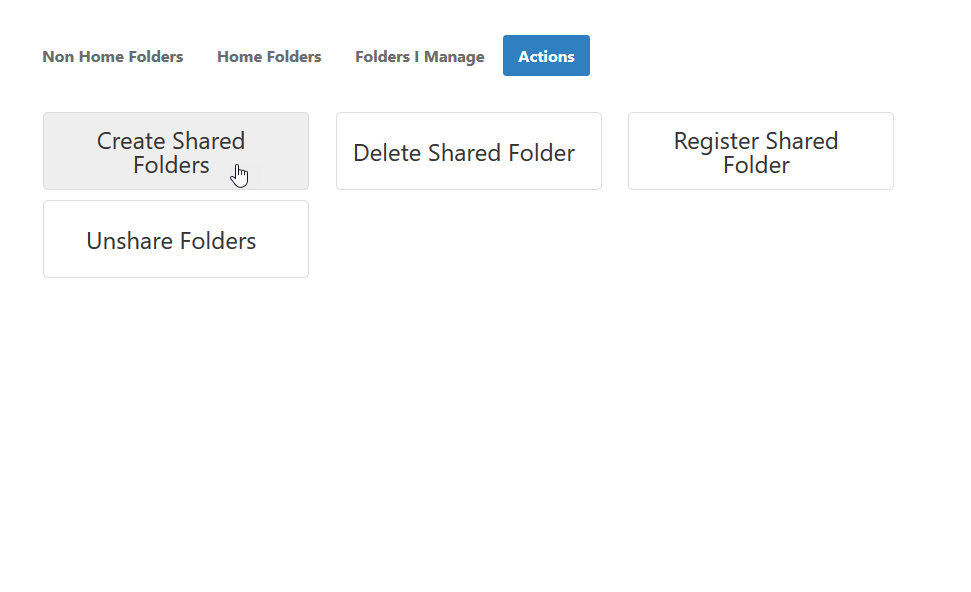
- From the Shared Folders page, click the Actions tab and then click Create Shared Folders.
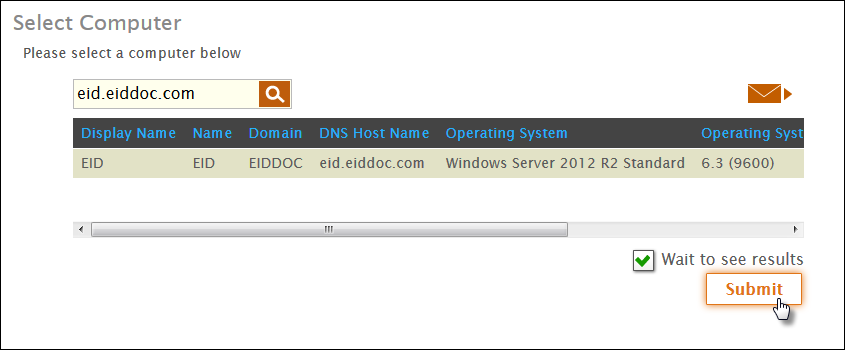
- In the Select Computer lookup that appears, search for the File server you registered with EmpowerID, click the record for that server to select it and then click Submit.
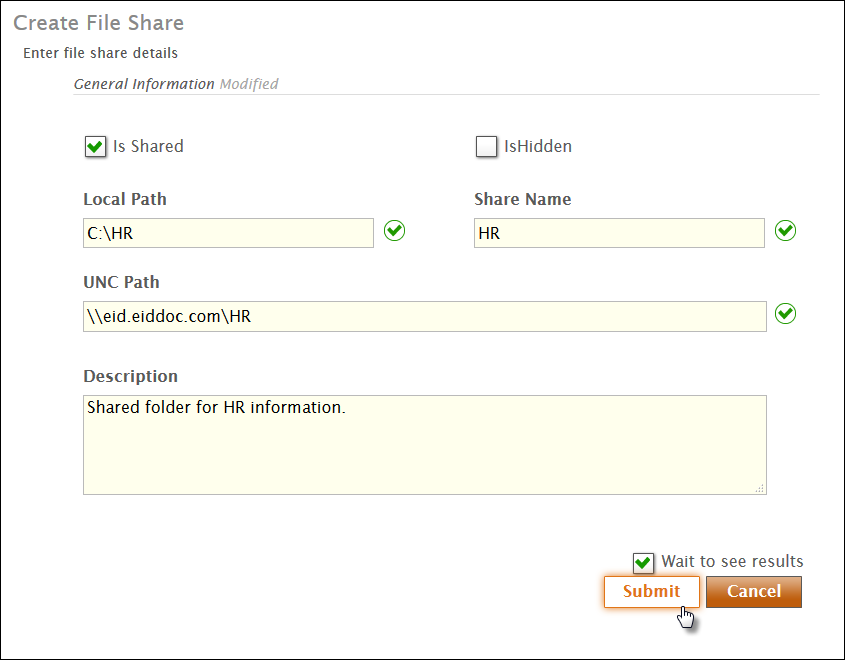
- In the Create File Share form that appears, enter the appropriate information for the share and then click Submit.
...
Verifying the shared folder on the file server
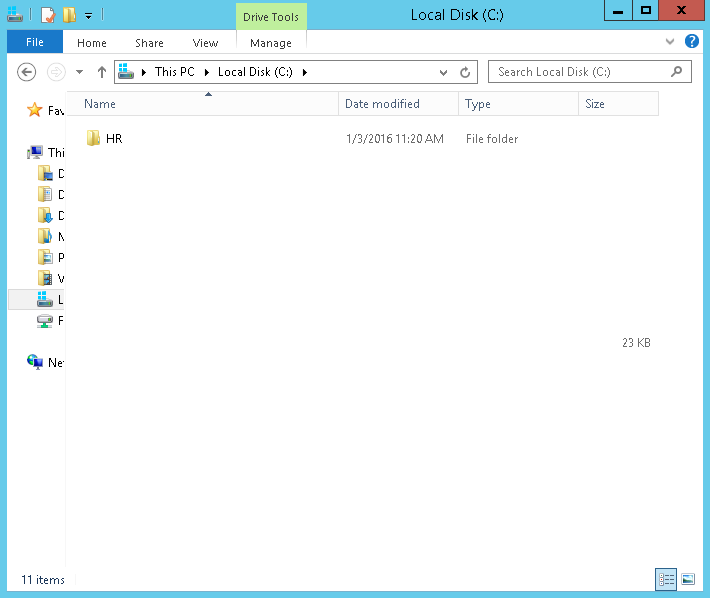
- On your File server, navigate to the local path you specified for the shared folder when you created it.
- You should see the home folder you just created.
...
| style | float: left; position: fixed; top: 105px; padding: 5px; |
|---|---|
| id | toc |
| class | topicTOC |
| Div | ||||||||
|---|---|---|---|---|---|---|---|---|
| ||||||||
|
| Div | ||
|---|---|---|
| ||
On this page |
...


