/wiki/spaces/E2D/pages/29982926  /  Role Mining Analytics  /  Current: Publishing Candidate Roles

When you execute a campaign run, EmpowerID creates candidate roles based on how you configured the owing campaign and the campaign run. The goal of this process is to publish the resulting candidate roles into Management Roles. In order to do so, you should review the candidates, select those you wish to keep, discard those you don't (if any) and then publish those candidate roles. When you publish a candidate, EmpowerID creates a Management Role for it that contains the users and entitlements the campaign run produced.

To publish candidate roles

  1. From the Navigation Sidebar, navigate to the Role Mining Campaign page by expanding Role Mining and clicking Role Mining Campaign.
  2. From the Role Mining Campaign page, click the Runs tab and search for the run you want to analyze.
  3. From the grid, click the Display Name link for the run.


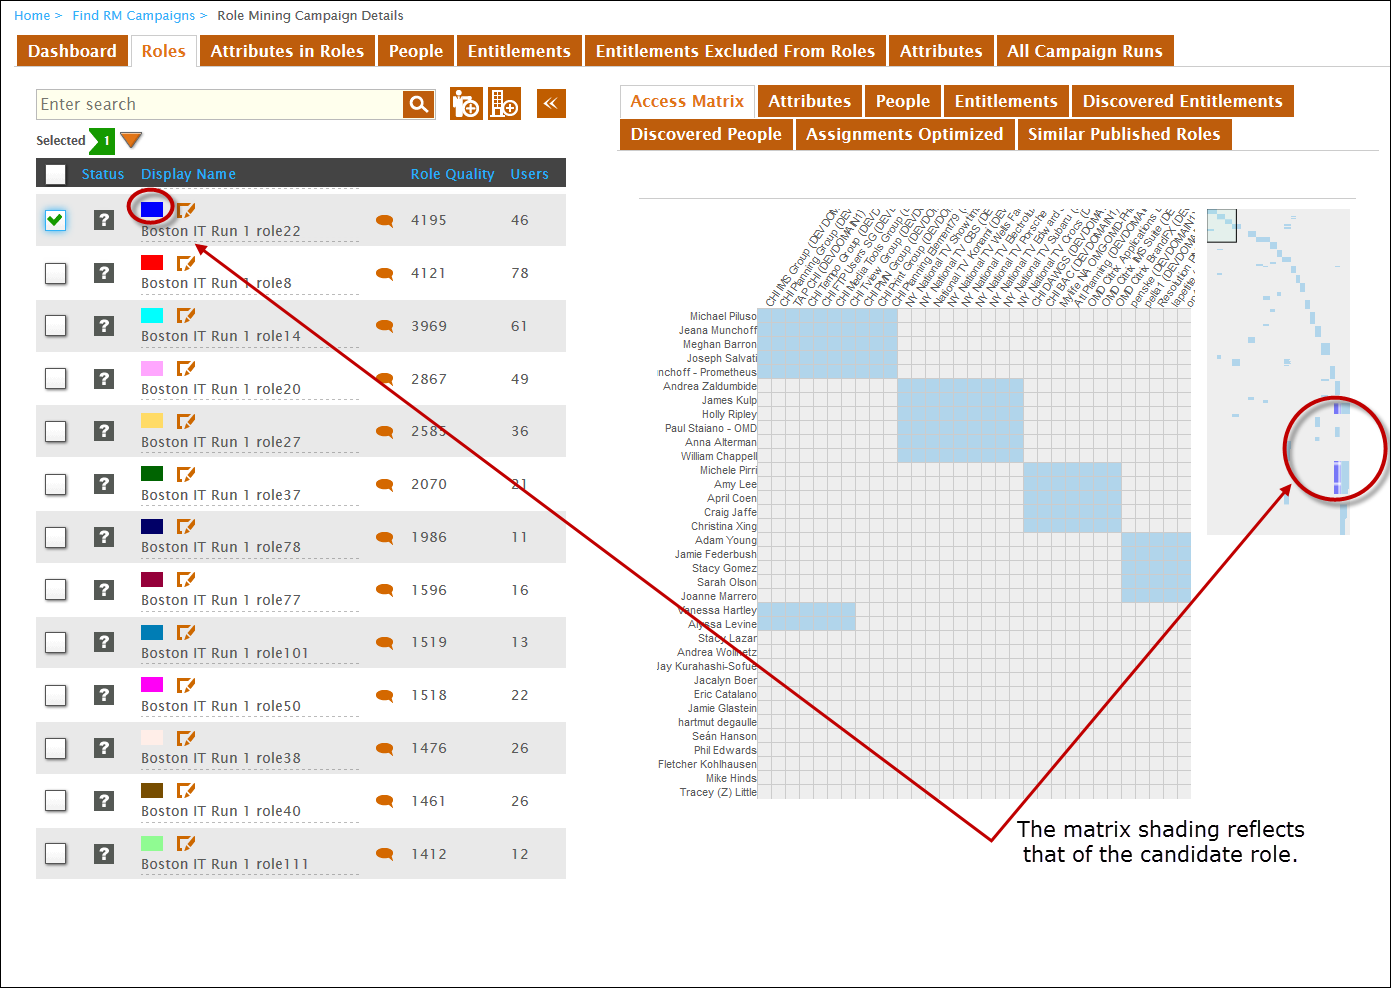
  4. From the Role Mining Campaign Details page for the campaign that appears, click the Roles tab. You should see a list of roles generated by the run as well as an Access Matrix.


  5. Select a specific role from the roles grid. You should see that the smaller map on the Access Matrix updates to show the entitlements for the selected role. The entitlements will be color-coded to match the color shown for the run in the Display Name field.


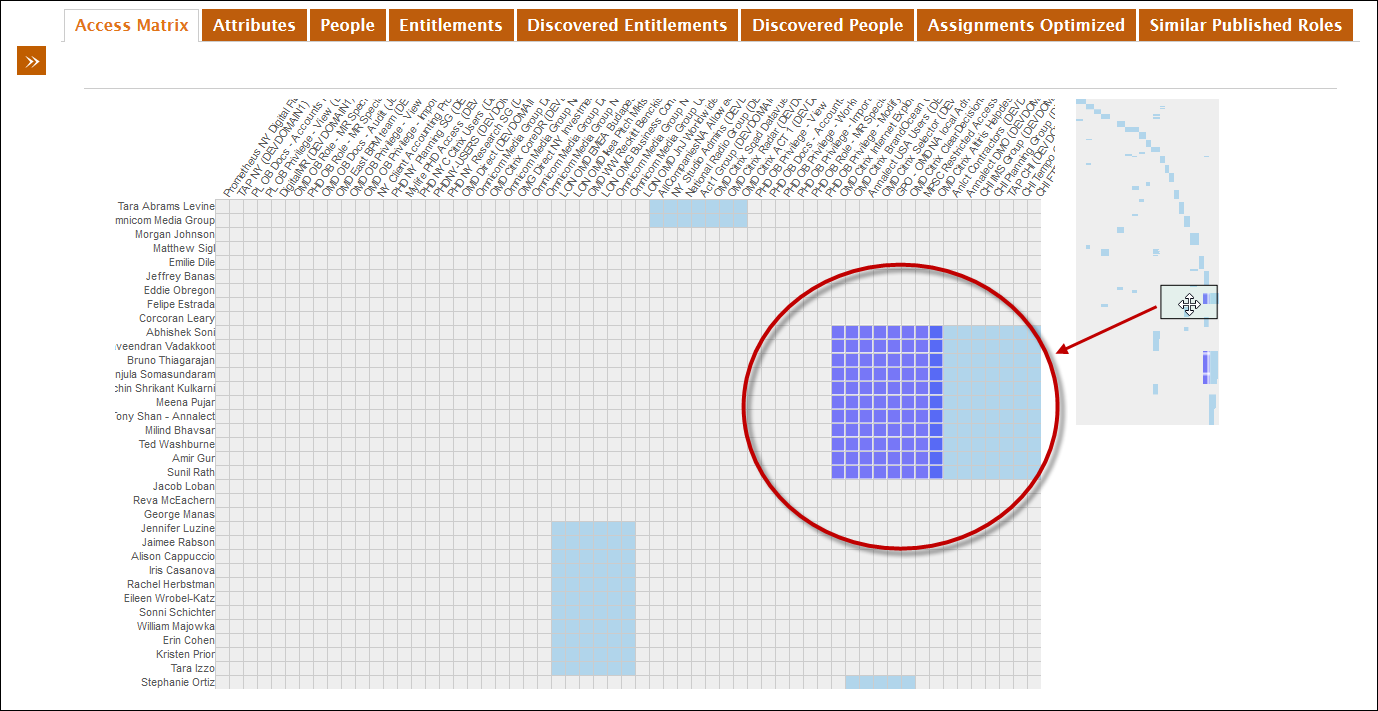
  6. Click the arrow above the Role grid to collapse the grid. Doing so enlarges the Access Matrix.


  7. On the map, drag the Viewer control to the color-coded area. You should see the specific users and their access in the matrix.


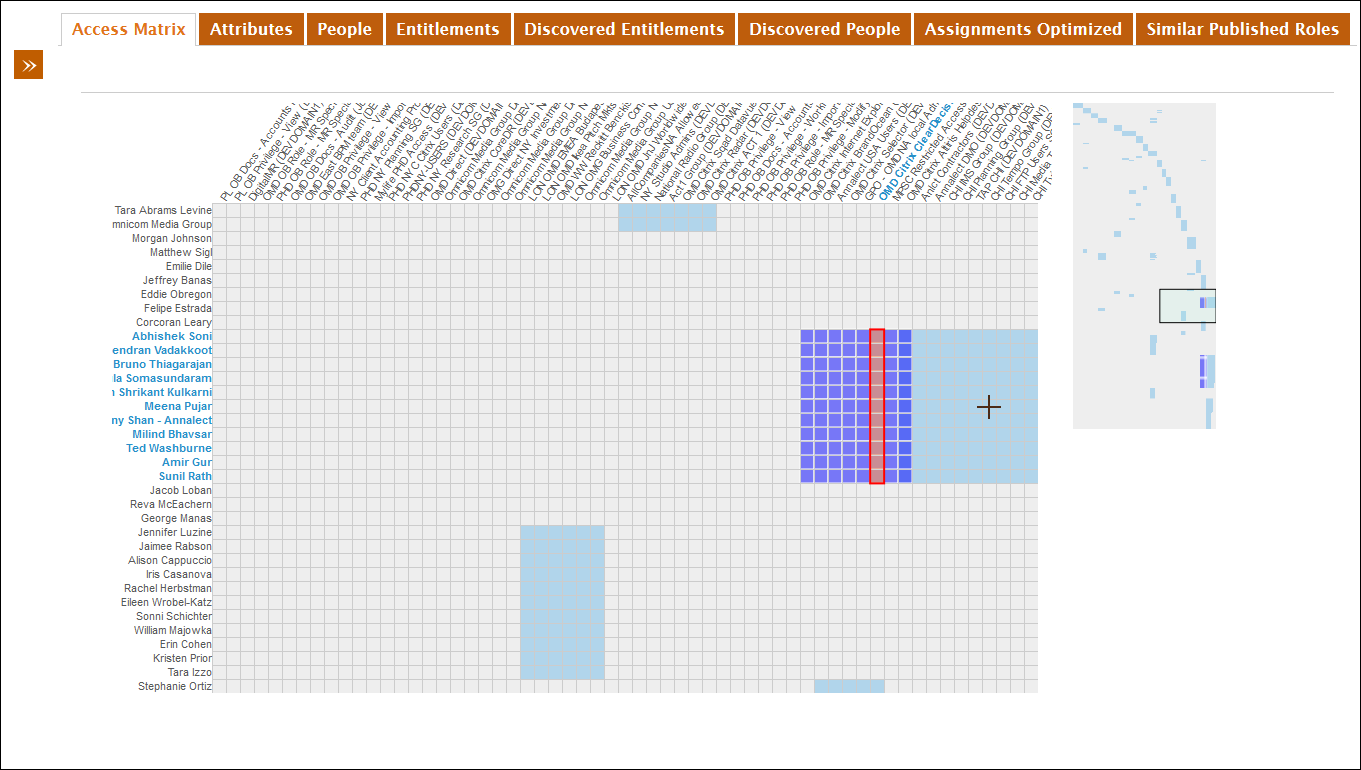
  8. Selecting a column highlights the specific group and group members.


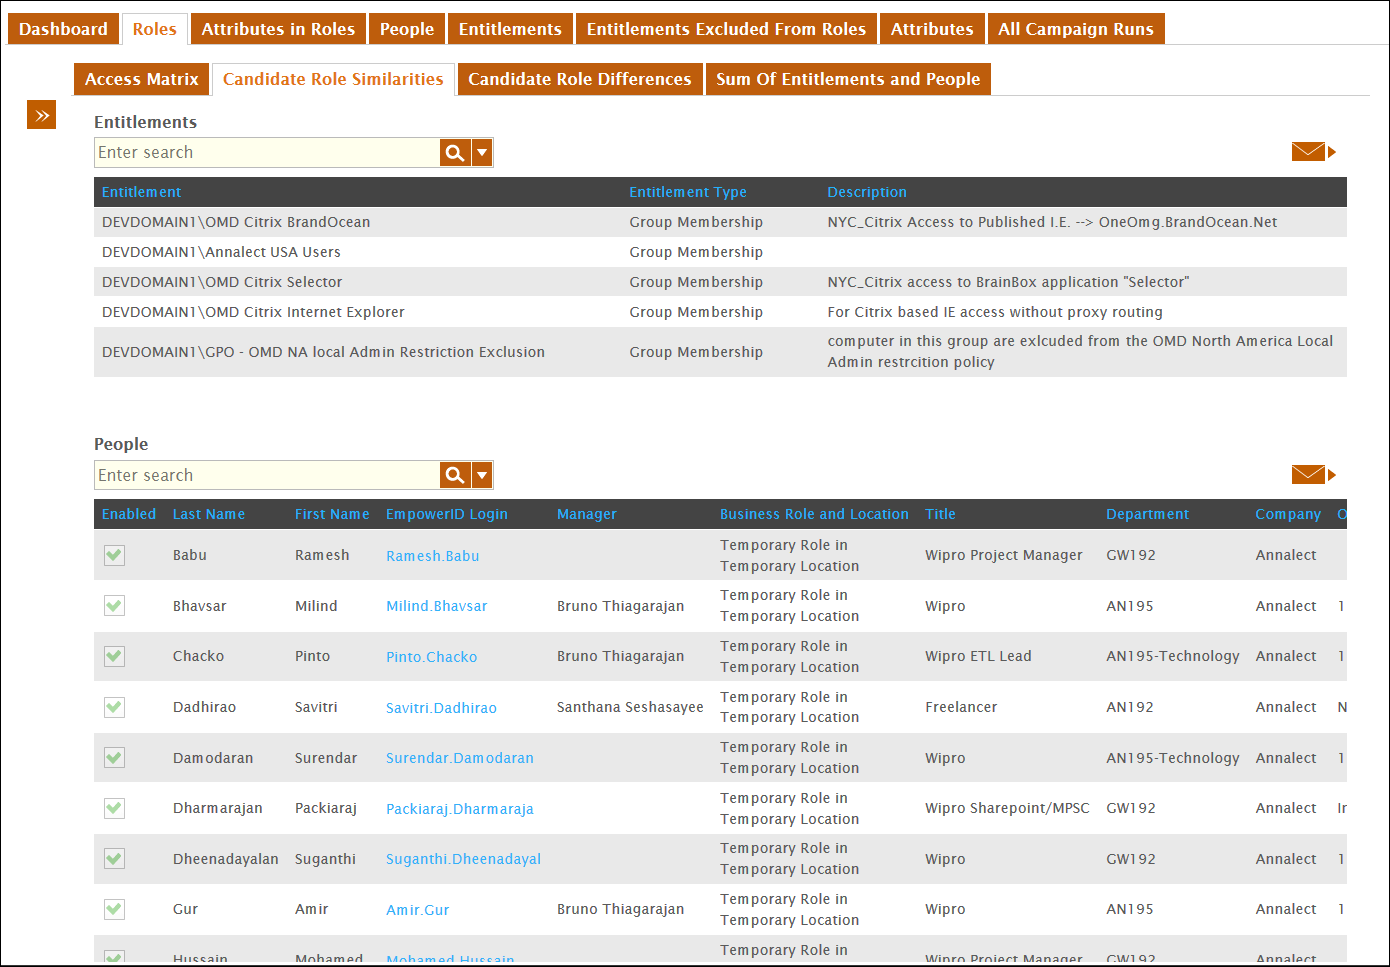
  9. Click through each of the tabs to view the related data for the candidate.
  10. If you have more than one role returned by the run, selecting multiple roles allow you to compare the similarities and differences between those roles. If you find that two roles are similar, you can chose to publish only one.


  11. If you have previously published a role, you can determine if the candidate role is too similar to be published.


  12. Add a comment to the runs you decide to keep and those you decide to discard. This can be helpful later when reviewing why you made the decision. To do so, click the Edit button for the run in the Roles grid, enter and save your comments.


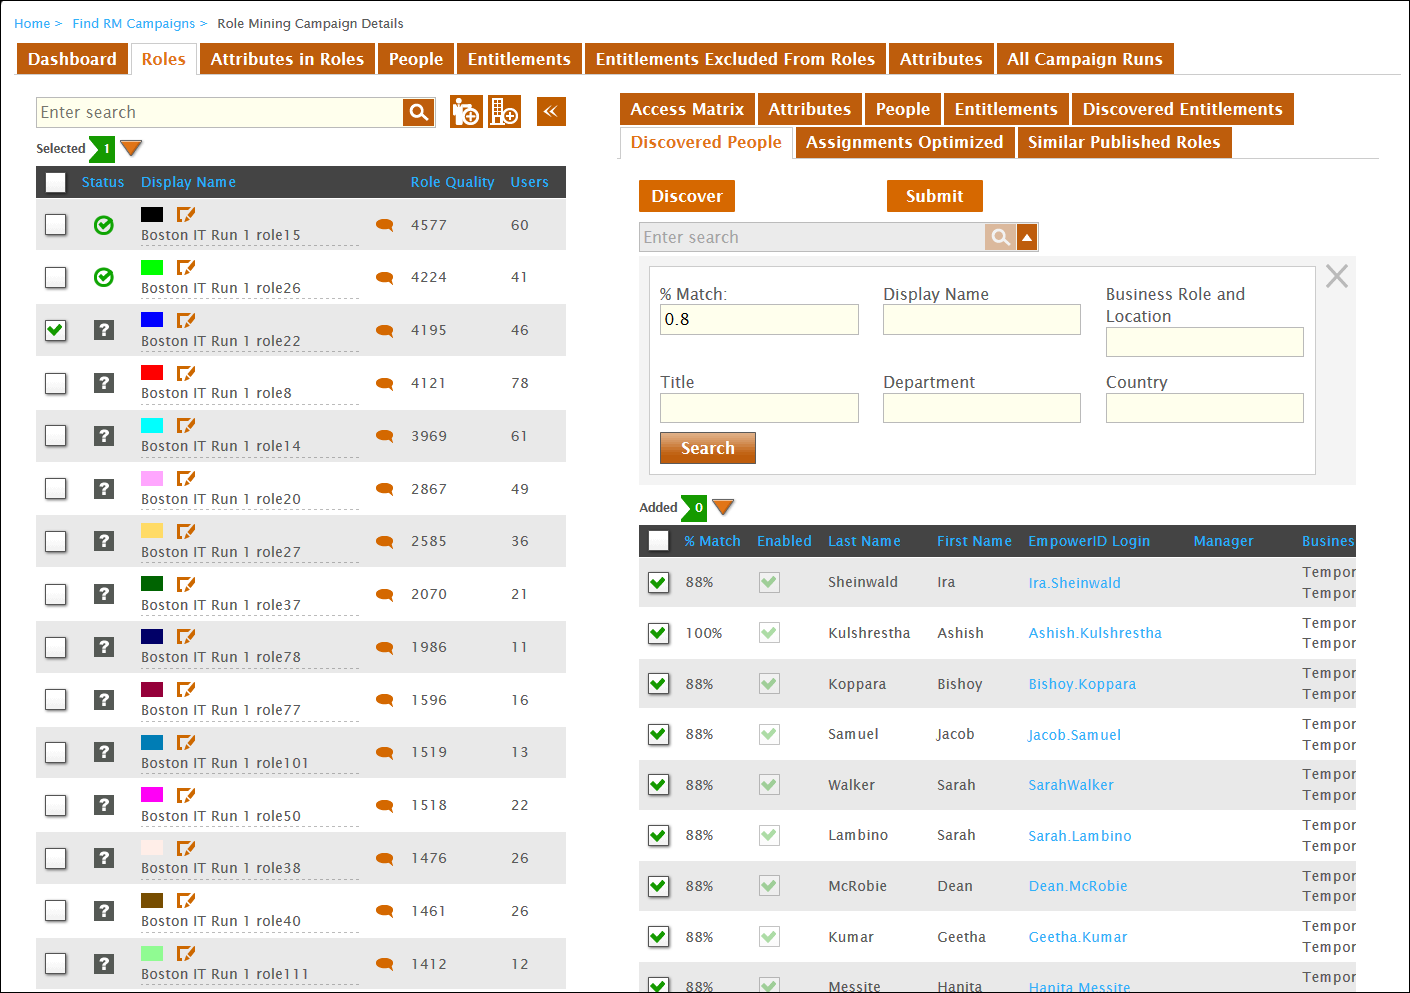
  13. After selecting the roles you want to publish, you can discover the people and entitlements that will be included in the published Management Role by clicking the Discover button under Discovered People and Discovered Entitlements. When doing so, you can refine percentage used for discovering by setting the % Match value. The default match is 80%, which means that all people with a greater than 80% match are automatically flagged for inclusion.


  14. Review the discovered people and entitlements and, if desired, deselect any that you do not want to include in the role.
  15. When ready to publish a candidate role, ensure you have selected it from the Roles grid and then click either the Publish as Management Role or Publish as Business Role and Location button, depending on how you want the role to be used.


This publishes the candidate role as a Management Role. Assigns people and entitlements to the Management Role.

  1. Select the role you want to publish (tick the record for the role in the Roles grid) and then click the Create as Management Role button


This publishes the entitlements to a new Business Role and Location. Assigns the people to a selected Business Role and Location (BRL). Each person in the BRL maps as members of the Management Role.

  1. Select the role you want to publish (tick the record for the role in the Roles grid) and then click the Create as Business Role button.
  2. In the Business Role and Location section of the Publish Candidate Role form that appears click the Select a Role and Location link and then do the following in the Role and Location Selector that appears:
    1. Type the name of the Business Role in the Business Role field and then click the node for the that role.


    2. Click the Location tab.
    3. Type the name of the Location in the Location field and then click the node for the that location.
    4. Click the Select button to close the Role and Location selector.


    5. Review the people in the candidate role. If you wish to exclude a person from the role, select Exclude People above the People in the Role section and then select the appropriate people.


    6. Review the entitlements in the candidate role. If you wish to exclude an entitlement (group) from the role, select Exclude Entitlements above the Entitlements Covered by the Candidate Role section and then select the appropriate entitlements.

    7. When ready, click Submit.


Role Mining Overview

Setting Up Role Mining

Creating Campaign Runs

Configuring Campaigns

Compiling Campaigns

Creating Campaign Runs

Analyzing Run Results