In order to manage shared folders in EmpowerID or execute other system management tasks on a local Windows server, you need to create a service account identity and link that identity to the Windows Server Management Web Service. By default, this service is turned on for the following server roles:
- All-in-One Server
- Application Server Full
- Application Server Light
- Web Front-End
As this is the case, the local Windows server must have one of these roles assigned to it. For information on assigning server roles to Windows servers, see Configuring Server Roles. Additionally, as the Windows Server Management Web Service is hosted in IIS, the service account needs to be a member of the domain administrator's group with a password that is vaulted in EmpowerID. Vaulting the password allows the service to access the private key that was used to encrypt the password, decrypting it to gain the necessary privileges on the server.
To configure the Windows Server Agent account, you will need to do the following:
- Create a service account for the Windows Server Agent
- Vault the service account password
- Add the service account to the Windows Server agent WCF service
 Creating a service account for the Windows Server Agent
- In the Navigation Sidebar of the EmpowerID Web interface, expand Identities and click User Accounts.
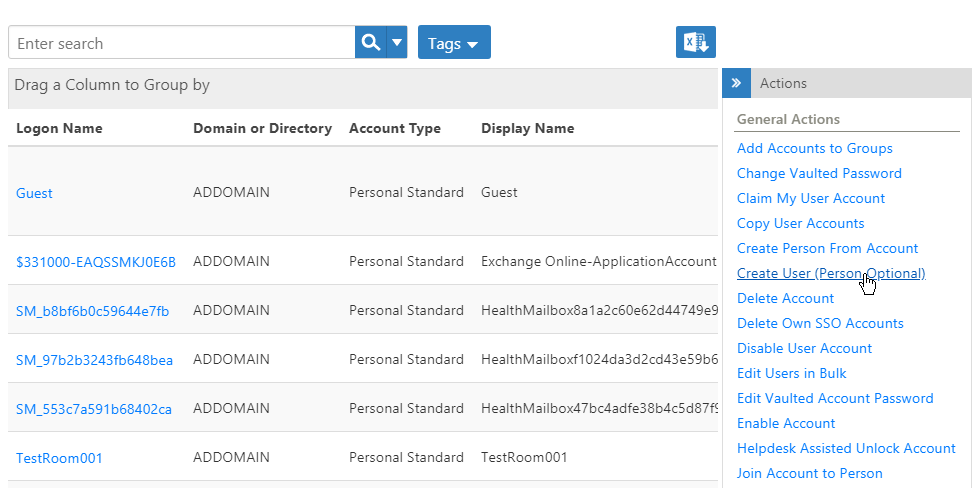
- From the Actions pane of the User Account management page, click Create User (Person Optional).
This opens the Create User page.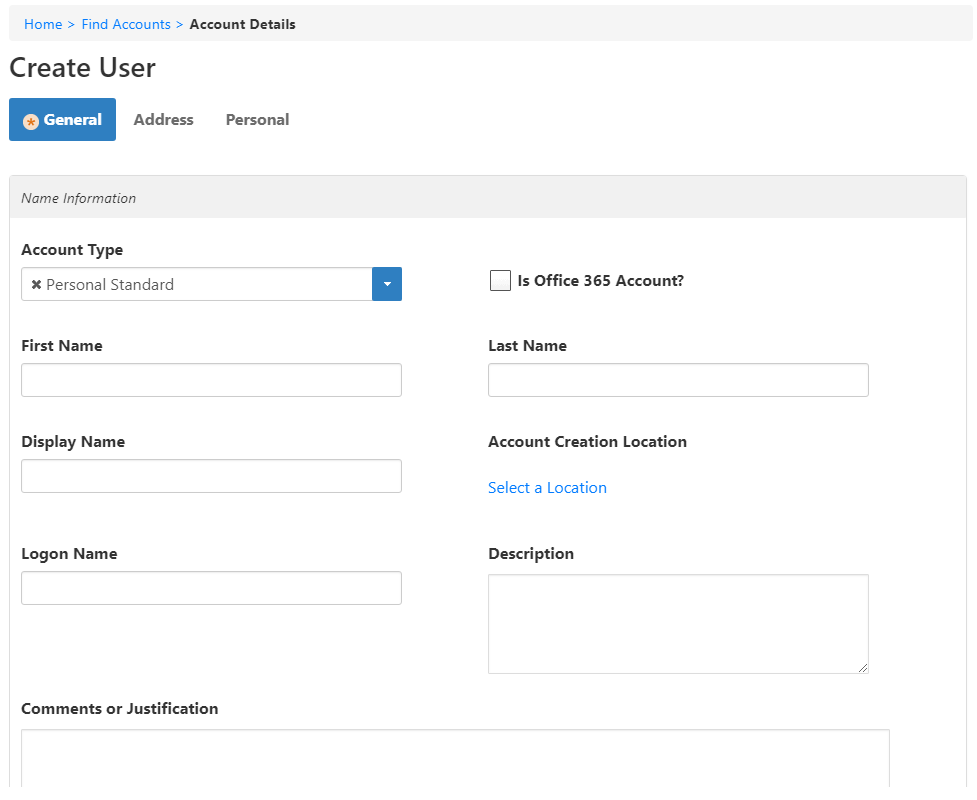
From the General tab, select Service from the Account Type drop-down.
Notice that the fields on the form change to reflect the options you have for creating a service account. Specifically, EmpowerID removes the First Name, Last Name, and Display Name fields.
This keeps EmpowerID from automatically provisioning an EmpowerID Person from the account during the next inventory event.
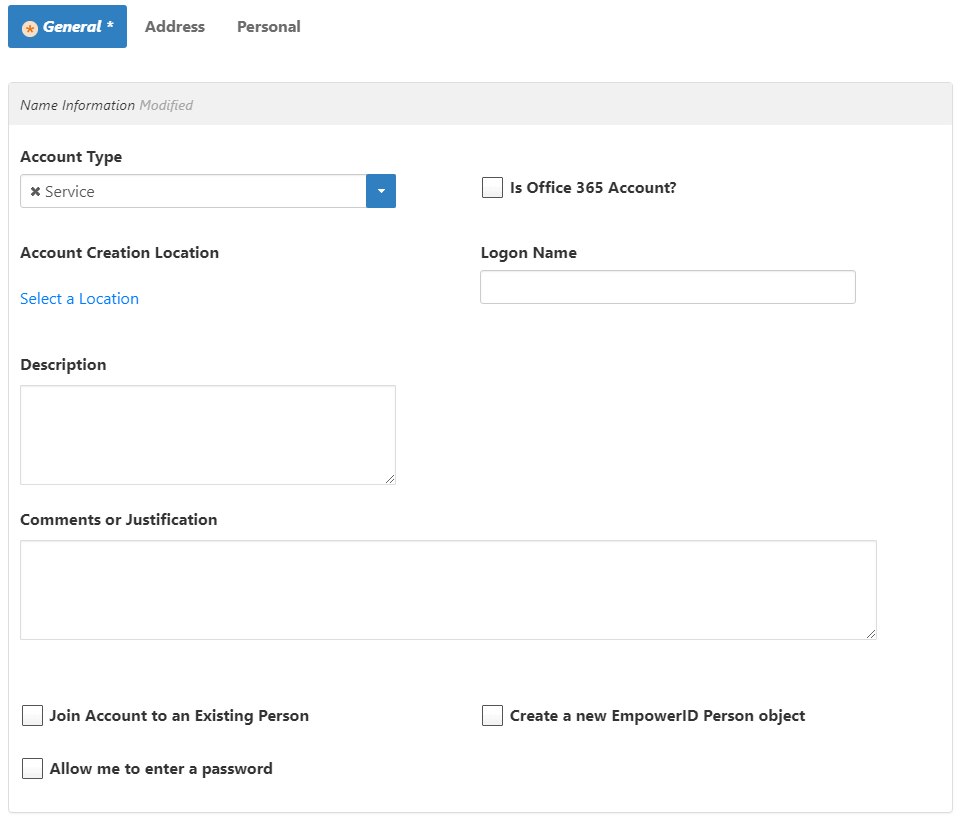
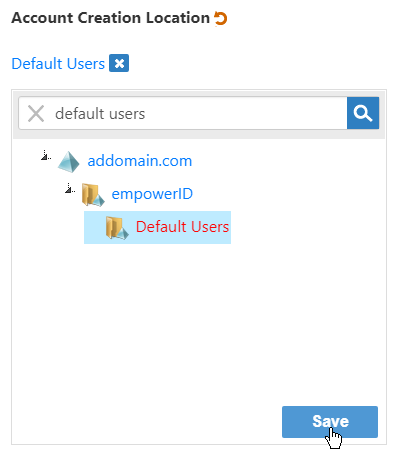
- Under Account Creation Location, click Select a Location and in the Location selector that appears, search for and select the directory location in which you want to create the service account. Once you have selected a location, click Save to close the Location selector.
- Type a logon name for the account in the Logon Name field.
- Type a description and any comments in the Description and Comments or Justification fields, respectively.
Select Allow me to enter a password and then type a password in the Password and Confirm Password fields.
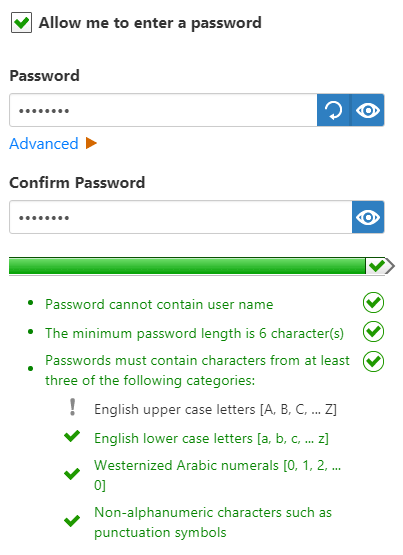
The account must have a password before it can be vaulted in EmpowerID.
- In the Security section of the form, clear Allow Joining Account to a Person, Allow Provisioning a Person from Account, and Enable Sync Password.
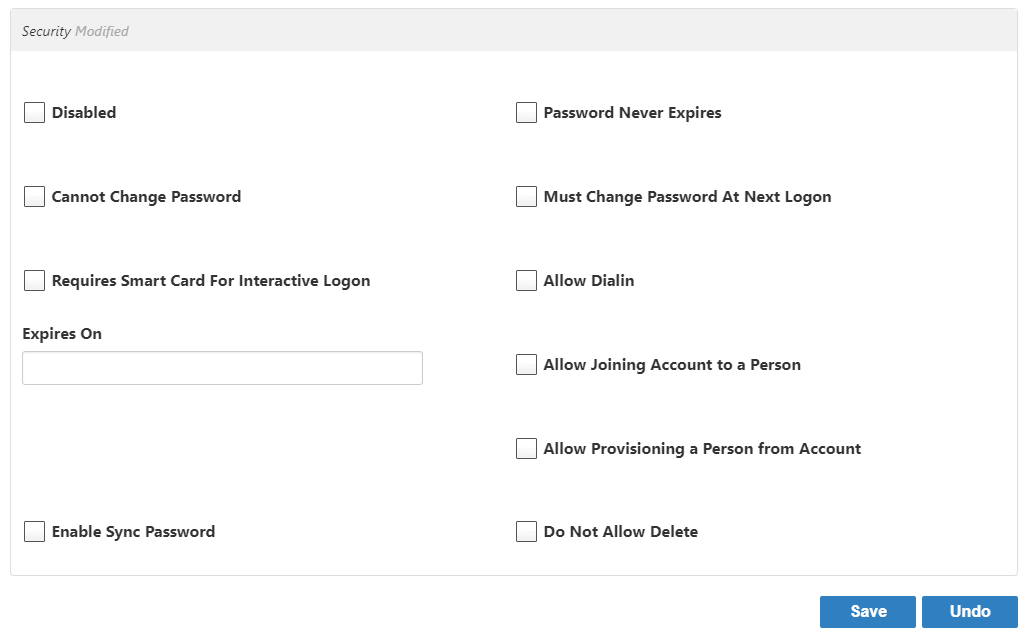
- Click Save.
After EmpowerID creates the account, its View page appears. The View page allows you to view information about the account and manage it as needed. You will use this page to add the account to the Domain Admins group, as well as to vault the account password.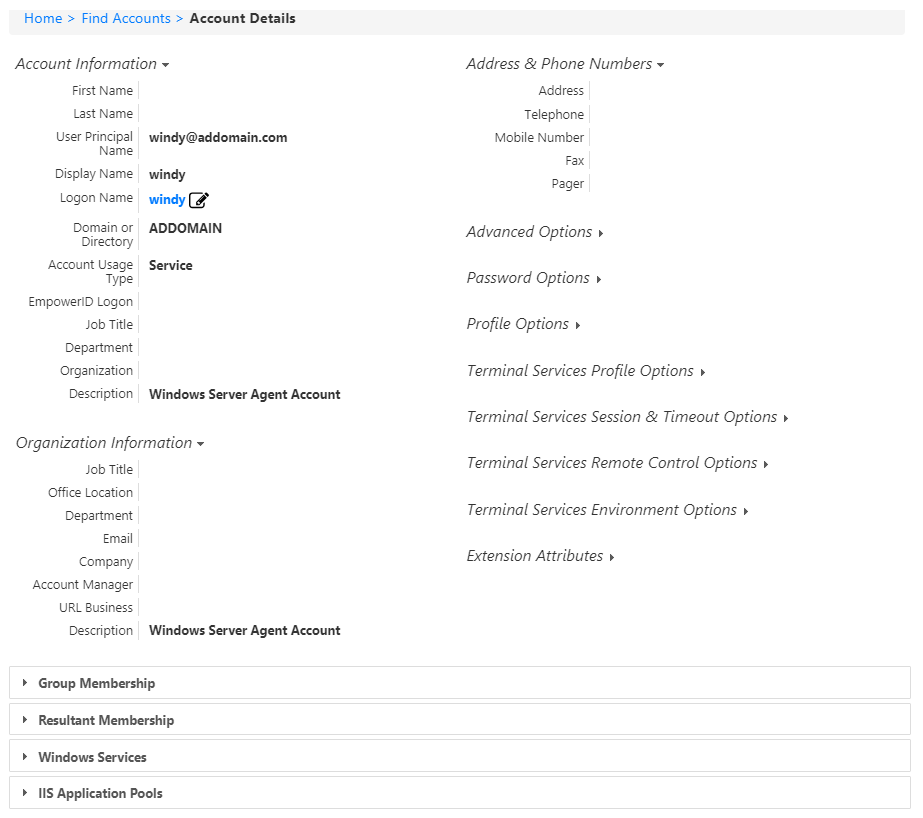
- From the View page, expand the Group Membership accordion.
- From Group Membership accordion, type Domain Admins in the Enter name to add field and then click the tile for that group.

- Click Submit.

Now that the service account has been created and added to the domain admins group, the next step is to vault the account password. This is discussed in the next section.
 Vaulting the service account password
- From the View page for the service account, expand the Actions accordion and click Edit Vaulted Account Password.
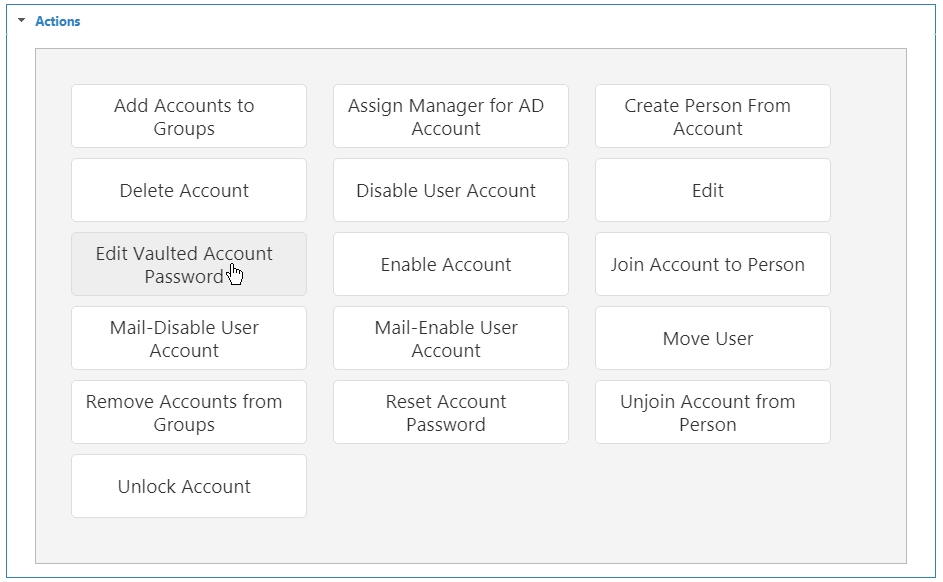
This directs you to the Service Account Credentials page.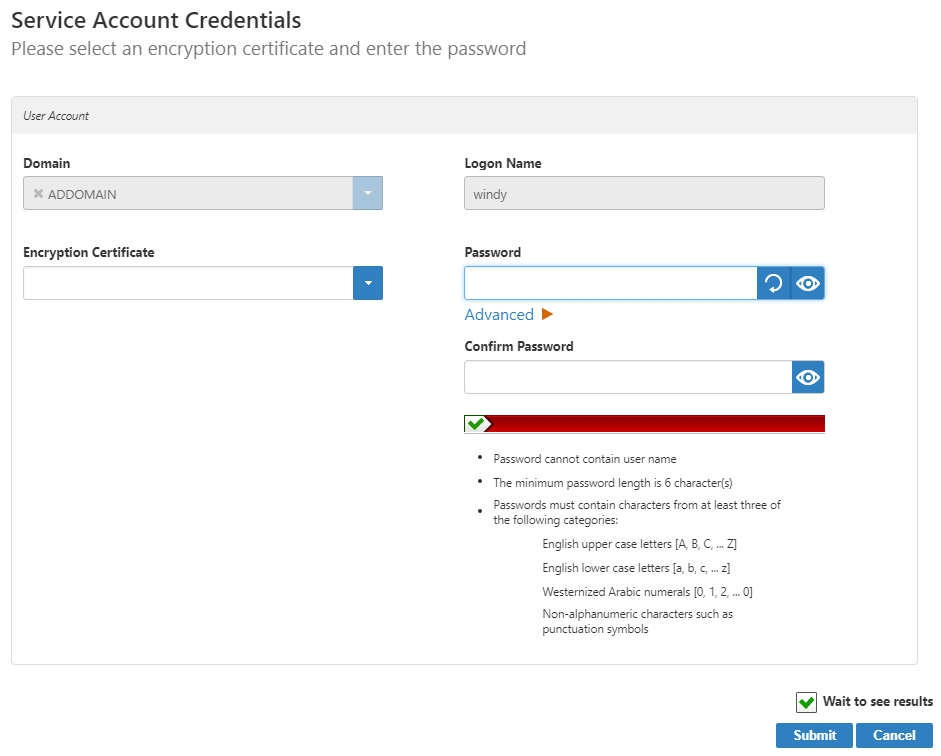
- From the Encryption Certificate drop-down, select the SSL certificate you are using to secure communications between EmpowerID and IIS.
- Type the service account password in the Password and Confirm Password fields and then click Submit.
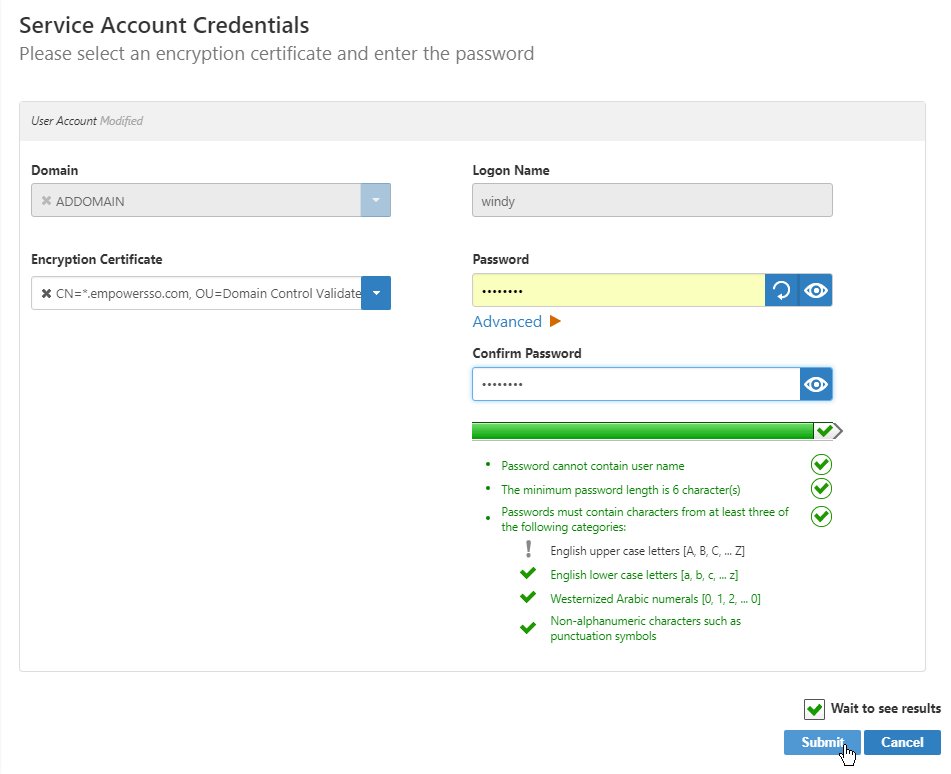
- Click OK to close the Operation Execution Summary.
Now that the service account password is vaulted, the next step is to add the account to the agent. This is discussed in the next section.
 Adding the service account to the Windows Server agent
- In the Navigation Sidebar, expand Admin, then Applications and Directories, and click Windows Server Agent Accounts.
From the Windows Server Agent Service Account page, search for the appropriate Windows server and then click the Name link for that server.

- From the View One page for the Windows Server Agent that appears, click the Edit link. Edit links have the pencil icon.
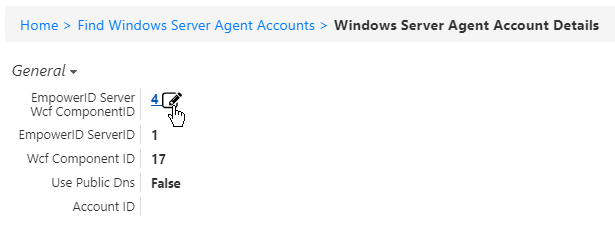
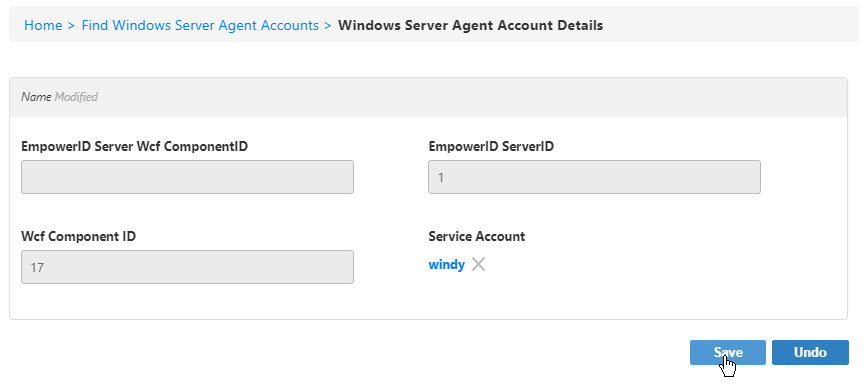
This directs you to theEdit Onepage for the WCF Component. This component represents the Windows Server Management Web Service in the EmpowerID Identity Warehouse.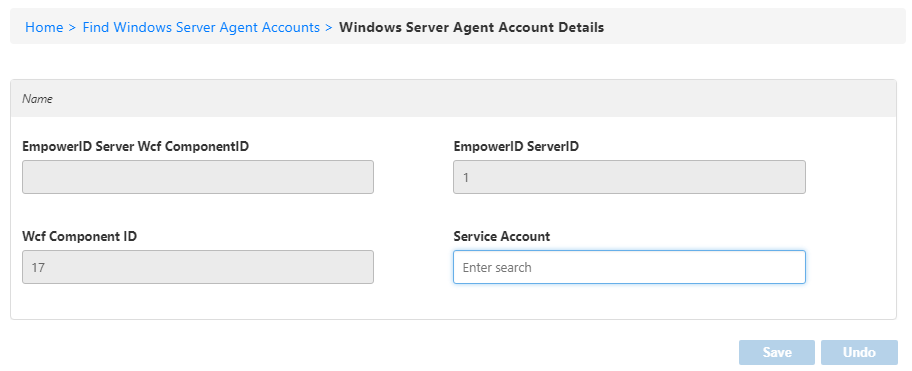
- In the Service Account field, type the name of the service account you created above and then click the tile for that account.
- Click Save.
|