Two-Level Management Roles
EmpowerID provides the capability for you to create Dynamic Hierarchy policies that provision Management Roles and Management Role Definitions based on the value of two specified Person attributes, such as Title and City. When these type of policies first run, EmpowerID provisions the Management Role Definition based on the first level attribute chosen and the Management Role based on a combination of the first and second level attributes selected. After the parent Management Role Definitions and Management Roles are provisioned, Persons with attributes matching the two specified attributes is added to the Management Roles.
The Extension Attribute 1 value for each Management Role Definition and Management Role created by a Dynamic Hierarchy policy is internally managed by EmpowerID and should not be altered.
To create a Two-Level Attribute Management Roles Dynamic Hierarchy Policy
- In the navigation sidebar, expand Admin, then Policies, and click Dynamic Hierarchies.
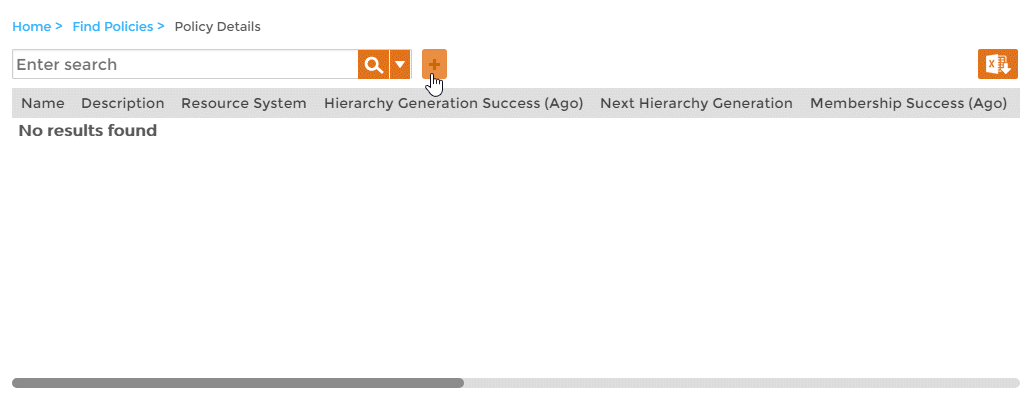
- From the Dynamic Hierarchies find page, click the Add (+) button.
- In the Choose Type section of the Policy Details form that appears, select Two level attribute management roles from the Select a Policy Type drop-down.
- In the General section of the Policy Details form, do the following:
- Type a name and description for the policy in the Name and Description fields, respectively.
- Select EmpowerID from the Resource System drop-down.
- In the Hierarchy Generation section of the Policy Details form, do the following:
- Select Hierarchy Generation Enabled so that the option is enabled. Doing so allows EmpowerID to generate the dynamic group hierarchies.
- Click the Hierarchy Generation Next Run field and in the calendar control that appears, specify the date and time for the next run of the Hierarchy Generation job.
Optionally, underneath Hierarchy Generation Schedule, click the Start and End fields and in the calendar control that appears for each field, specify the respective start and end dates for hierarchy generation to occur.
The default values for these fields is a start schedule of one day before the current day and an end date of 97 years from the start date. If you change these values, set the Start date to one day before the date specified in the Hierarchy Generation Next Run field to ensure the generation occurs as expected.
- Specify the occurrence interval for the hierarchy generation in the Interval pane. When doing so, you have the following options:
- Once - Hierarchy generation occurs one time.
- Minute Interval - Hierarchy generation occurs "X" times every "Y" minutes as specified in the Run Indefinitely, Iterations and Interval fields. So, for example, if you select an iteration of 2 and an interval of 24, hierarchy generation occurs twice. The first occurrence is at the date and time specified in the Hierarchy Generation Next Run field and the second occurrence is 24 minutes after the first run completes. However, if you select Run Indefinitely, and then select an Interval of 24, hierarchy generation occurs once every 24 minutes, indefinitely.
- Hour Interval - Hierarchy generation occurs "X" times every "Y" hours as specified in the Run Indefinitely, Iterations and Interval fields. So, for example, if you select an iteration of 2 and an interval of 24, hierarchy generation occurs twice. The first occurrence is at the date and time specified in the Hierarchy Generation Next Run field and the second occurrence is 24 hours after the first run completes. However, if you select Run Indefinitely, and then select an Interval of 24, hierarchy generation occurs once every 24 hours, indefinitely.
- Daily - Hierarchy generation occurs once every "X" days at a designated time as specified in the Run Indefinitely, Iterations and Times fields. So, for example, if you select an iteration of 2, hierarchy generation occurs twice. The first occurrence is at the date and time specified in the Hierarchy Generation Next Run field and the second occurrence is on the following day at the time specified in the Times field. However, if you select Run Indefinitely, hierarchy generation occurs on a daily basis at the time specified in the Times field.
- In the Membership Recalculation section of the Policy Details form, do the following:
- Select Membership Recalculation Enabled so that the option is enabled. Doing so allows EmpowerID to update group membership as specified.
- Click the Membership Recalculate Next Run field and in the calendar control that appears, specify the date and time for the next run of the Dynamic Hierarchy Membership Recalculation job.
Optionally, underneath Membership Recalculation Schedule, click the Start and End fields and in the calendar control that appears for each field, specify the respective start and end dates for hierarchy generation to occur.
- The default values for these fields is a start schedule of one day before the current day and an end date of 97 years from the start date. If you change these values, the Start date should be set to one day before the date specified in the Membership Recalculate Next Run field to ensure the generation occurs as expected.
- Specify the interval the hierarchy generation should occur from the Interval pane. When doing so, you have the following options:
- Once - Membership recalculation occurs one time.
- Minute Interval - Membership recalculation occurs "X" times every "Y" minutes as specified in the Run Indefinitely, Iterations and Interval fields. So, for example, if you select an iteration of 2 and an interval of 24, membership recalculation occurs twice. The first occurrence is at the date and time specified in the Membership Recalculate Next Run field and the second occurrence is 24 minutes after the first run completes. However, if you select Run Indefinitely, and then select an Interval of 24, membership recalculation occurs once every 24 minutes, indefinitely.
- Hour Interval - Membership recalculation occurs "X" times every "Y" hours as specified in the Run Indefinitely, Iterations and Interval fields. So, for example, if you select an iteration of 2 and an interval of 24, membership recalculation occurs twice. The first occurrence is at the date and time specified in the Membership Recalculate Next Run field and the second occurrence is 24 hours after the first run completes. However, if you select Run Indefinitely, and then select an Interval of 24, membership recalculation occurs once every 24 hours, indefinitely.
- Daily - Membership recalculation occurs once every "X" days at a designated time as specified in the Run Indefinitely, Iterations and Times fields. So, for example, if you select an iteration of 2, membership recalculation occurs twice. The first occurrence is at the date and time specified in the Membership Recalculation Next Run field and the second occurrence is on the following day at the time specified in the Times field. However, if you select Run Indefinitely, membership recalculation occurs on a daily basis at the time specified in the Times field.
- In the Policy Settings section of the Policy Details form, do the following:
- Select the Person attribute on which to base the generated Management Role Definitions from the Management Role Definition Attribute Name drop-down.
- Select the Person attribute on which to base the generated Management Roles from the Management Role Attribute Name drop-down.
- In the Management Role Naming Convention {Value1} {Value2} field, at a minimum enter {Value1} {Value2}. EmpowerID creates a Management Role for each combination of attributes matching the values selected from the Management Role Definition Attribute Name and the drop-downs. For example, if you selected the Department and Office attributes, a Management Role is created for each unique Department and Office combination and all people with those attribute values is added to the respective Management Role.
- In the Level 2 Naming Convention - {Value1} and {Value2} field, specify the name of the second level group, replacing {Value1} and {Value2} with the appropriate values in your directory structure.
- Select an action for EmpowerID to take if a Management Role is empty from the Empty Management Role Action drop-down.
After completing the above, the Policy Settings section of the form looks similar to the following image:
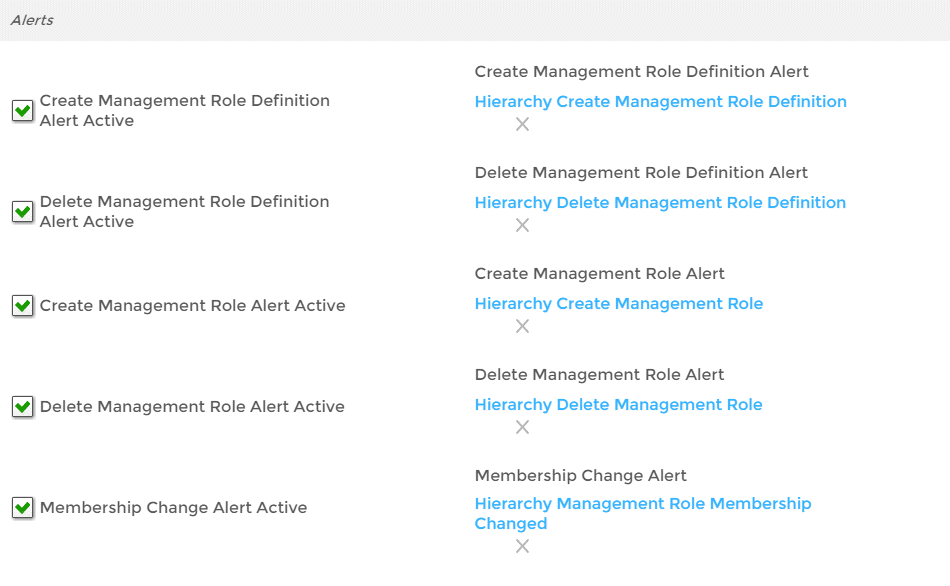
- In the Alerts section, select or deselect Alerts based on the action taken:
- Create Management Role Definition Alert Active - Select this option if you wish for the alert chosen for the Create Management Role Definition Alert setting to be sent to subscribers when a Management Role Definition is created based on the dynamic hierarchy policy settings.
- Create Management Role Definition Alert - When Create Management Role Definition Alert Active is enabled (checked), this sends an alert to subscribers when EmpowerID creates a new Management Role Definition from the policy. By default, the alert is set to the Hierarchy Create Management Role Definition alert.
- Create Management Role Alert Active - Select this option if you wish for the alert chosen for the Create Management Role Alert setting to be sent to subscribers when a Management Role is created based on the dynamic hierarchy policy settings.
- Create Management Role Alert - When Create Management Role Alert Active is enabled (checked), this sends an alert to subscribers when EmpowerID creates a new Management Role from the policy. By default, the alert is set to the Hierarchy Create Management Role alert.
- Delete Management Alert Active - Select this option if you wish for the alert chosen for the Delete Management Role Alert setting to be sent when a Management Role is deleted based on the dynamic hierarchy policy settings. The specific setting that governs whether or not a Management Role is automatically deleted is the Empty Management Role Action setting. If that field is set to Delete, the only time EmpowerID deletes a dynamic Management Role is when there are no members with the role.
- Delete Management Role Alert - When Delete Management Alert Active is enabled (checked), this sends an alert to subscribers when EmpowerID deletes a Management Role that was previously created from the policy.
- Membership Change Alert Active - Select this option if you wish for the alert chosen for the Membership Change Alert setting to be sent to subscribers when the membership of the Management Role changes.
Membership Change Alert - When Membership Change Alert Active is enabled (checked), this sends an alert when the membership of a Management Role created by the policy is changed by the policy. By default, the alert is set to Hierarchy Management Role Membership Changed alert.
EmpowerID includes default Alert email templates that are automatically selected for each type of Alert, but custom email alerts can be defined and selected as needed. To do so, click the Remove button to the right of the alert you wish to replace and then search for and select an alert. If you click the link for the alert rather than the Remove button, EmpowerID directs your browser to the View One page for the alert.
The following image shows what the Alerts section looks like with all Alerts selected.
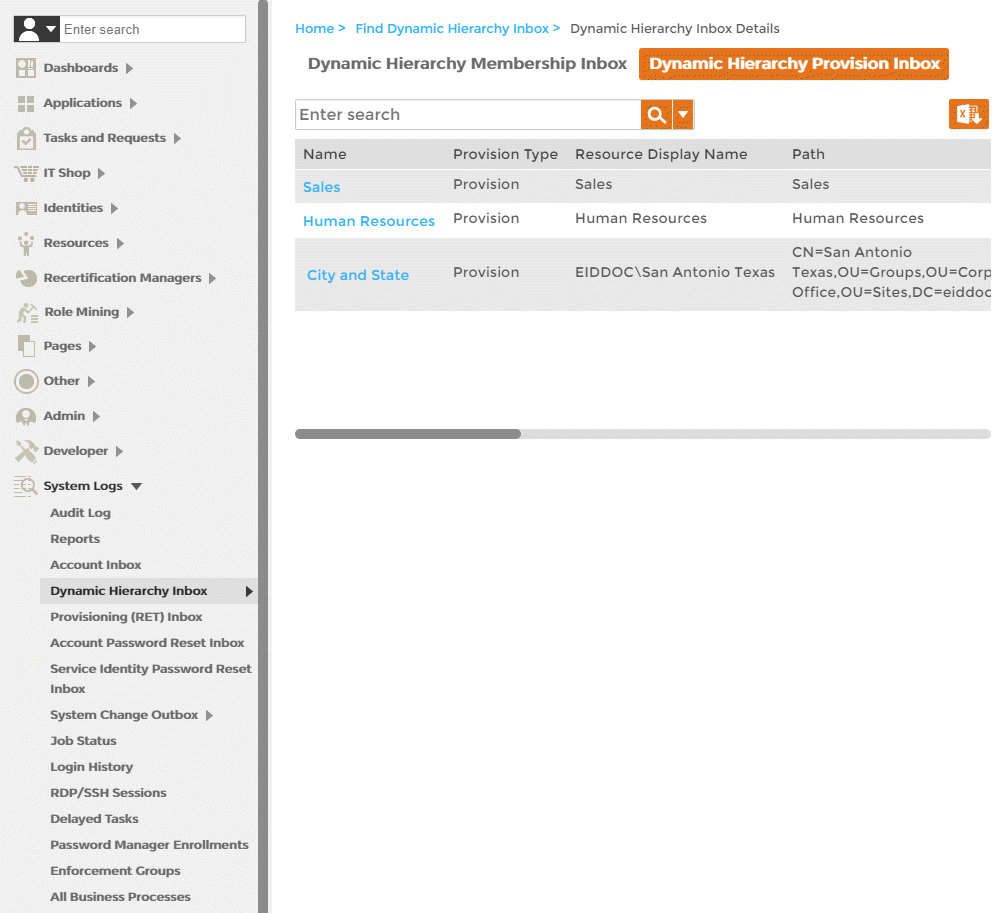
- Click Save. Once the Dynamic Hierarchy Policy runs, you can see the new Management Role Definitions and Management Roles provisioned by the policy in a Management Role search. You can also view the Dynamic Hierarchy Membership Inbox and Dynamic Hierarchy Provision Inbox by expanding System Logs and clicking Dynamic Hierarchy Inbox on the Navigation Sidebar.


