Responding to Recertification Tasks
Phillip Hanegan
If you are an audit participant who manages resources being audited, you will be assigned recertification tasks. Recertification tasks give you the opportunity to review the access surrounding the resource and either certify that access or revoke it. For example, if you are a manager with direct reports whose access is being audited, EmpowerID sends you a recertification task for each of those direct reports. To respond to the task, you review the access of the direct report for whom the task corresponds, decide whether the access is appropriate or not, and submit that decision to the auditor for review.
This topic demonstrates how to respond to recertification tasks from the perspective of a manager involved in an audit of direct reports .
View your Recertification tasks
- Log in to the EmpowerID Web application as a manager of people with access assignments that you need to certify.
- From the Navigation Sidebar, expand Tasks and Requests, then Recertifications and click To Do.
Your direct reports' recertification tasks appear on the Person Recertifications tab view. This view allows you to see each person whose access you need to review and certify, the status of the task, as well as other relevant information, including the task due date. - To view more information about a particular task, click the Direct Report link for one of your direct reports.
This directs you to the Recertification Details page, which is divided into several sections for interacting with the recertification tasks:- A Certifying Section — This section of the page shows which person you are certifying as well as the status and percentage completed of the certification.
In the image below, the person to be certified is John Lily, the certification status is Not Started, and the percentage completed is 0.
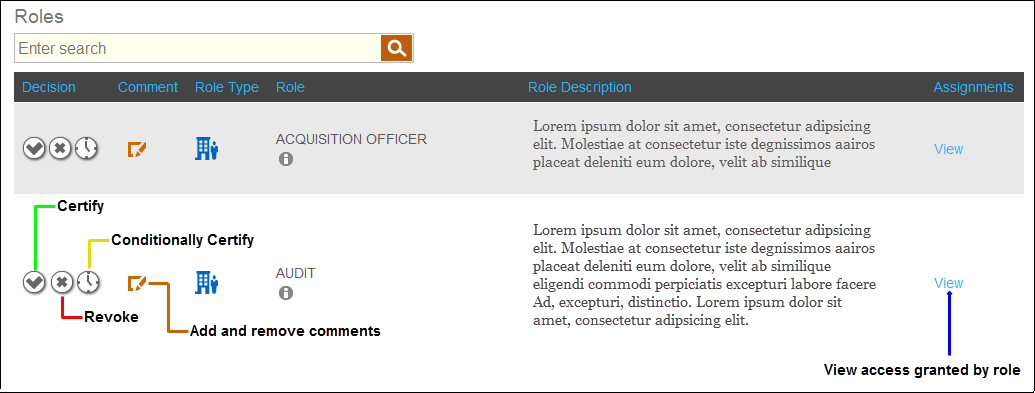
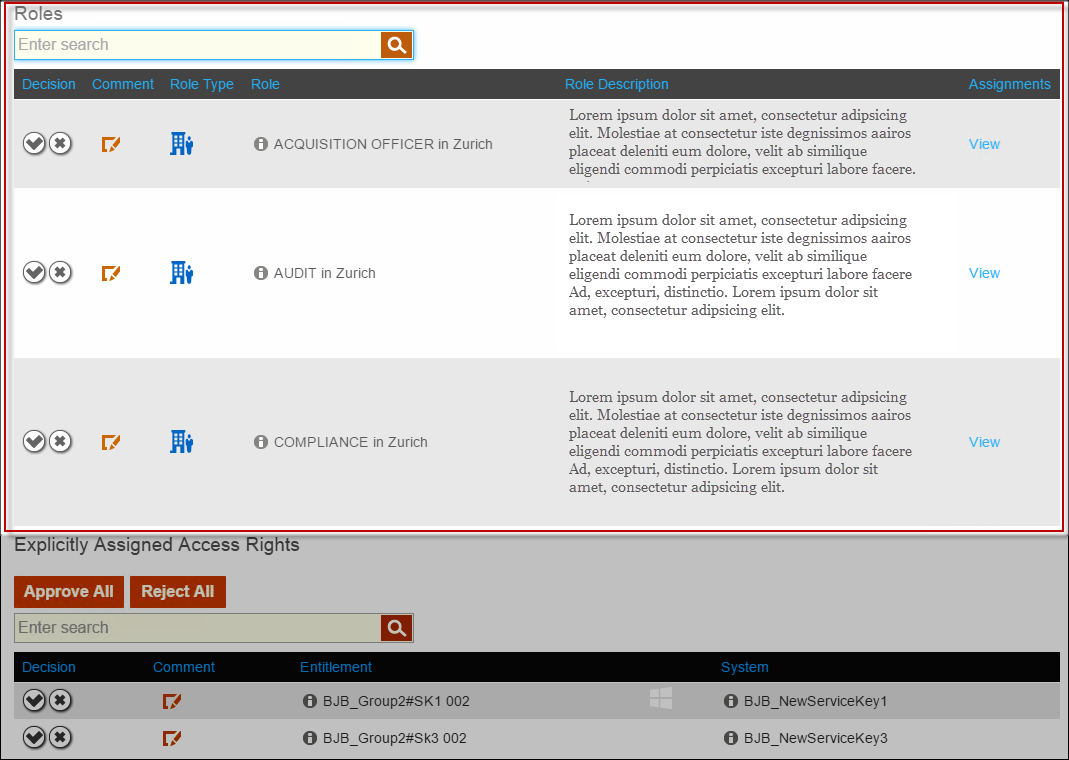
- A Roles Grid — This grid displays any Business Roles or Management Roles assigned to the person being audited and provides controls for interacting with those role assignments. These controls include the following:

- Certify Button — Clicking this button certifies the role assignment.
- Revoke Button — Clicking this button revokes the role assignment. When you revoke a role, the assignments the person has through the role drop into the Explicitly Assigned Access Rights grid (explained below). Depending on your organization, if you revoke a role, you may see a Business Role tree appear. This tree gives you the opportunity to select a suggested alternative role to the one you are revoking.
- Conditionally Certify Button — Clicking this button certifies the role assignment, but constrains it to a specific period of time, such as the next three months. Depending on your organization, you may not see the Conditionally Certify button.
- Comments Button — Clicking this button allows you to add and remove comments concerning the assignment.
- View Link — Clicking this link opens another tab in your browser with each individual entitlement or access assignment the person has by virtue of belonging to the role. For example, in the below image, the Acquisition Officer Business Role has three entitlements.
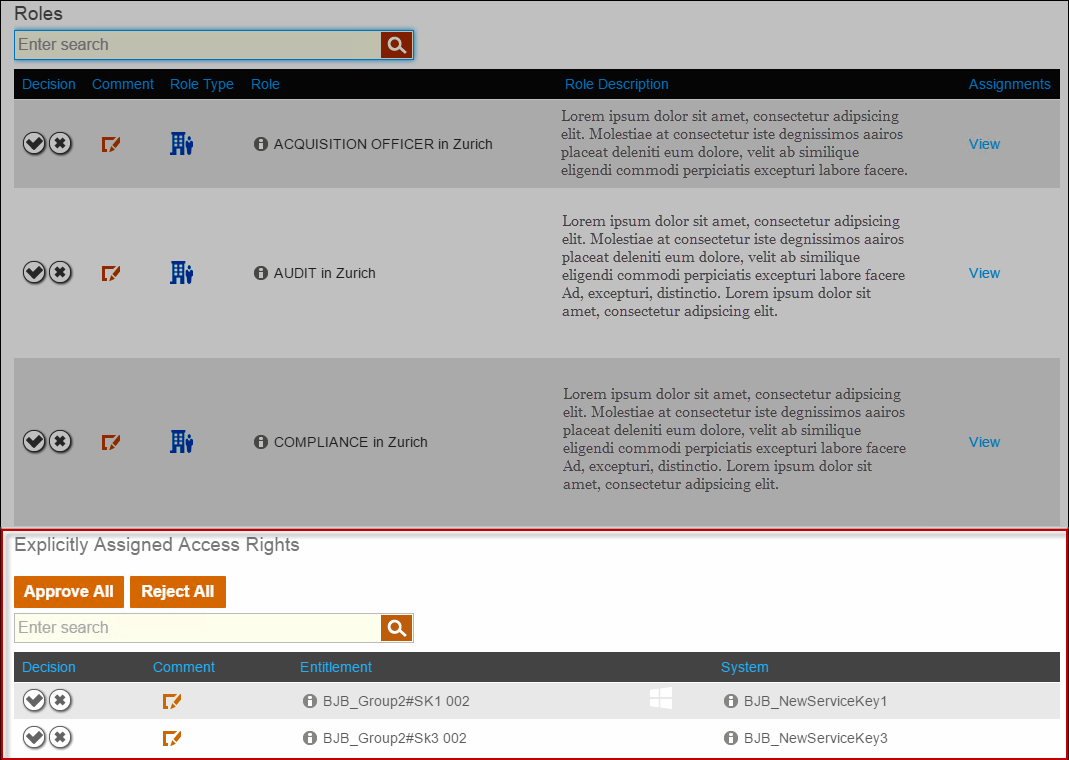
- An Explicitly Assigned Access Rights Grid — This grid displays access rights that the person has received beyond those granted by membership in a role and provides controls for interacting with those explicit assignments.

- Certify Button — Clicking this button certifies the role assignment.
- Revoke Button — Clicking this button revokes the role assignment. When you revoke a role, the assignments the person has through the role drop into the Explicitly Assigned Access Rights grid, where you then must make a case-by-case decision for each of the access rights.
- Conditionally Certify Button — Clicking this button certifies the role assignment, but constrains it to a specific period of time, such as the next three months. Depending on your organization, you may not see the Conditionally Certify button.
- Comments Button — Clicking this button allows you to add and remove comments concerning the assignment.
- A Certifying Section — This section of the page shows which person you are certifying as well as the status and percentage completed of the certification.
Now that you have an understanding of the page, the next step is to make your recertification decisions.
Make Recertification decisions
- From the appropriate grid on the Recertification Details page, search for and locate the assignment for which you want to make a decision. For example, if you want to make a decision on a role assignment, you search for that role in the Roles grid.

- On the other hand, if you want to make a decision on an explicit access right, you search for the right in the Explicitly Assigned Access Rights grid.

- Once you have selected the access assignment for which you want to make a decision, the next step is to make the decision. When making decisions, you have three options:
- You can certify the assignment
- You can conditionally certify the assignment
- You can revoke the assignment
Certify access assignments
When you certify an access assignment, you are saying that the person should have the access assignment. And if the assignment is a Role assignment, you are saying that the person should have the role, as well as any access rights the role gives that person.
As a manager, certifying an access assignment is a simple one- or two-step process, depending on the type of access assignment you are certifying. If the assignment is a Role assignment, you simply click the Certify button. If the assignment is an Explicitly Assigned Access Right, you click the Certify button and when ready, submit the decision to EmpowerID via your shopping cart.
- If you want to certify a role assignment, click the Certify button for that role in the Roles grid.

The decision for the assignment updates to Certified. Also, if this is the first assignment for which you are making a decision, the recertification status changes from Not Started to In Progress.
Certifying an assignment does not finalize the decision. You can reverse your decision by clicking the Revoke button. - If you are certifying explicitly assigned access rights, you have two options:
- You can click Approve All to certify all rights in the grid for which you have yet to make a decision.
When you do so, EmpowerID toggles the decision for each undecided access right assignment as Certify and adds those decisions to your shopping cart.
If you have revoked one or more of the access rights in the Explicitly Assigned Access Rights grid, clicking Approve All does not override your revokes. It only applies the Certify decision to those access rights that have yet to be decided. - You can click the Certify button for each access right you want to certify. When you do so, EmpowerID adds each decision to your shopping cart.
- You can click Approve All to certify all rights in the grid for which you have yet to make a decision.
Conditionally certify access assignments
In situations where the person with the role or explicit access assignment needs the assignment to remain in effect, but only for a limited period of time, you can conditionally certify the assignment if your organization has enabled that feature.
If you do not see the Certify Conditional button, your organization has disabled the feature. You can simply disregard this procedure.
If your organization allows for conditional certification and the want to conditionally certify the access right, then do the following:
- Click the Certify Conditionally button.

This opens the Valid Dates dialog. This dialog allows you to place date parameters around the access assignment. The access ends on the date and set in the Valid To field. - To set an ending date and time for the access right, click the Valid To field.
- In the Calendar control that appears, pick the appropriate date and time and then click Done. When picking the time you slide the Hour and Minute sliders right or left to increment or decrement the hour and minutes as may be the case.
- Back in the Valid Dates dialog, click Save.
Revoke an access assignment
When you revoke an access assignment, you are saying that the person should not have the role or access right granted by the assignment.
Revoking a role from a person differs from revoking an explicit access assignment in that the revocation simply revokes the role—it does not revoke the individual access rights granted to the person from the role. Rather, those role-derived access rights become explicit access rights and are moved to the Explicitly Assigned Access Rights grid for that person. You must then make a decision on each of those rights from that grid. This gives you the opportunity to pick and choose which access rights the person may keep, if any, and which access rights the person should lose.
- If you want to revoke a role assignment, click the Revoke button for that role in the Roles grid.

The decision in the Roles grid updates to Revoked, and each of the access rights granted to the person by the role are added as line items to the Explicitly Assigned Access Right grid. To complete the recertification, you need to make a decision on each of these items.
As with certifying an assignment, revoking an assignment does not finalize the decision. You can reverse your decision by clicking the Certify button. - When revoking explicitly assigned access rights, you have two options:
- You can click Reject All to revoke all rights in the grid for which you have yet to make a decision.
When you do so, EmpowerID toggles the decision for each undecided access right assignment to Revoke and adds those decisions to your shopping cart.
If you have certified one or more of the access rights in the Explicitly Assigned Access Rights grid, clicking Reject All does not override your approvals. It only applies the Revoke decision to those access rights that have yet to be decided. - You can click the Revoke button for each access right you want to revoke. When you do so, EmpowerID adds each decision to your shopping cart.
- You can click Reject All to revoke all rights in the grid for which you have yet to make a decision.
Once you have finished making your decisions, you need to submit your decisions to close out the task. All submitted decisions route to the auditor for final review.
Submit your decisions
Once you have reviewed all of the items for the recertification task, and made a decision for each, you need to submit those decisions to close out the task. Once you have submitted your decisions, the auditor can review them and ultimately close the audit.
- Click the Shopping Cart icon located at the top of the page.
- Type a reason for your decisions in the Cart dialog that appears and click Submit.
The status updates to Done. - Next, click the Close button and then click Yes to confirm your decision.
EmpowerID updates the status to Pending Auditor. Your role in the recertification is complete. The next step is for the auditor to review your revokes. This is demonstrated in the Performing Revokes Quality Checks topic.