Installing and Configuring the EmpowerID Virtual Directory Server on Linux
EmpowerID's Virtual Directory Service (VDS) provides a robust identity virtualization service with unified, enterprise-wide security by acting as an abstraction layer between disparate data stores, such as payroll systems, HR systems, Active Directory, custom applications and other sources. EmpowerID's VDS allows applications to interact with these data sources, without being directly connected to them.
In this topic, we use the terms "Virtual Directory Service", "VDS", and "LDAP Server" interchangeably.
The VDS is a server-side JavaScript application managed by Node.js. As such, Node must be installed on your Linux Server before the VDS can be configured for use. Additionally, the LDAP Server uses the Forever node module to keep the server up and running. The installer you received from EmpowerID checks to see if these prerequisites are installed. If they are not, the installer installs them for you.
Installing and configuring the EmpowerID Virtual Directory Server on Linux involves the following:
- Creating a SQL Login on the EmpowerID database for the VDS (see prerequisite information)
- Extracting the LDAPServer.X.X.X.tar.gz file.
- Making the installer executable.
- Executing the installer.
- Configuring the LDAP Server for your environment.
- Adding the SQL password, PFX certificate and passphrase to the LDAP Server.
- Starting the LDAP Server service.
SQL Login Prerequisite: As the LDAP Server authenticates users against the EmpowerID database, you need to provide it with a SQL login that has rights to the EmpowerID database. Expand the below drop-down for step-by-step directions on creating the login in SQL Server.
- Open SQL Server Management Studio.
- From Object Explorer, create a Login and set the Default database to the instance of the EmpowerID database in your environment. Note that SQL Serve authentication is used.
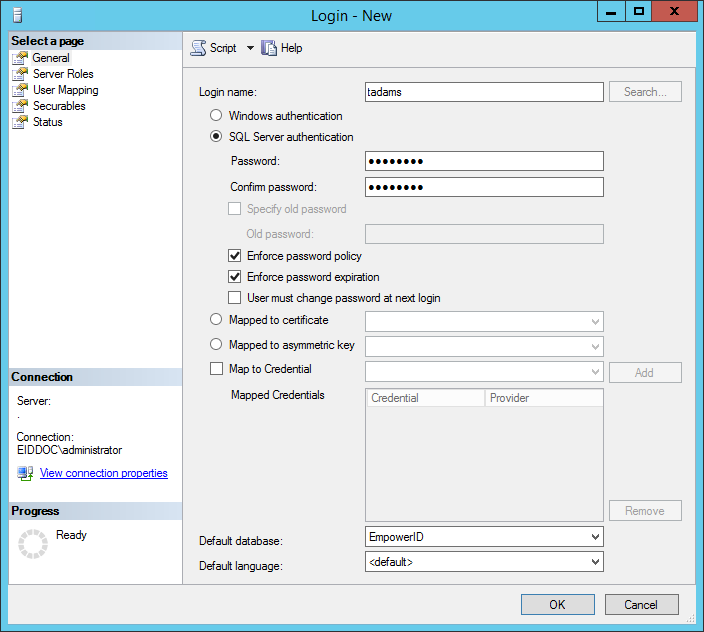
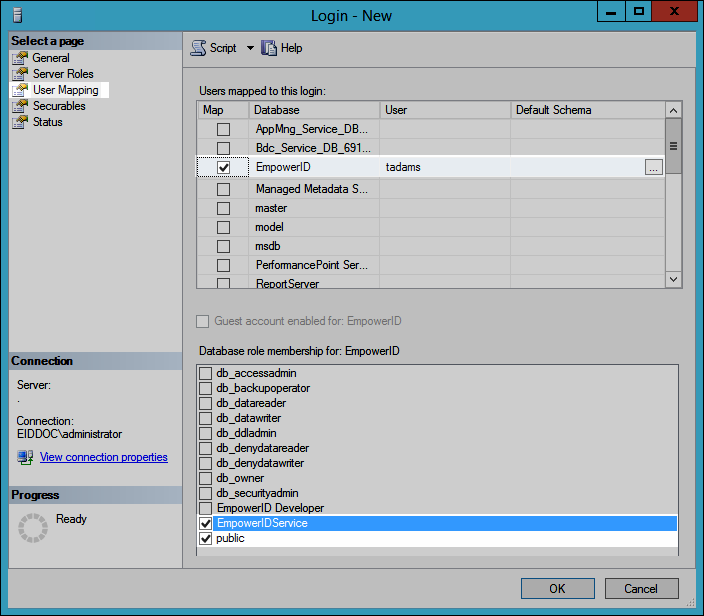
- From the Login Properties dialog, set the User Mapping to EmpowerID Service and public.
- To verify the login, open a new instance of the Connect to Server dialog, select SQL Server Authentication and enter the credentials you just created.
To install the EmpowerID Virtual Directory Server
Run the following command to extract the LDAPServer.X.X.X.tar.gz file you received from EmpowerID.
tar -xzf Downloads/LDAPServer.1.0.74.0.tar.gz
Please note that the location of the file on your server as well as the name of the file may differ. Update the command for your specific scenario accordingly.
Optional: Run the following commands to navigate to the folder with the LDAP Server install script and view the README file.
Run the following command to make the installer executable:
sudo chmod +x install.sh
Run the following command to execute the installer. When executed, the installer checks to see if you have node and forever installed—installing them if you do not—and then installs the EmpowerID LDAP Server.
sudo ./install.sh
To configure the LDAP Server for your environment
After installing the EmpowerID LDAP Server, run the following command to open theconfig.txtfile. The file needs to be edited for your environment. In the command, we are using gedit, but you can use another editor if preferred. To do so, replace "gedit" with your editor.
sudo gedit /usr/local/empoweridLDAP/LDAP\ Server/config.txt
- From config.txt specify the following values for your environment:
- Port- If you are using TLS, the standard port for LDAP is 636; if you are not using TLS, the standard port for LDAP is 389. However, you can use any port for either situation.
- IP- You can specify a specific port or set the value to 0.0.0.0.
- USE_TLS- Set totrueorfalsebased on whether you are using TLS to secure the communication between the LDAP server and the LDAP client.
- DB_USERNAME- This is the database user you set above.
- DB_DATABASE- This is the name of the EmpowerID database.
- OAUTH_HOSTNAME- This the FQDN or fully resolvable DNS to the EmpowerID Web server.
- OAUTH_PORT- Set to 443
- OAUTH_IS_TLS- Set to true
- WORKFLOW_HOSTNAME- This is the FQDN or fully resolvable DNS to the EmpowerID Web server hosting the EmpowerID Worker Role service.
- WORKFLOW_SITEPATH- Set to EmpowerID
- WORKFLOW_PORT- Set to true
- WORKFLOW_IS_TLSSet to true
- Specify the rotating log file settings. By default, the LDAP server rotates log daily, keeping a maximum of 10 logs in theLDAP Server > Loggingfolder. You can change these setting as needed.

- Leave the rest of the settings in this file at the default.
Save your changes and exit config.txt.
If you need to make changes to the config.txt file beyond those listed above, it is recommended that you contact EmpowerID support.
To add the SQL password, PFX certificate and passphrase to the LDAP Server
If you are not using TLS, you can skip the below steps that pertain to TLS.
From your terminal, run the following command to list the contents of the empoweridLDAP directory:
sudo ls /usr/local/empoweridLDAP
If you see a folder named certs, run the following command to rename it to cert and move it to the empoweridLDAP/LDAP Server directory.
sudo mv /usr/local/empoweridLDAP/certs /usr/local/empoweridLDAP/LDAP\ Server
- List the contents of the LDAP Server directory. You should see the cert folder.

- Locate the TLS certificate you want to use and move it to the cert directory, renaming it ldaps.pfx.
- From the LDAP Server directory, type node configure in the terminal, type the SQL password for the SQL user you created earlier and then press ENTER.
- If you are using TLS, type the pfx passphrase for the certificate and press ENTER. If you are not using TLS, just press ENTER.
You should see a "Successful configuration!" message in the terminal.
To start and stop the LDAP Server
Run the following command to start the LDAP Server:
sudo /etc/init.d/EmpowerIDLDAPServer start
After starting the server, you can explore the directory with a Linux-based LDAP Browser.
Run the following command to stop the LDAP Server:
sudo /etc/init.d/EmpowerIDLDAPServer stop