/
Creating Shared Folders
You are viewing an earlier version of the admin guide. For the latest version, please visit EmpowerID Admin Guide v7.211.0.0.
Creating Shared Folders
Home / Identity Administration / Shared Folders / Current: Creating Shared Folders
This topic demonstrates how to create shared folders in EmpowerID.
Prerequisites
- EmpowerID must first be connected to Active Directory. For details, see Connecting to Active Directory.
- After EmpowerID is connected to Active Directory, a Windows File Server within that directory must be added to EmpowerID as a managed resource system. For details, see Adding Windows File Servers.
- Additionally, for EmpowerID to have the necessary NTFS permissions to create shared folders, you must associate the Windows Server Management Web Service job with a service account that is a member of the domain administrator's group with a password that is vaulted in EmpowerID. For more details, see Configuring the EmpowerID Windows Server Agent Account.
Creating a shared folder
- In the Navigation Sidebar, expand Resources and click Shared Folders.
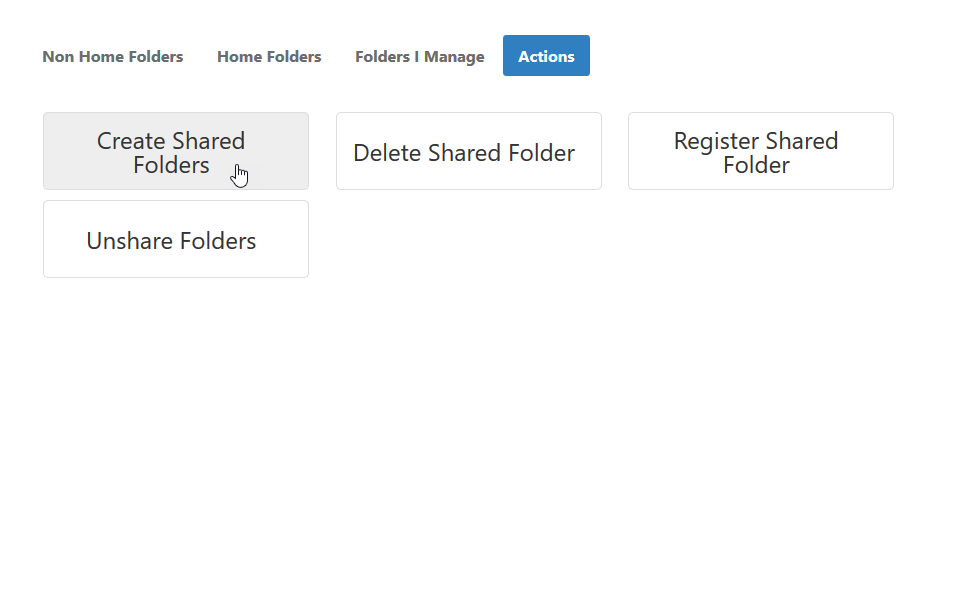
- From the Shared Folders page, click the Actions tab and then click Create Shared Folders.
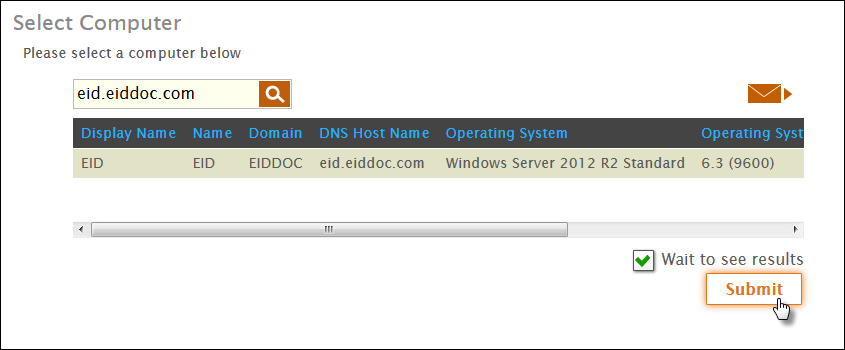
- In the Select Computer lookup that appears, search for the File server you registered with EmpowerID, click the record for that server to select it and then click Submit.
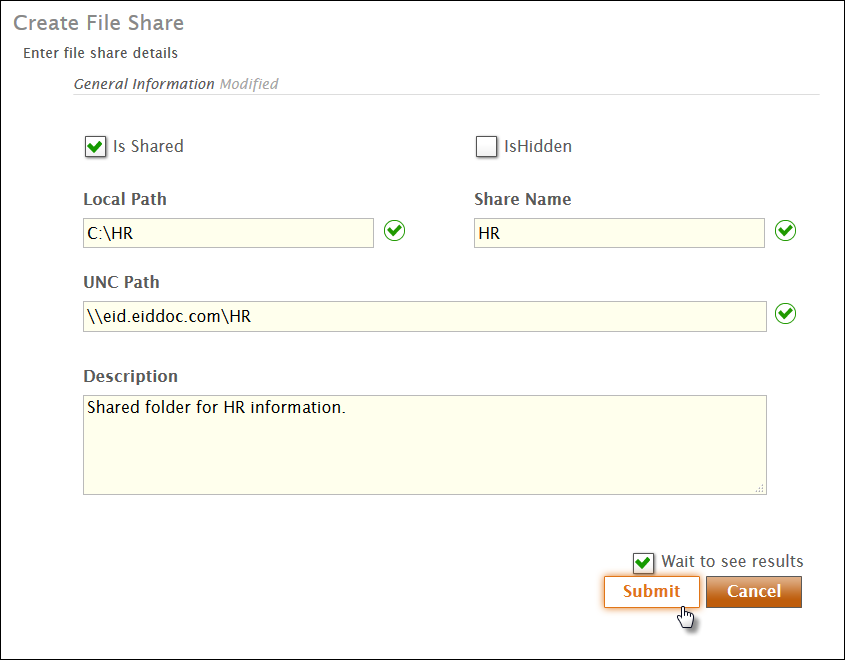
- In the Create File Share form that appears, enter the appropriate information for the share and then click Submit.
Verifying the shared folder on the file server
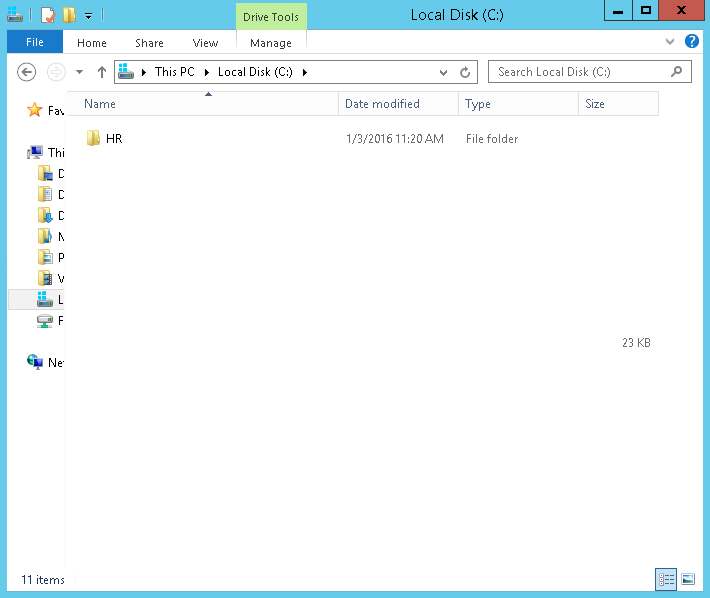
- On your File server, navigate to the local path you specified for the shared folder when you created it.
- You should see the home folder you just created.
Related content
Creating Shared Folders
Creating Shared Folders
More like this
Create Shared Folders
Create Shared Folders
More like this
Create Shared Folders
Create Shared Folders
More like this
Create Shared Folders
Create Shared Folders
More like this
Create Shared Folders
Create Shared Folders
More like this
Create Shared Folders
Create Shared Folders
More like this


