You are viewing an earlier version of the admin guide. For the latest version, please visit EmpowerID Admin Guide v7.211.0.0.
Creating Asset Request Catalog Items
Phillip Hanegan
- Anonymous
Analytics
In EmpowerID, Asset Requests are requests for resources not automatically given to users through Provisioning policies. Once you have created an Asset Type for the asset, you can create an Asset Request to allow users to shop for and request the asset from the IT Shop. EmpowerID then routes these requests to the owners of the Asset Request for approval.
This topic demonstrates how to create Asset Requests by creating four types of Asset Requests: a mobile phone, an AD user account, an Exchange mailbox, and a home folder. You can follow the principles demonstrated for these types to create any type of Asset Request.
To create an Asset Request for a mobile phone
- In the navigation sidebar, expand Object Administration and click Assets.
- From the find asset page, click the Actions tab and then click Create Asset Request.

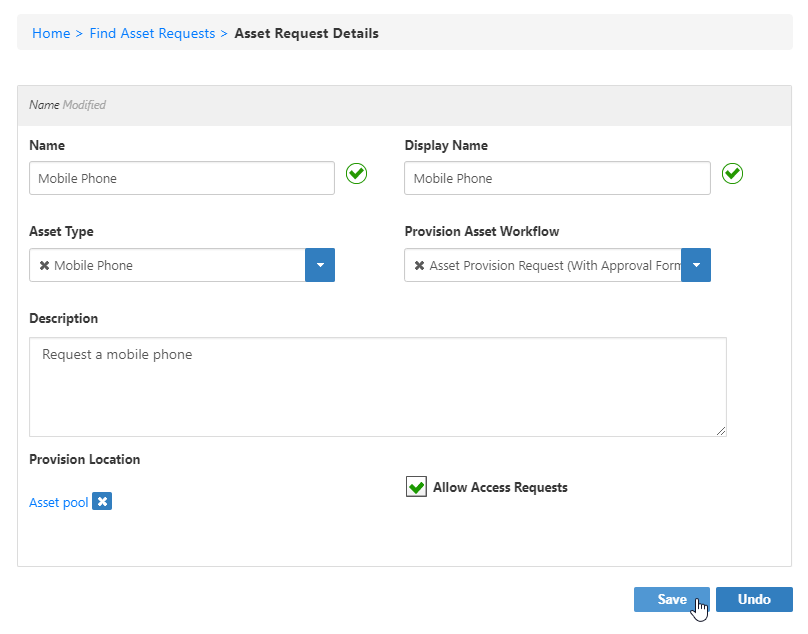
- In the Asset Request Details form that appears, do the following:
- Type a name and display name for the Asset Request in the Name and Display Name fields.
- Select the appropriate asset type for the Asset Request from the Asset Type drop-down. In this case, we are creating an Asset Request for a mobile phone so we have selected Mobile Phone as the asset type. Please note that in order asset types to appear in the drop-down, you must first create them.
Select Asset Provision Request (With Approval Form) from the Provision Asset Workflow drop-down.
The Asset Provision Request (With Approval Form) workflow is for Asset Requests pertaining to hard assets like laptops and mobile phones. When this workflow is selected, the request for the hard asset is routed to an approver with a form for filling in the details about the particular asset being issued to the user.
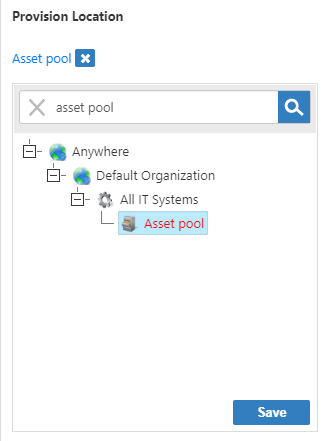
- Below Provision Location, click the Select a Location link and then search for and select Asset pool. This location is a logical EmpowerID location for tracking hard assets like mobile phones and laptops.
- Set Allow Access Requests according to your policy. If this option is selected, users can request the asset from the IT Shop.
- Click Save.
To create an Asset Request for an AD user account
- In the navigation sidebar, expand Object Administration and click Asset Requests.
- From the Asset Request Management page, click the Actions tab and then click the Create Asset Request tile.

- In the Asset Request Details form that appears, do the following:
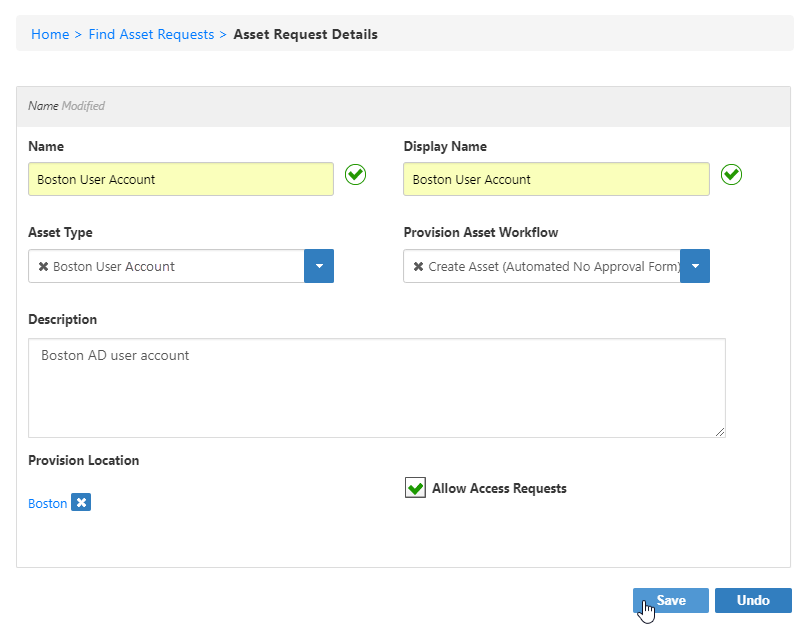
- Type a name and display name for the Asset Request in the Name and Display Name fields.
- Select an asset type for the Asset Request from the Asset Type drop-down. In this case, we are creating an Asset Request for an AD user account so we have selected AD User Account as the asset type. Please note that in order for asset types to appear in the drop-down, you must first create them.
Select Create Asset (Automated No Approval Form) from the Provision Asset Workflow drop-down.
If the current user does not have the delegations to create the asset, EmpowerID routes the request to all users with the delegations to do so.
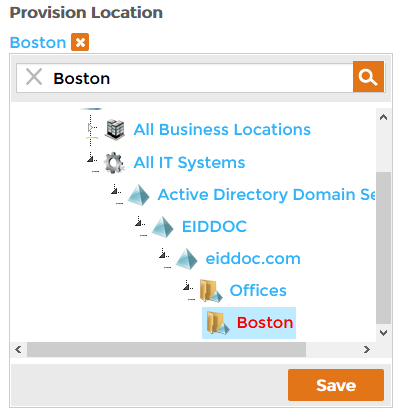
- Select a Provision Location for the asset, being sure to select an Active Directory location, and not an EmpowerID Location. Expand All IT Systems in the tree to find AD locations, as in the image below.
- Set Allow Access Requests according to your policy. If this option is selected, users can request the asset from the IT Shop.
- Click Save.
To create an Asset Request for an Exchange mailbox
- In the navigation sidebar, expand Object Administration and click Assets Requests.
- From the Asset Request Management page, click the Actions tab and then click the Create Asset Request tile.

- In the Asset Request Details form that appears, do the following:
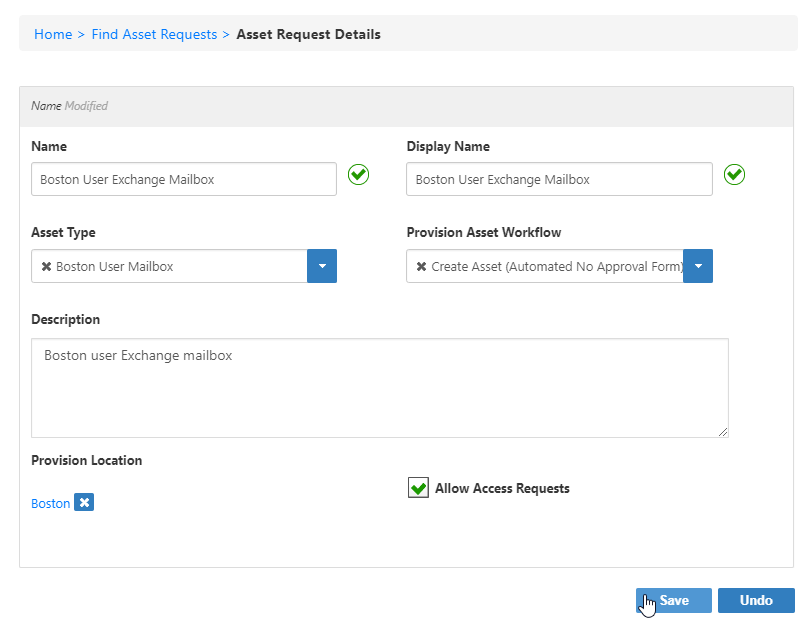
- Type a name and display name for the Asset Request in the Name and Display Name fields.
- Select the appropriate asset type for the Asset Request from the Asset Type drop-down. In this case, we are creating an Asset Request for a Exchange mailbox so we have selected User Mailbox as the asset type. Please note that in order for asset types to appear in the drop-down, you must first create them.
Select either Create Asset Mailbox (With Approval Form) or Create Asset (Automated No Approval Form) from the Provision Asset Workflow drop-down.
If you select Create Asset Mailbox (With Approval Form), EmpowerID creates an approval task and routes it to anyone with the delegations to create the mailbox. The approval form allows the approver to define various settings for the mailbox, such as the size in Mb, Hidden in GAL, storage quota, etc.
- Select a Provision Location for the asset, being sure to select an Active Directory location, and not an EmpowerID Location. Expand All IT Systems in the tree to find AD locations, as in the image below.

- Set Allow Access Requests according to your policy. If this option is selected, users can request the asset from the IT Shop.
- Click Save.
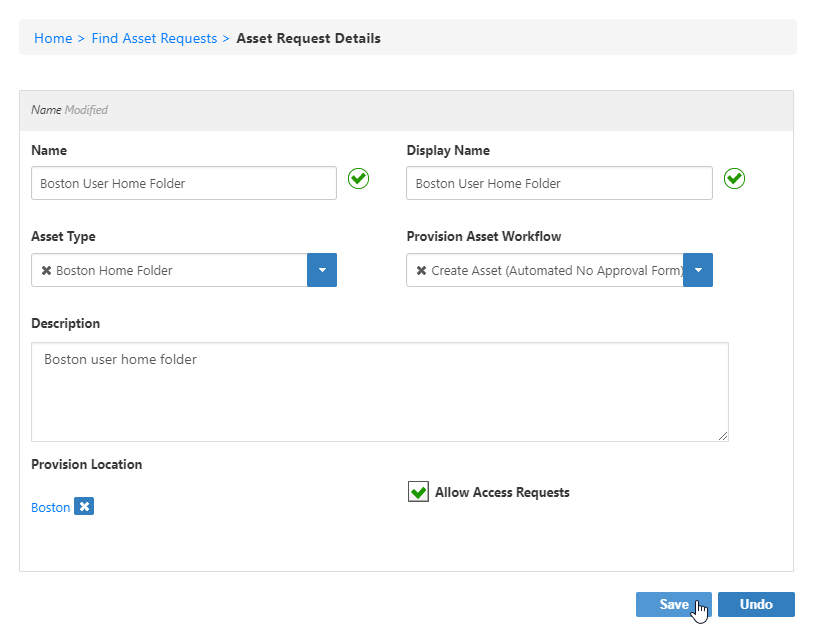
To create an Asset Request for a home folder
- In the navigation sidebar, expand Object Administration and click Asset Requests.
- Click the Actions tab and then click the Create Asset Request tile.

- In the Asset Request Details form that appears, do the following:
- Type a name and display name for the Asset Request in the Name and Display Name fields.
- Select an asset type for the Asset Request from the Asset Type drop-down. In this case, we are creating an Asset Request for a home folder for users in London, so we have selected Home Folder as the asset type. Please note that in order for asset types to appear in the drop-down, you must first create them.
- Select Create Asset (Automated No Approval Form) from the Provision Asset Workflow drop-down.
- Type a description for the Asset Request in the Description field.
- Select a Provision Location for the asset, being sure to select an Active Directory location, and not an EmpowerID Location. Expand All IT Systems in the tree to find AD locations, as in the image below.

- Set Allow Access Requests according to your policy. If this option is selected, users can request the asset from the IT Shop.
- Click Save.
