/
Enabling Computers
Enabling Computers
Home / Identity Administration / Computers / Current: Enabling Computers
EmpowerID allows you to manage the computer objects in your connected directories. This topic demonstrates how to enable disabled computer accounts.
The EmpowerID workflow used to disable computer accounts is the EnableComputer workflow. To run the workflow, users need to have the Initiator Access Level for it.
To enable computers
- From the Navigation Sidebar of the EmpowerID Web interface, expand Resources and click Computers.
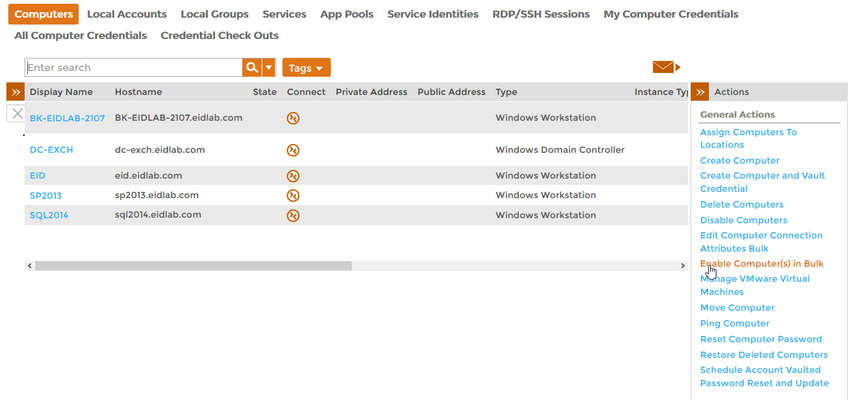
- Click the Enable Computers in Bulk action link.
- Search for the disabled computer you want to enable and then from the grid tick the selection box for that computer.
- Click Submit and then click OK to close the Operation Execution Summary.
To verify that the computer is enabled
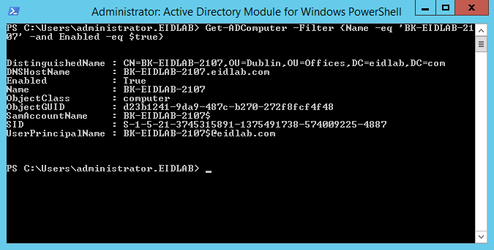
On a server with the Active Directory PowerShell Module, run the below PowerShell cmdlet. Replace the name of the computer in the below example with the name of the computer you disabled.
Get-ADComputer -Filter { Name -eq 'BK-EIDLAB-2107' AND Enabled -eq $true }- You should see that the computer is enabled.
, multiple selections available,
Related content
Enabling Computers
Enabling Computers
More like this
Enable Computers
Enable Computers
More like this
Enable Computers
Enable Computers
More like this
Enable Computers
Enable Computers
More like this
Enable Computers
Enable Computers
More like this
Enable Computers
Enable Computers
More like this


