/
Creating Computers
You are viewing an earlier version of the admin guide. For the latest version, please visit EmpowerID Admin Guide v7.211.0.0.
Creating Computers
Home / Identity Administration / Computers / Current: Creating Computers
EmpowerID allows you to manage the computer objects in your connected directories, including new computer accounts in those directories. This topic demonstrates how to create new computer accounts in Active Directory.
The EmpowerID workflow used to create computer accounts is the ProvisionComputer workflow. To run the workflow, users need to have the Initiator Access Level for it.
To create new computers accounts in EmpowerID
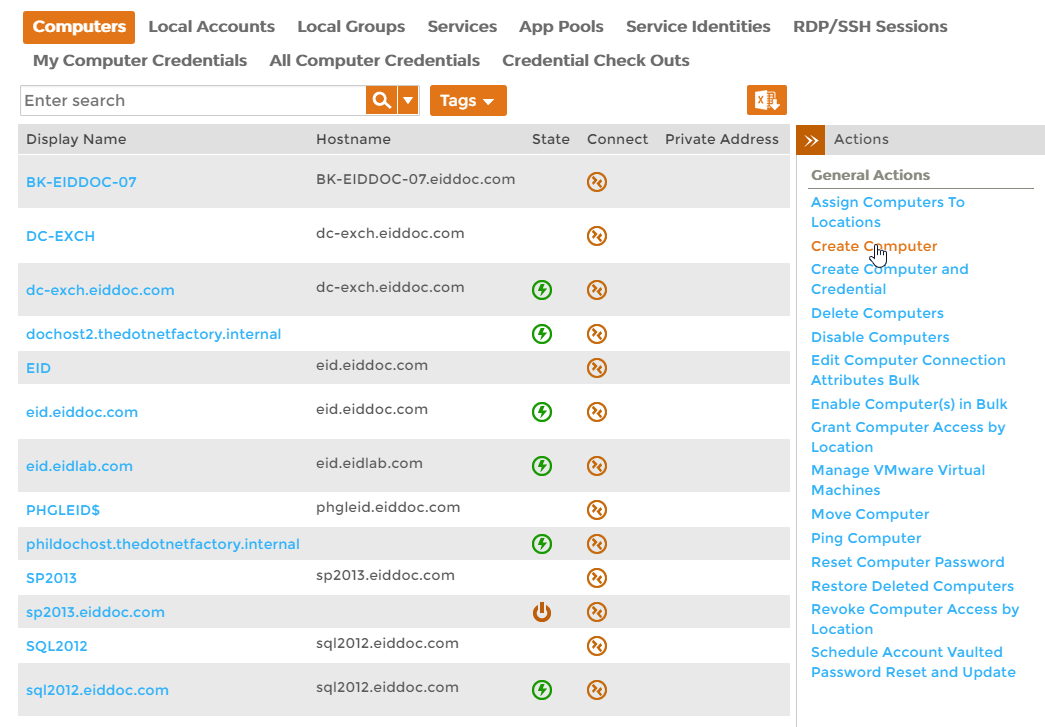
- In the Navigation Sidebar of the EmpowerID Web interface, expand Resources and click Computers.
- From the Actions pane of the Computer management page, click the Create Computer action.
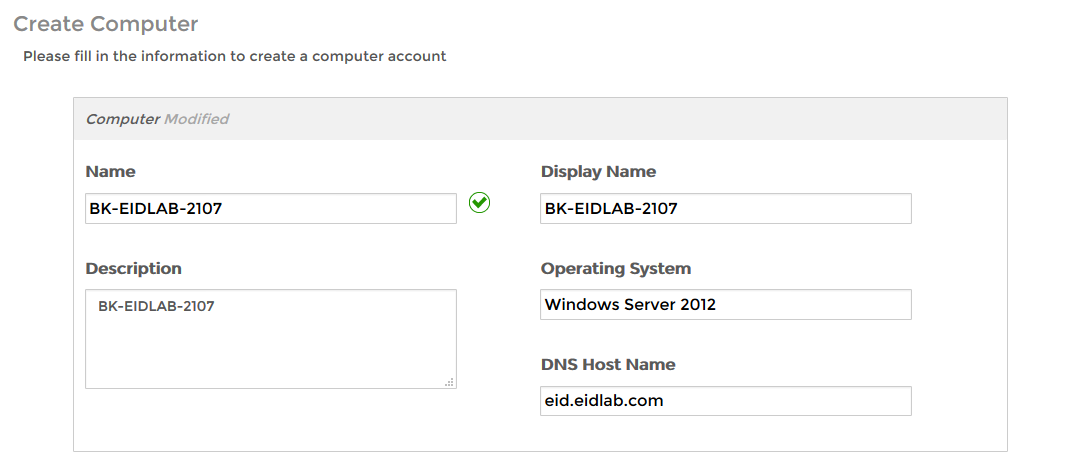
- In the Create Computer form that appears, do the following:
- Type a name in the Name field. This field is required.
- Optionally, type a display name and description for the computer in the Display Name and Description fields, respectively.
- Optionally, type the operating system and DNS host name for the computer in the Operating System and DNS Host Name fields, respectively.
- Click Submit.
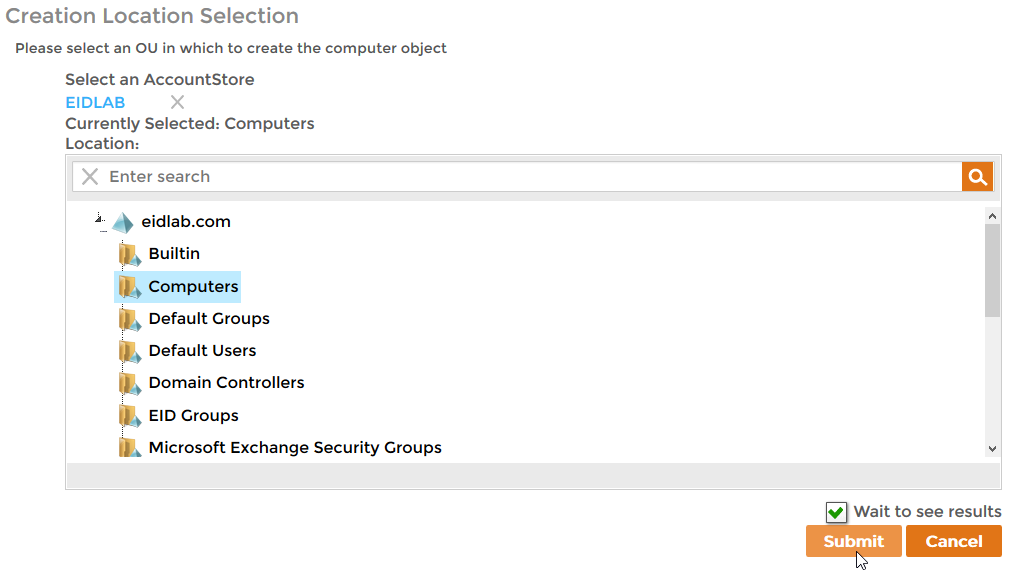
- In the Creation Location Selection lookup that appears, search for and select the account store for the computer and then select the OU from the Computer's Location tree.
- Click Submit.
- Click OK to close the Operation Execution Summary.
To verify the new computer
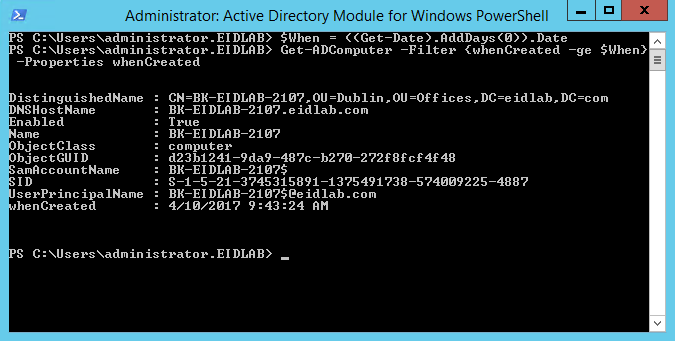
On a server with the Active Directory PowerShell Module, run the below PowerShell cmdlet. The cmdlet returns all computers created today.
$When = ((Get-Date).AddDays(0)).Date Get-ADComputer -Filter {whenCreated -ge $When} -Properties whenCreated- You should see a record for the computer.
Related content
Creating Computers
Creating Computers
More like this
Create Computers
Create Computers
More like this
Create Computers
Create Computers
More like this
Assign Computers to Locations
Assign Computers to Locations
More like this
Assign Computers to Locations
Assign Computers to Locations
More like this
Assign Computers to Locations
Assign Computers to Locations
More like this


