You are viewing an earlier version of the admin guide. For the latest version, please visit EmpowerID Admin Guide v7.211.0.0.
Group Settings
Phillip Hanegan
- Anonymous
When you visit the Group Details page for a group, you can view information about that group and you can edit the group. This topic details each of the settings that you can edit, and each of the accordions that you can expand for information about the group.
To edit group settings
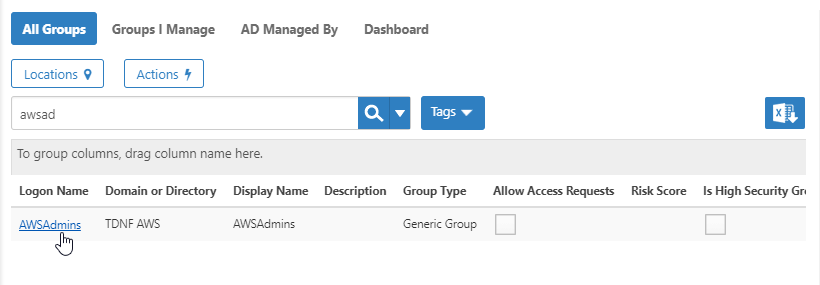
In the navigation sidebar, expand Identity Administration and select Groups.
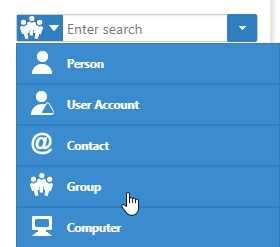
If you know the name of the group, you can use the Search box. First, select Group from the drop-down selector, then search for and select the group.

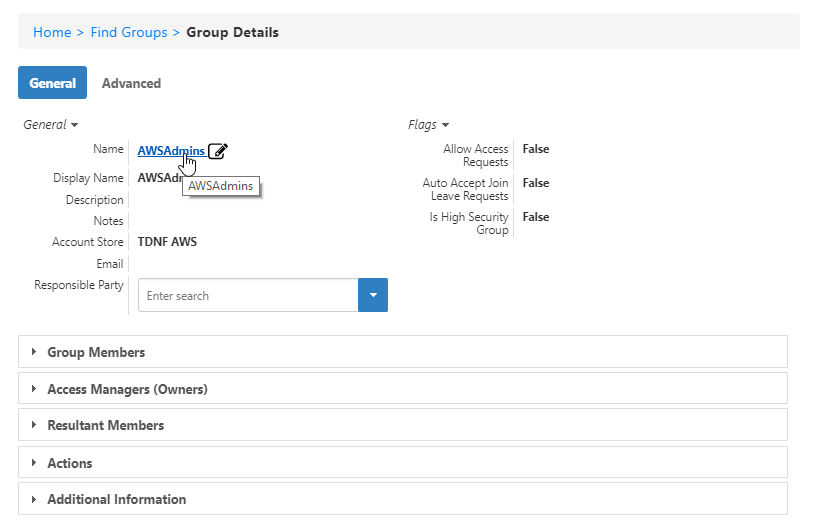
- Click the Logon Name link for a group to open the Group Details page.

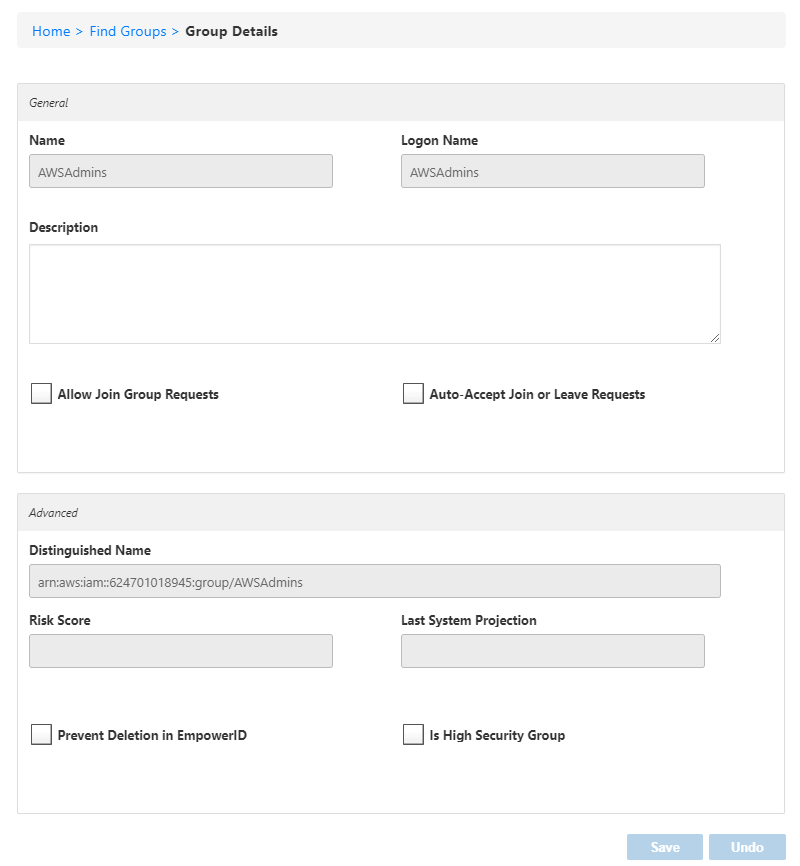
- On the Group Details page that appears, click the Edit icon or the Name link for the group to open it for editing.

In edit mode, there are two sections, General and Advanced.
- The General tab has the following editable fields.
- Description — Add a description for the group.
- Allow Join Group Requests — Select to allow users to request membership in the group via the IT Shop.
- Auto-Accept Join or Leave Requests — Select to allow users to join or leave the group without sending approval requests.
- The Advanced tab has the following editable fields.
- Prevent Deletion in EmpowerID — Select to prevent the group from being deleted via the EmpowerID web application.
- Is High Security Group — Select to flag the group to be returned in reports or recertification policies that target high security groups.
- Click Save to save your changes.
Group Information
The Group Details page General tab has the most commonly used information and group features such as adding and removing members and owners. The Advanced tab adds extensive options and information. The tables below provide details about each.
General tab
| Name | Description |
|---|---|
| Responsible Party (General drop-down section) | Select a person to be responsible for the group. This is different from a group owner. See Responsible Parties for details. |
| Group Members accordion | |
| Enter name to add | Type a name and click the tile for a user account to add to the group, then click the Submit button that appears to the right. (If you change your mind, click the green Added flag to see the list of members you are adding and click the X next to the names of any members you do not wish to add after all.) |
| Enter search | Type a name to find whether a user account is a member of the group and to see their information. |
| Check box | Select the check box to the left of any group member to flag it for removal, then click the Submit button. (If you change your mind, clear the check box.) |
| RBAC Assigned | Tells you whether the member is assigned to the group by an EmpowerID Dynamic Group Management (Hierarchies). |
| Account Username | Click the link to navigate to the Account Details page for the user account. |
| Account Domain | Displays the name of the domain to which the account belongs. |
| Account Display Name | Displays the friendly name of the user account. |
| Last Certified | Displays the date on which the membership was last certified. See Audits and Recertification for more information. |
| Task ID | Click the link to navigate to the recertification task details. |
| Access Managers (Owners) accordion | |
| Enter name to add | Type a name and click the tile for a person to add as an access manager for the group, then click the Submit button that appears to the right. (If you change your mind, click the green Added flag to see the list of people you are adding and click the X next to the names of any people you do not wish to add after all.) Access managers control who has access to the group, and receive membership approval tasks and recertification tasks. |
| Enter search | Type a name to find whether a person is an owner of the group and to see their information. |
| Check box | Select the check box to the left of any access manager to flag it for removal, then click the Submit button. (If you change your mind, clear the check box.) |
| Display Name | Displays the friendly name of the person. |
| Login | Click the link to navigate to the person details page. |
| Displays the email address for the person. | |
| Resultant Members accordion | |
| Enter search | Type a name to find whether a user account is a member of the group and to see their information. |
| Logon Name | Click the link to navigate to the Account Details page for the user account. |
| Domain or Directory | Displays the name of the domain or directory to which the account belongs. |
| Display Name | Displays the friendly name of the user account. |
| Distinguished Name | Displays the unique, distinguished name of the user account. |
| Actions accordion | |
| Add Person to Groups | Click to add user accounts by first finding the person associated with the account, then selecting their user account to add. |
| Convert Group Membership to RBAC Assignments | Click to convert the group membership process to use RBAC assignments. |
| Delete Group(s) | Click to delete the group. |
| Edit | Click to enter edit mode for the group. |
| Additional Information accordion | |
| Access Assignments Grated to this Group (Generic) | Click to navigate to a page that includes the following accordions for the group:
|
| Who Has Access to this Group (Generic) | Click to navigate to a page that includes the following accordions for the group:
|
| All Locations for this Group (Generic) | Click to navigate to a grid listing resultant resource locations for the group. |
| Audit History for this Group (Generic) | Click to navigate to the audit log for the group. |
Advanced tab
Coming soon.