IBM Domino
Before connecting EmpowerID to an external directory, please review the Getting Started with Directory Systems topic. The topic walks you through the prerequisites you need to complete before connecting to an external directory for the first time. These prerequisites include:
- Configuring the appropriate server roles for your EmpowerID servers
- Reviewing the Join and Provision Rules for your environment
- Reviewing the Join and Provision Filters for your environment
If you have already connected EmpowerID to another external directory, you can skip these prerequisites.
EmpowerID provides connectors for a wide range of user directories and resource systems. As an administrator, you can use these connectors to quickly connect EmpowerID to your organization's identity-aware systems and applications. When you do so, you create an account store for that application in the EmpowerID Identity Warehouse and use that account store to configure how you want EmpowerID to manage the identity information in that system.
EmpowerID IBM Domino connector allows organizations to bring the user and group data in their IBM Domino system to EmpowerID, where it can be managed and synchronized with data in any connected back-end user directories. Once connected, you can manage this data from EmpowerID in the following ways:
- Create new users
- Edit user attributes
- Delete users
- Reset user passwords
- Create new groups
- Manage group membership
- Delete groups
Additionally, EmpowerID provides Provisioning policies or Resource Entitlements that allow you to automatically provision Domino accounts for any person within your organization based on your policy requirements.
Prerequisites
In order to connect EmpowerID to Domino, the following prerequisites need to be met:
- IBM Domino version 9.0 or above
- IBM Domino client installed on a 32-bit machine
- IIS
- EmpowerID Domino Web Service installed on the same machine as the Domino client. The installer for the EmpowerID Domino Web Service is a separate package that needs to be requested from EmpowerID.
Before connecting EmpowerID to a directory system, you should determine whether you want EmpowerID to provision Person objects from the user accounts it discovers in the account store. If you do, then you should be able to answer the following questions before turning on inventory.
- When do you want EmpowerID to provision Person objects for those user accounts? At inventory or at a later point in time using the Account Inbox (recommended)?
- If inventory provisioning is desired, in what Business Role and Location should those Person objects be placed?
- How many user accounts can one Person have in the account store?
- If people can have more than one user account in the account store, do you want EmpowerID to attempt to automatically join any user accounts meeting the conditions of your Join rules to an existing Person during inventory?
- Do you want attribute flow to occur between EmpowerID and the account store? If so, what rules do you want to apply?
- If you have Resource Entitlement policies in place, do you want EmpowerID to apply them to the account store?
This topic demonstrates how to connect EmpowerID to IBM Domino and is divided into the following activities:
- Installing the EmpowerID Domino Web Services
- Connecting EmpowerID to your Domino directory
- Configuring the Domino Account Store
To install the EmpowerID Domino Web Service
- On a 32-bit machine with IIS, double-click the Lotus Notes Connector Service X.X.X.X msi to launch the EmpowerID Lotus Notes Service Setup wizard.
Click Next to begin the installation.
- Accept the terms of the license agreement and click Next.
- Select the destination folder and click Next.
- In the Lotus Notes Server Configuration screen, do the following:
- Type YourDominoServerName/Domain in the Registration Server field, replacing "YourDominoServerName" with the name of your actual Domino server and "Domain" with the server's domain.
- Type /Domain in the Certifier Name field, replacing "Domain" with the server's domain.
- Click the Ellipses (...) for the CertifierID File field, browse to the data folder of your Domino installation (located by default at "C:\Program Files\IBM\Domino\data") and select cert.id.
- Click the Ellipses (...) for the ID File Location field, browse to the Domino folder of your Domino installation (located by default at "C:\Program Files\IBM\Domino\data"), select the data folder and click OK.
- Specify whether the short name is unique in your system by selecting True (recommended) or False from the Unique ShortName drop-down.
- Specify whether you are using an ID File by selecting True or False (recommended) from the No ID File drop-down.
- Select your mail system from the Mail System drop-down. Notes is the default.
- Type the domain of the mail system in the Mail Domain field, if it differs from the Domino server domain.
- Click Next.
- In the IIS Settings screen, do the following:
- Type the user name and password of the service identity in the Username and Password fields, respectively. These credentials need to be those of a Domino administrator with read and write permissions to the Domino database.
- Type the name of the Web site for the service in the IIS Web Site field.
- Click Next.
- Click Install and then click Finish when the installation completes.
After installing the EmpowerID Domino Web service, the next step is to connect EmpowerID to your IBM Domino Lotus directory.
To connect EmpowerID to your IBM Domino Lotus directory
- Log in to the EmpowerID Management Console as an administrator.
- Click the application icon and select Configuration Manager from the menu.
- In Configuration Manager, select the Account Stores node and then click the Add New button above the grid.
- In the Add New Security Boundary window that opens, select the Lotus Notes Security Boundary type from the drop-down list and then click OK.
- In the Account Store Details window that appears, do the following:
- Type a name for the connector in the Name field.
- Type the user name of the Domino administrator in the Domino Admin UserName field. This should be the user name you specified when installing the EmpowerID Domino Web service.
- Type password for the Domino administrator in the Domino Admin Password field.
Type the URL for the EmpowerID Domino Web service you installed above in the ServiceUrl field. When setting the URL, be sure to specify "https" as the scheme and the version of EmpowerID Domino Web service you are using. The URL should look similar to the following example:
https://192.168.15.99/LotusNotes/LotusNoteService.svc/v1
- Type the Domino certifier password in the CertifierPassword field.
- Click Save.
- Back in the main screen of Configuration Manager, search for the account store you just created and then double-click it or right-click it and select Edit from the context menu. This opens the Account Store Details screen for the account store, which is where you specify how you want EmpowerID to manage the account store.
To configure the Domino account store
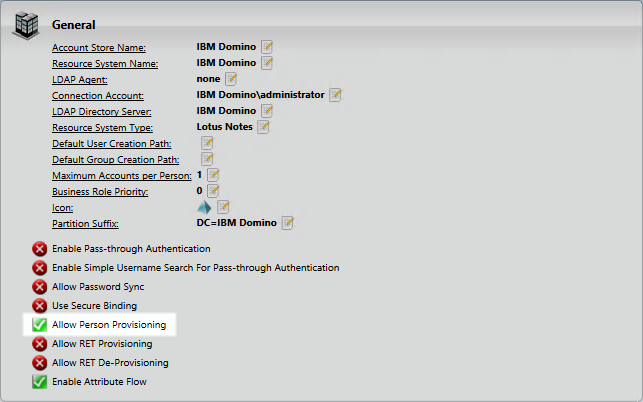
The Account Store Details screen contains three panes—the General pane, the Inventory pane, and the Group Membership Reconciliation pane—each with settings for configuring a different aspect of the Domino account store you just created. To view reference information about a particular pane, expand the drop-down for that pane.
From the General pane of the Account Store Details screen, enable each desired feature by toggling the icon to the right of each feature from a red sphere to a green check box. For example, if you want EmpowerID to provision an EmpowerID Person for each Domino user, toggle the red sphere to the right of Allow Person Provisioning to a green check box.
From the Inventory pane of the Account Store Details screen, do the following:
EmpowerID recommends using the Account Inbox to provision Person objects from user accounts. The below information is included to make you aware of the option to provision during inventory.
Toggle Allow Automatic Person Provision On Inventory to reflect your policy for the account store (red sphere for disable and green checkbox for enable). When enabled (and Allow Person Provisioning is enabled for the account store), EmpowerID will provision Person objects for all new accounts discovered during inventory in real-time, if they meet the conditions of your Provision rules.
- Toggle Allow Automatic Person Join On Inventory to reflect your policy for the account store (red sphere for disable and green checkbox for enable). When enabled (and Allow Person Provisioning is enabled for the account store), EmpowerID will attempt to join any new accounts discovered during inventory — if it finds one that matches the conditions of the Join rules for the account store. If this setting is not enabled, EmpowerID will not join secondary accounts to an EmpowerID Person, but will instead provision new EmpowerID Persons for each of those additional accounts.
The last action to perform on this screen is to enable inventory. However, before doing so, it is important to configure the attribute flow rules for the account store and to enable the Account Inbox if batch processing of those accounts is desired.
To configure Attribute Flow rules
- Open a browser and log in to the EmpowerID Web application.
- From the Navigation Sidebar, expand Admin > Applications and Directories and click Attribute Flow Rules.
From the Attribute Flow Rules page, click the Advanced Search drop-down button, enter the name of the account store for which you want to configure the flow rules and then click Search to filter the rules shown in the grid.
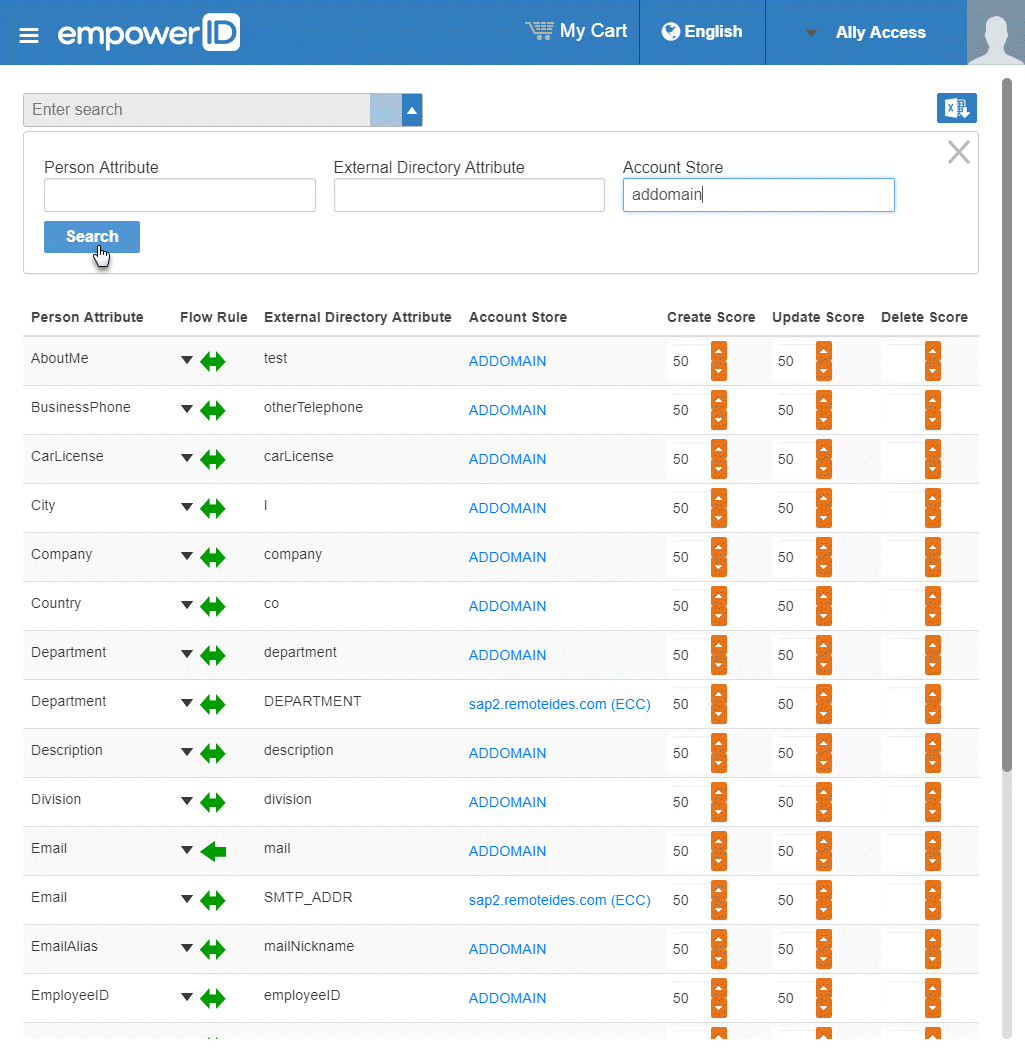
The attributes from the EmpowerID Person object are displayed in the left column with the corresponding attributes from the account store displayed in the right column.
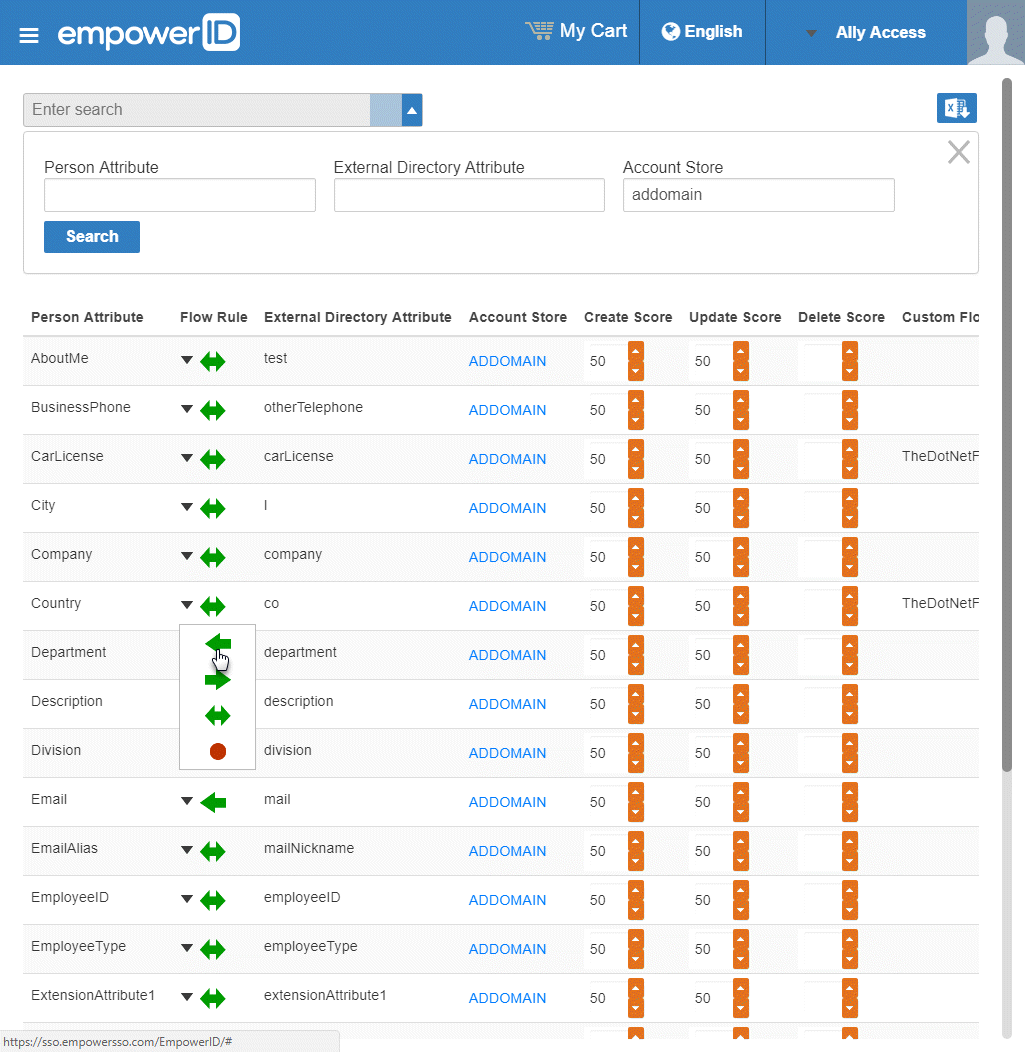
To change the flow for an attribute, click the Attribute Flow drop-down located between the Person Attribute column and the External Directory Attribute column, and select the desired flow direction from the context menu.
To change the score for any of the available CRUD operations (Create, Update and Delete), enter the new score in the appropriate field. By default, scores are weighted evenly, which means that a change to an attribute originating in one connected external directory has the same authority as a change to an attribute occurring in another connected external directory.
EmpowerID only considers scores for attribute CRUD operations when multiple account stores with the same user records are connected to EmpowerID, such as would be the case if an HR System and Google Apps were being inventoried by EmpowerID.
To turn on inventory
Return to the Account Store Details screen in Configuration Manager.
Look over your settings one last time and when satisfied, turn on inventory by toggling the Enable Inventory button from a red sphere to a green check box.
If you are using the Account Inbox to provision or join the user accounts in IBM Domino to Empower Persons, you need to turn on the Account Inbox. This is demonstrated in the below section.
To enable the Account Inbox permanent workflow
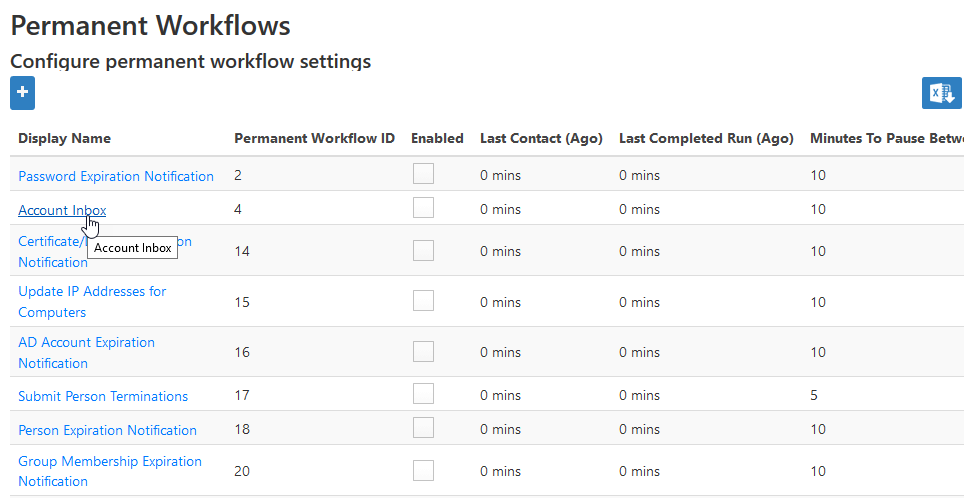
- From the Navigation Sidebar of the EmpowerID Web interface, expand Admin > EmpowerID Servers and Settings and click Permanent Workflows.
- From the Permanent Workflows page, click the Display Name link for Account Inbox.
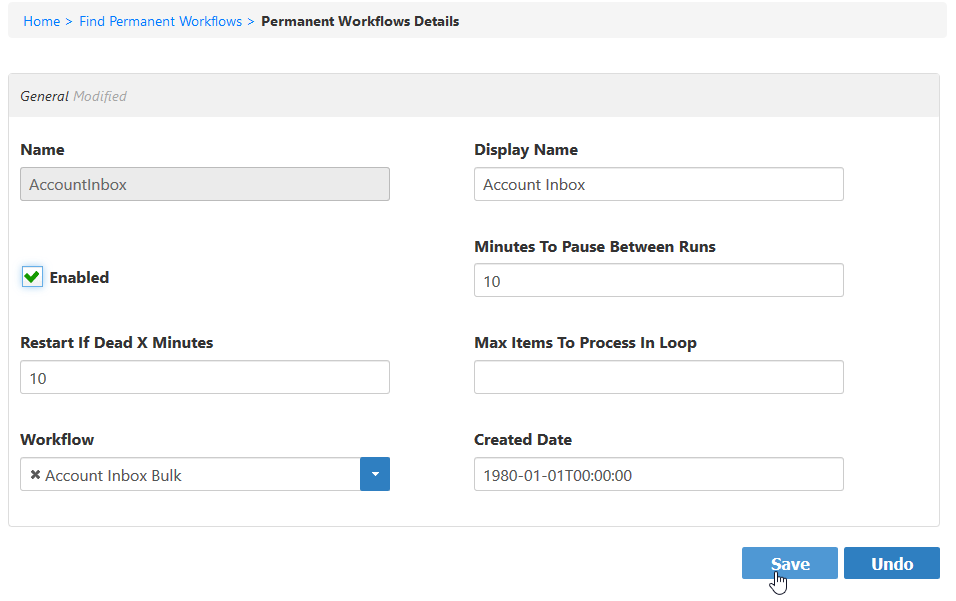
- From the View One page for the workflow that appears, click the edit link for the workflow.
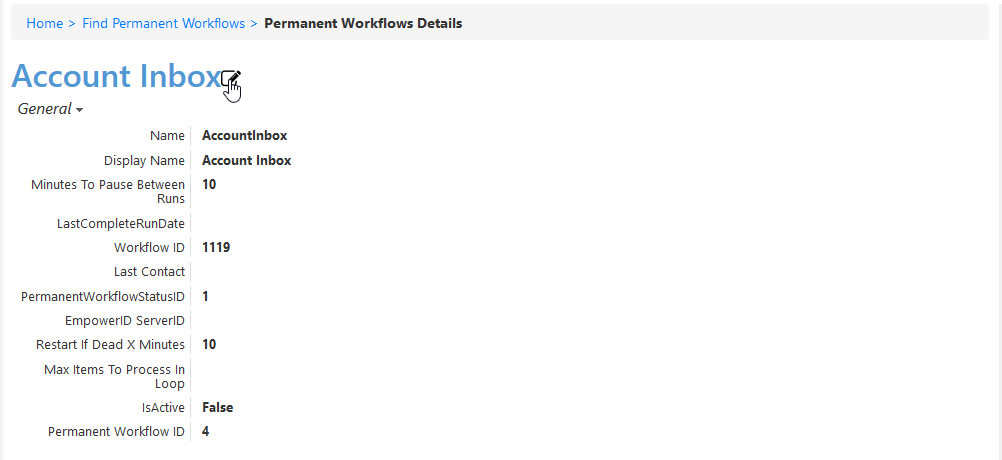
- From the Permanent Workflow Details form that appears, select Enabled and then click Save. Based on the default settings applied to the workflow, EmpowerID will process 1000 of the user accounts in the Account Inbox every ten minutes, provisioning Person objects from those user accounts and joining them together based on the Join and Provision rules applied to the account store.
To monitor inventory
- From Navigation Sidebar, expand System Logs > Policy Inbox Logs and click Account Inbox.
The Account Inbox page appears. This page provides tabbed views of all information related to processing new user accounts discovered in a connected account store during inventory. An explanation of these tabs follows.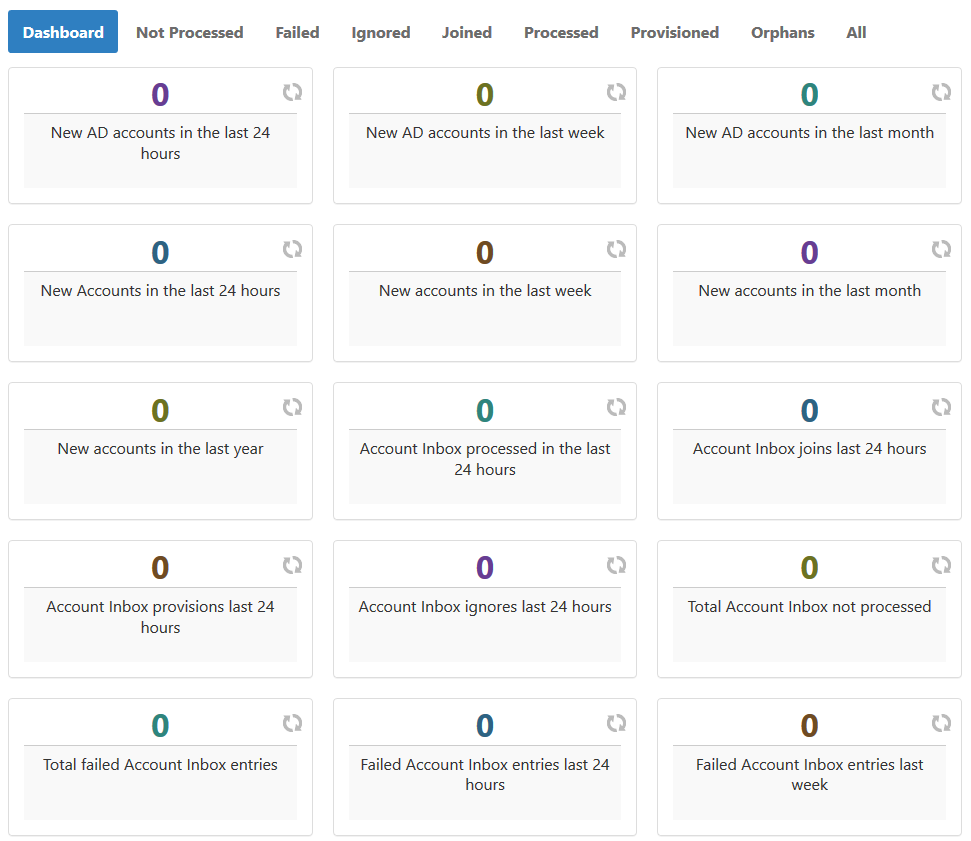
- Dashboard - This tab provides a quick summary of account inbox activity.
- Not Processed - This tab displays a grid view of all inventoried user accounts not yet used to provision a new EmpowerID Person or joined to an existing Person. Any accounts that fail to meet the Join and Provision rules are displayed here as well.
- Failed - This tab displays a grid view of any account joining or provisioning failures.
- Ignored - This tab displays a grid view of all accounts ignored by the account inbox. Accounts are ignored if they do not qualify as user accounts.
- Joined - This tab displays a grid view of all accounts joined to an EmpowerID Person. Joins occur based on the Join rules applied to the account store.
- Processed - This tab displays a grid view of all accounts that have been used to either provision a new EmpowerID Person or joined to an existing EmpowerID Person.
- Provisioned - This tab displays a grid view of all accounts that have been used to provision an EmpowerID Person. Provisioning occurs based on the Provision rules applied to the account store.
- Orphans - This tab displays a grid view of all user accounts without an EmpowerID Person.
- All - This tab displays a grid view of all user accounts and the status of those accounts in relation to the Account Inbox.